If you’re creating podcasts or YouTube videos then you really need to use this audio normalise feature. What this feature does is change the audio volume or gain to be at a standard range.
For example, if you had the microphone set too close to your mouth the recording volume may be too high when played back. In this particular case, you can decrease the gain on the recording device or you can simply just decrease the output volume. Changing the output volume can be annoying as your viewers or listeners would need to change it every time they play a different video, game, or music clip.
Most professional video and audio editing tools will have the Audio Normalise feature, but I’ve been simply using Wondershare Filmora for all my editing needs and if you are one of these users then keep reading to see how to use this feature. If you haven’t used Wondershare Filmora you can always use the trial version here: Wondershare Filmora
Here are the steps to follow to turn on the Audio Normalise on a video or audio clip in Wondershare Filmora:
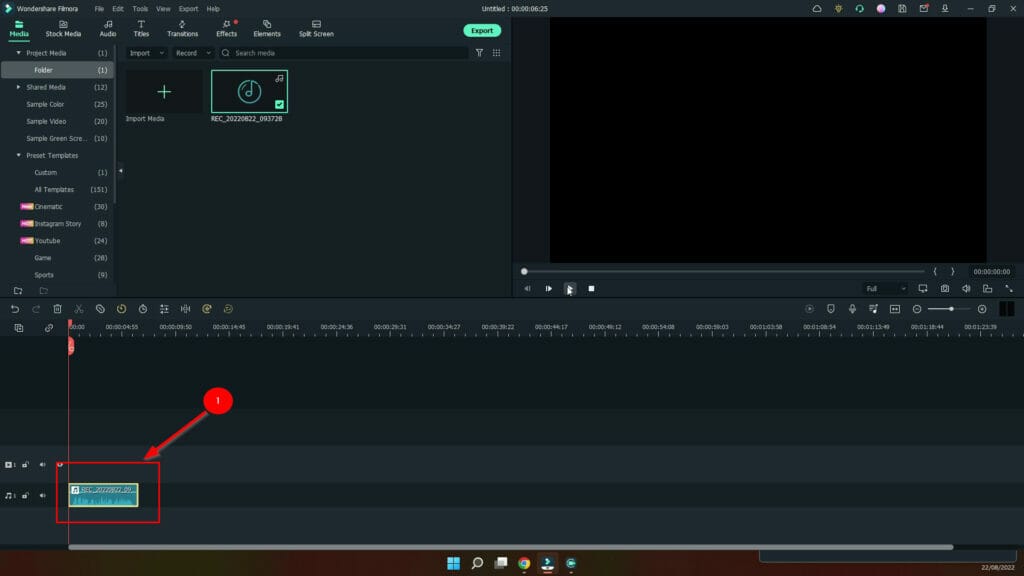
- Add the audio or video clip to the timeline
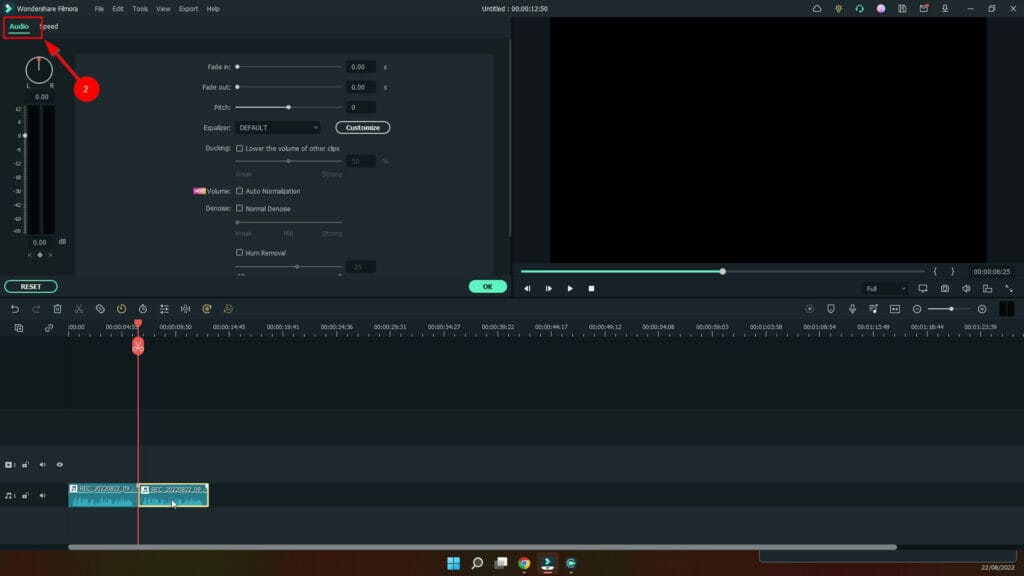
- Click on the clip and then select Audio
- Click on the Auto Normalisation check button
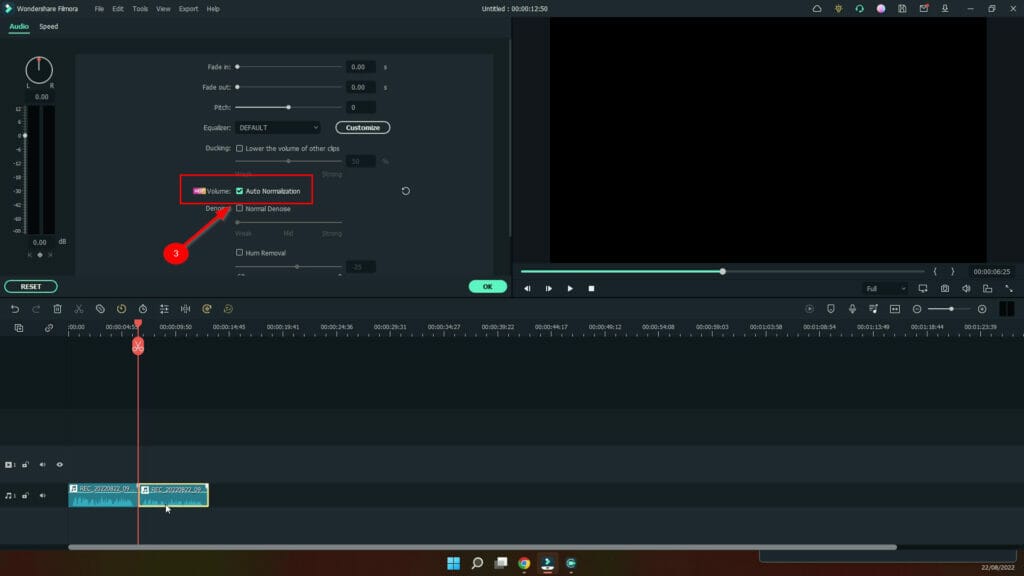
Yes, it’s that simple and you can select whether you use the audio normalise feature for each audio or video clip. I hope this helps and if it does, please share it and even subscribe to my email list to receive more useful content.
Here’s a video showing you how to do this whole process: