Every now and then, a small feature shows up in a tool you use every day and makes you wonder how long it has been sitting there unnoticed. That was my reaction when I came across Split View in Google Chrome. I use Chrome constantly for work, research, writing, and general admin, so finding a built in way to place two tabs side by side in the same window was genuinely useful.
If you regularly compare documents, check one web page against another, copy information between tabs, or simply want a cleaner way to multitask, this feature is worth knowing about. It is one of those practical additions that fits perfectly into a productivity focused workflow because it removes a bit of friction without requiring an extension or another app.
In this post, I will walk through how to use Split View in Google Chrome, what it actually does, and where it is most useful in day to day work.
What Google Chrome Split View actually does
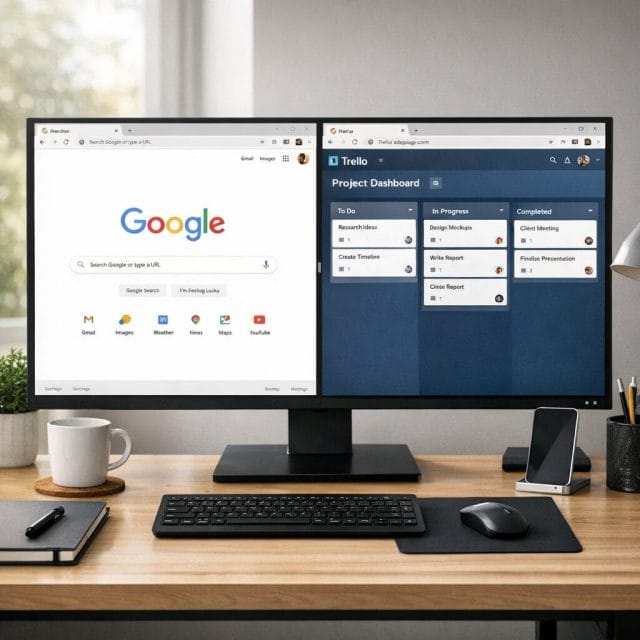
Split View in Chrome lets you place two tabs next to each other inside the same browser window. Instead of manually resizing two separate windows and trying to line them up, Chrome handles the layout for you. That makes it faster, tidier, and much easier to manage.
This is especially useful if you tend to work with related tabs at the same time. You might have a reference page on one side and a working document on the other. You might be checking product specifications across two websites. You might even be reviewing content, comparing pricing, or reading notes while filling out a form. In all of those situations, having both tabs visible in one organised view is a simple but effective improvement.
What I like about the feature is that it feels native to the browser rather than bolted on. You do not need to install anything extra, and once you know where it is, it is very quick to use.
How to start Split View in Chrome
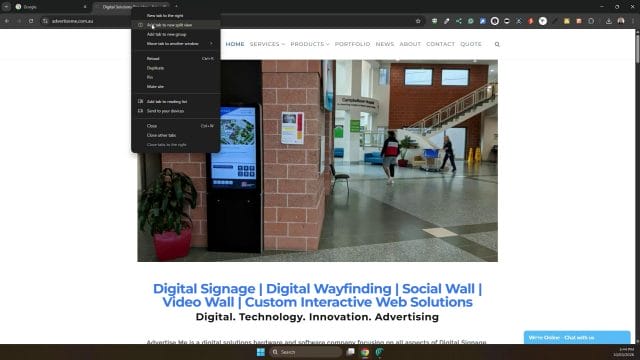
Getting started is straightforward. Open Google Chrome and look at your row of tabs as normal. From there, right click on the tab you want to use and look for the option to add the tab to a new split view.
The transcript shows exactly where this starts, and if you are following along visually, this first screenshot helps identify the tab area and the general location where the feature is accessed.

Once you right click on a tab, Chrome presents the context menu with the relevant option. The key item to click is Add tab to new split view. This tells Chrome to create a side by side layout using the selected tab.
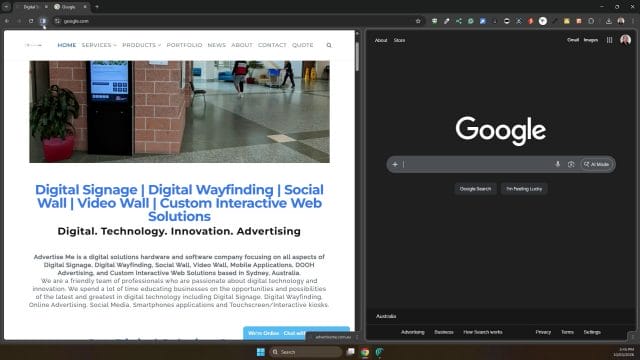
After selecting it, Chrome splits the window into two panels. You now have two different tabs displayed within the same browser window, which is the core benefit of the feature. It feels a bit like a lightweight multitasking mode built directly into Chrome.
Choosing and switching tabs inside Split View
Once Split View is active, you are not locked into only one pair of tabs. You can click around and choose which tab appears on each side. That makes the feature much more flexible than a one off comparison tool. It becomes a live working layout that you can adapt as you go.
For example, you might start by comparing two articles, then switch one side to your email, then replace it again with a Google Doc or product listing. The left and right panels can be adjusted depending on what you need in that moment. This is particularly useful during research sessions where you are moving between multiple sources but still want one reference point to stay visible.
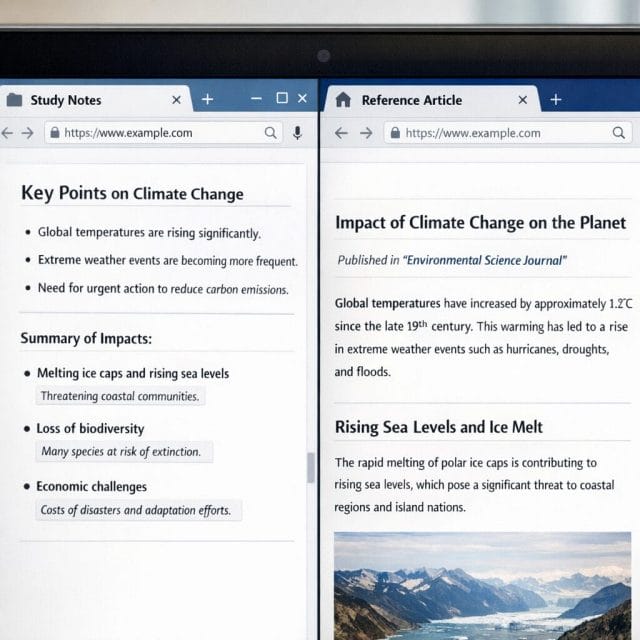
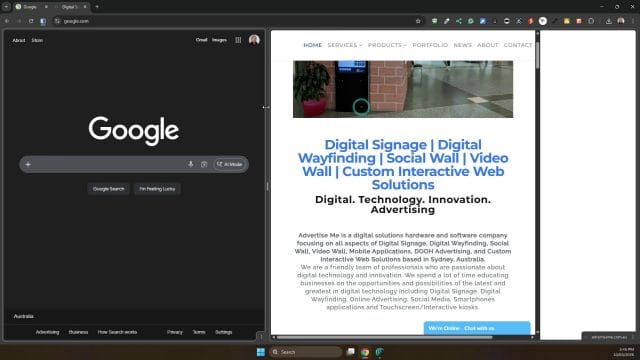
The following screenshot shows the split layout in action and gives a better sense of how tabs can be selected and viewed side by side.

Another practical benefit here is scrolling. You can independently scroll through each side, which makes it much easier to compare content line by line or section by section. If you have ever been toggling back and forth between tabs and losing your place, this is where Split View starts to feel genuinely useful.

Where Split View is genuinely useful
This is one of those features that sounds minor until you start thinking about how often you could use it. The obvious use case is comparing one document with another. If you are editing a draft and checking it against source material, Split View can save time immediately. The same applies if you are reviewing contracts, comparing spreadsheets in browser based tools, or checking revisions between versions.
It is also useful for general web research. If you are looking at two product pages, comparing software pricing, checking technical specifications, or cross referencing help articles, the side by side layout is far more efficient than tab switching. For anyone doing admin, content work, or online business tasks, that can add up to a real improvement in focus.
There is also a strong case for using it in learning and troubleshooting. If you are following a guide on one side and applying the steps on the other, the process feels much smoother. That fits well with the kind of practical, step by step content that tends to be useful on a site like this. Whether it is fixing a browser setting, using an AI tool, or following a setup tutorial, Split View helps reduce unnecessary back and forth.
The arrange Split View controls
Once you are in Split View, Chrome adds a new icon to help you manage the layout. This is where the feature becomes more polished, because it is not just about creating the split. Chrome also gives you controls to adjust it without having to start over.
The transcript mentions the Arrange split view icon, and this is worth paying attention to because it gives you control over how the two panels behave. If you click it, you get options to separate the view, reverse the layout, or close one side.
Reversing the layout is a small detail, but it is useful. Sometimes you naturally want your main working tab on the left and your reference material on the right. Other times, depending on your monitor setup or reading flow, the opposite makes more sense. Being able to switch the sides quickly keeps the feature practical rather than rigid.
Separating the view can also help if you decide that the two tabs need to become independent again. Rather than manually dragging and rebuilding your layout, Chrome gives you a direct way to break the split apart. That is helpful when a quick comparison turns into two separate tasks.
How to exit Split View cleanly
When you are finished, exiting Split View is simple. You can close one of the views, and Chrome will return to the normal single window layout. That means there is no complicated reset process and no need to reorganise your workspace afterwards.
The final screenshots in the transcript show this part of the workflow clearly. You can see the available controls and how closing one side brings everything back to a standard browsing setup.
That simplicity matters. A lot of browser features are technically useful but awkward enough that you stop using them. Split View avoids that problem because it is quick to start, easy to adjust, and easy to close. For a built in productivity feature, that is exactly what you want.

Why this feature fits a simple productivity workflow
On a practical level, Split View suits anyone trying to keep their workflow simple. It does not require browser extensions, desktop window snapping, or a second monitor. It just gives you a better way to use the tabs you already have open. That aligns well with a simple entrepreneur mindset where the goal is not to collect more tools, but to make better use of the ones already on your desk.
There is also something to be said for reducing mental clutter. Constantly switching tabs interrupts concentration, even when the task itself is simple. With Split View, both pieces of information stay visible. That can make writing, researching, checking details, and following instructions feel more controlled and less fragmented.
If you spend a large part of your day in the browser, small improvements like this can have an outsized effect. Not because they transform everything overnight, but because they quietly remove repetitive friction from the tasks you do every day.
A feature worth remembering
Google Chrome Split View is not flashy, but it is genuinely practical. If you compare pages, follow guides, work between documents, or just want a cleaner way to multitask in the browser, it is absolutely worth trying. The setup is quick. The controls are simple. And because it is built into Chrome, it is one less extra tool to think about.
I had not even realised Chrome had this feature until recently, but now that I have seen it in action, it is easy to picture plenty of situations where it would save time. If you have not tried it yet, right click one of your tabs and give it a go. It is one of those small browser tricks that can make everyday work noticeably smoother.

If this article helped you in any way and you want to show your appreciation, I am more than happy to receive donations through PayPal. This will help me maintain and improve this website so I can help more people out there. Thank you for your help.