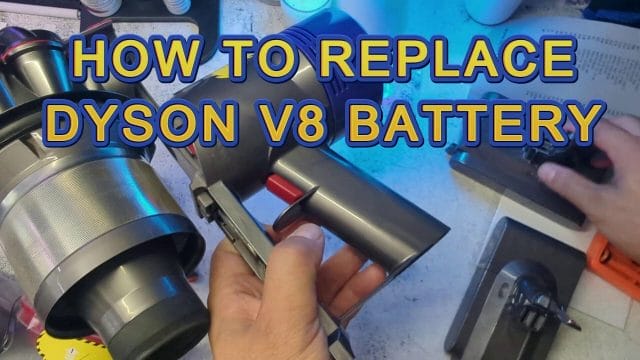
Replacing the battery on a Dyson V8 is a straightforward task that can give your cordless vacuum a fresh lease of life. If you have noticed shorter run times, sudden cut outs, or inconsistent performance even after cleaning the filters, the battery is likely the cause. A new battery restores reliability and helps you keep your home clean without interruptions. In this detailed guide, I will walk through the exact process, share practical tips to avoid common mistakes, and offer a few maintenance steps to do while the machine is open. The aim is to help you complete the swap with confidence in a single listening and reading session, using tools that most of us already have at home.
While this is a hands on how to, it follows the same simple, practical approach I use across technology and tool posts on my site. You will get real world tips from replacing the battery on a well used Dyson V8, including how to deal with stubborn screws, how to align the barrel component correctly, and how to make sense of the battery level indicator light once everything is back together.
What You Will Learn
- How to open the Dyson V8 barrel and access the battery
- Where the three screws are located and how to remove them without stripping the threads
- How to install the new battery, including why the new screws that come with the battery can be a better choice
- How to close the barrel, listen for the clip, and test the vacuum correctly
- Maintenance steps to clean the barrel and seals while you have the unit open
- Tips for selecting a replacement battery and recycling the old one responsibly
Safety and Preparation
Before you start, make sure the Dyson V8 is switched off and unplugged from any charger. If you have been vacuuming, give the unit a few minutes to cool down. Lithium batteries can hold charge even when disconnected, so treat the battery with care and do not short the terminals. Work on a clean table or bench with good lighting. If you have pets or little ones around, choose a time and place where you will not be disturbed, especially when handling small screws.
Wear light gloves if you prefer, and avoid touching dusty internal parts with bare hands. Keep a small container for the screws so you do not lose them. A shallow bowl or magnet tray works well. Lay down a soft cloth to protect the Dyson from scratches and to catch dust from the barrel.
Tools and Parts You Will Need
- Phillips head screwdriver with a tip that fits the Dyson V8 screws snugly
- Replacement battery for Dyson V8 with an LED level indicator on the side
- The new screws supplied with the replacement battery
- Soft brush or microfibre cloth for cleaning dust from the barrel component
- Optional compressed air for loose dust in the cyclone area
- Small container or tray for the original screws
Understanding the Dyson V8 Layout
The battery sits at the base of the handle, secured by three screws. One screw is at the back. Two screws are underneath, accessible once you open and remove the barrel component. The barrel is the clear bin that collects dust and debris, with a bottom flap that opens for emptying. A red clip holds parts of the barrel in place. You will open the flap and press that red clip to release the barrel component, which gives you access to the bottom screws that hold the battery in place.
The Dyson V8 has a tab at the top that you pull to slide and extend the barrel forward. This motion opens the bottom flap and exposes the red clip. As soon as you press the red clip, the barrel component can be removed, revealing a clean line of sight to the two underside screws. The back screw is visible once the barrel is moved forward, and it is the one most people remove first.
Step by Step Battery Replacement
Step One Open the Barrel and Bottom Flap
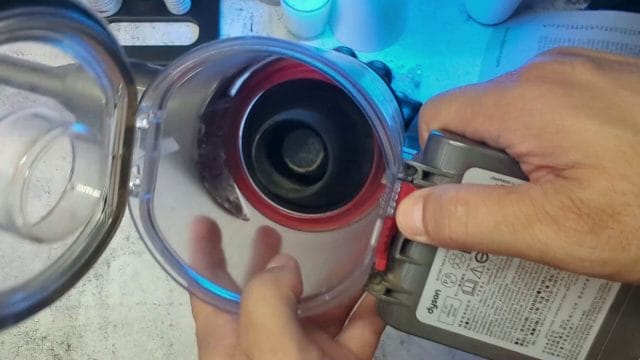
Hold the Dyson V8 upright and locate the tab at the top near the cyclone. Pull this tab firmly. This action extends the barrel forward and opens the bottom flap. As the bottom flap opens, debris may fall out, so do this over a bin or on your work cloth if the barrel has not been emptied recently. With the barrel extended, you can see the red clip that locks the barrel component in place.
Press the red clip down to release the barrel component. Some units may have a little resistance if dust has built up around the clip. If needed, use your other hand to stabilise the barrel. Once the clip releases, gently slide the barrel off and set it aside. You now have easy access to the bottom of the unit and the two screws securing the battery. The back screw is also visible and easier to reach with the barrel off.
Step Two Identify the Three Screws
There are three screws holding the battery in place on a Dyson V8. One is at the back of the handle. Two are at the bottom of the unit, now visible with the barrel removed and the flap open. Take a moment to inspect each screw. Look at the head for signs of previous wear. If the driver slips easily, choose a slightly different driver size or a driver with a fresh tip to avoid stripping.
The replacement battery you have may include new screws. This is important because new screws often have cleaner threads, and they seat better in the new battery shell. The new battery also commonly has an LED indicator on the side to show charge level. The indicator is useful later when testing and charging, so note its position before you install the battery so you can see it clearly once the vacuum is back together.
Step Three Remove the Back Screw
Position the Dyson so the back of the handle is facing you. Place the Phillips head screwdriver into the back screw and apply steady downward pressure. Turn slowly to break any initial bond. Older units may have dust and minor corrosion around the screw head, so take your time. If the screw resists, pause and adjust your angle, make sure the driver is fully seated in the head, and try again with a controlled turn. The aim is to avoid cam out. Once the back screw loosens, unwind it fully and store it in your tray.
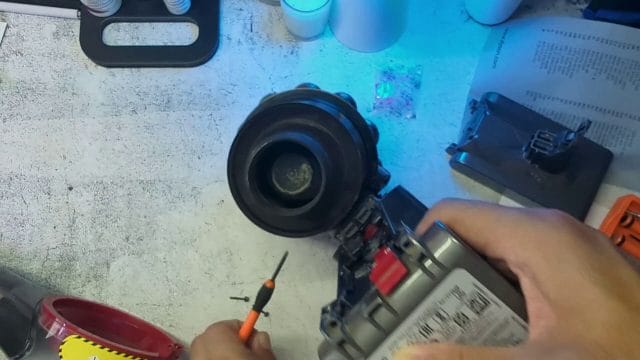
Step Four Remove the Two Bottom Screws
With the barrel component removed, the bottom screws are easy to spot. Repeat the same careful technique. Hold the unit steady, give the driver a precise fit, and apply even pressure while turning. Depending on the age of the vacuum, you may need a little extra force to start the screws. Keep the driver straight to avoid damage. As the screws come free, place them with the back screw in your tray to keep everything organised. Some owners reuse the original screws, but if the new battery comes with a full set of three screws, use them. New screws with fresh threads often seat more cleanly into the new battery casing and reduce the risk of cross threading.
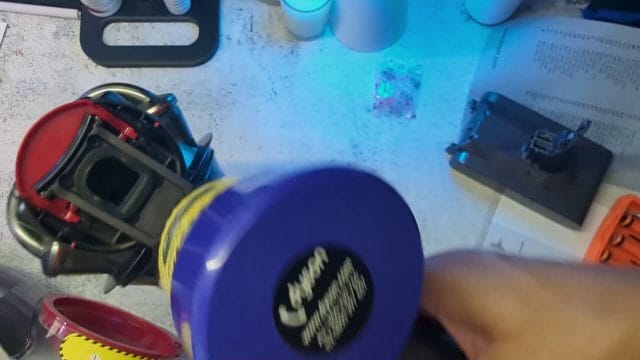
Step Five Remove the Old Battery
At this point, the battery is free. Hold the handle and gently pull the battery out of the base. It should slide out smoothly. If it hesitates, check that all three screws are fully removed. Avoid prying with metal tools, and do not pull at an angle that could stress the plastic shell. Once out, place the old battery to one side away from your working area.
Step Six Fit the New Battery and Listen for the Clip
Take the new battery and align it with the base of the handle. Slide it into place with a straight, firm motion. You will hear and feel a clip when the connectors seat properly. That clip is your confirmation that the battery is fully engaged. If you do not hear the clip, pull the battery back out and inspect the connectors. Dust or misalignment can prevent a clean connection. Wipe the mating surfaces gently with a clean cloth and try again. The fit should not require excess force. If you find it a bit more difficult to insert compared to the old battery, a slight difference in moulding can be the reason. Do not force it. Hold the battery square and apply smooth pressure until the clip engages.
Step Seven Use the New Screws to Secure the Battery
Now secure the battery with the three screws. Use the new screws that came with the battery. Start each screw by hand to ensure the threads engage cleanly. A hand start reduces the chance of cross threading and ensures the screw seats in the correct position. Once started, finish tightening with the screwdriver. Do not overtighten. A snug fit is enough. Tighten the back screw first, then the two bottom screws. This sequence helps the battery settle evenly in its mount.
Some replacement kits include slightly different thread profiles compared to the original screws. That is normal. The new threads are often designed to suit the replacement battery casing. If any screw feels tight at the start, back it out gently and try again with a careful hand start. If you can feel a clean engagement, proceed to tighten with steady pressure. Avoid rapid spinning with an electric driver, as that can strip the head or the plastic seat.
Step Eight Refit the Barrel and Close the Flap
With the battery secured, slide the barrel back into place. Align the barrel rails with the tracks on the Dyson body. Take your time to line it up. Once aligned, slide it in and listen for the clipping sound as it seats. If you do not hear the clip, pull back and realign, then try again. When clipped, push the bottom flap up to close it. Press around the edges to ensure the seal is even and the flap locks fully. The red clip should be in the neutral position after the flap is closed.
Step Nine Test the Vacuum
Press the trigger to test. The Dyson V8 should power on immediately. Listen for smooth motor sound. If you hear anything unusual or if the motor cuts out, check your battery seating and the screw tightness. If the unit is silent, make sure the battery clip is fully engaged and the back screw is snug. The LED indicator on the side of the new battery may show a level. Keep the vacuum switched off and place it on the charger to ensure the battery accepts charge. After a short charge period, try again and confirm the run time improves.
Practical Tips for a Smooth Battery Swap
Swapping a battery can be done in minutes, but there are a few small details that make the process even smoother. These tips are based on actual hands on replacement and testing, and they can save you from frustration:
- Use the right driver tip that fits the screw head perfectly. A driver that is too small can slip and damage the screw head.
- Start each new screw by hand to feel the thread engagement before tightening with the driver.
- If a screw resists, apply firm downward pressure and slow turning rather than speed. Speed increases the risk of cam out.
- Keep the screws organised in a tray or bowl to avoid losing them among dust and parts.
- Inspect the barrel seals and the flap latch while the barrel is off. Clean dust from the inner surfaces to improve performance.
- Listen for the clip when inserting the new battery. That audible cue confirms a secure connection.
- Do a final visual check of alignment before testing the vacuum. A small misalignment can affect the barrel seal and suction.
Common Pitfalls and How to Avoid Them
Most battery swaps are straightforward, but a few common issues can slow you down. Here is how to avoid them:
- Stripped screw heads: This happens when the driver slips. Ensure the driver is fully seated and use steady, firm pressure. If you notice early slipping, stop and switch to a better fitting driver.
- Cross threading with new screws: Always start screws by hand to feel natural engagement. If resistance feels gritty or misaligned, back out and start again.
- Forcing the battery: The new battery should slide in and clip without brute force. If it does not, remove it and inspect the connectors and alignment.
- Forgetting the back screw: The vacuum may feel solid even without the back screw fully tightened, but poor stability can lead to intermittent contacts. Tighten all three screws.
- Misaligned barrel: If the barrel does not clip, do not push the flap closed. Realign the barrel until it clips firmly, then close the flap.
Maintenance While You Have the Dyson Open
Having the barrel off is an ideal time to do a quick clean. Dust can build up inside the bin, around the red clip, and in the lower part of the cyclone. Gentle cleaning improves suction and reduces odour. Here is what I recommend:
- Use a soft brush to remove loose dust from the barrel interior and around the clip. Avoid harsh scrubbing that might scratch clear parts.
- Wipe the inside of the barrel with a dry microfibre cloth. If needed, a slightly damp cloth can be used, but make sure everything is fully dry before reassembly.
- Inspect the bottom flap seal. Remove any dust or hair trapped along the seal line to ensure a tight closure.
- Check the pre and post filters on the Dyson V8. If they look dusty, remove and wash them according to the manufacturer guidance. Allow filters to dry completely before reinstalling.
- Clean the outside of the unit with a cloth to remove smudges and dust, especially around the handle and trigger.
Choosing a Replacement Battery
Replacement batteries for the Dyson V8 vary in capacity, shell design, and features like an LED indicator. A genuine battery typically matches the original specifications and is a safe choice. Third party batteries can offer larger capacity and more visible indicators, but they vary in quality. Here are key points to consider:
- Capacity: Higher capacity batteries can extend run time, but they may take longer to charge and can add a small amount of weight.
- Indicator: An LED level indicator on the side helps you judge remaining charge more easily. This is useful if you switch between rooms and do not want to stop mid clean.
- Screw set: A good replacement battery includes three new screws with clean threads. This makes installation smoother and reduces wear on the old screw seats.
- Warranty: Check the warranty terms. A clear return policy is a sign of confidence in the product.
- Compatibility: Ensure the battery is listed for the Dyson V8 specifically. Some sellers offer multi model batteries. Verify exact compatibility.
In my testing, a replacement battery with an indicator and a fresh screw set made the swap smoother and the ongoing use more convenient. The indicator allowed a quick check before tackling larger areas, and the new screws seated cleanly without any drama.
Testing After Replacement
After the battery is fitted and the barrel is clipped back, test in stages:
- Trigger test: Press and hold the trigger. Listen for smooth operation. The motor should ramp up cleanly without wobble or rattle.
- Suction test: Run the vacuum over a small patch of carpet or a hard floor section. Confirm that suction feels strong and consistent.
- Indicator check: If your new battery has an LED indicator on the side, check its reading. Place the unit on the charger and confirm the indicator changes appropriately. Leave it to charge for a short period and retest.
- Run time assessment: After a full charge, test the vacuum across a normal cleaning routine and note the run time. A fresh battery should deliver steady performance without sudden cut outs.
These tests tell you the battery is correctly seated and everything is aligned. If anything feels off, recheck the screws and the barrel alignment. A simple half turn to snug an under tightened screw can remove minor vibration.
Troubleshooting if the Vacuum Does Not Power On
Occasionally after a battery swap, the unit may not power on immediately. Here is a step by step check to find the cause:
- Confirm the battery is clipped fully into place. Remove and reinstall the battery to be sure, listening for the clip sound.
- Check all three screws are tightened snugly. A loose bottom screw can cause intermittent contact.
- Inspect the connectors for dust or debris. Wipe gently and try again.
- Place the vacuum on the charger for a few minutes. If the battery was shipped with a low charge, it may need a little time before the unit responds.
- Verify that the charger is working. Try another outlet if needed.
If the vacuum powers on but cuts out quickly, check the filters. A clogged filter can cause the unit to trip and stop. Clean the filters completely and test again. If the issue persists, revisit the battery seating and screw tightness.
Why Use the New Screws Provided with the Battery
The replacement battery often includes three new screws. It might be tempting to reuse the originals, but in practice the new screws tend to perform better. Here is why:
- Fresh threads engage more cleanly with the new battery moulding
- Reduced risk of wear from multiple removals over the life of the vacuum
- Better feel during tightening, allowing a snug fit without overtightening
In my swap, the original screws came out fine, but the new screws had a noticeably crisp start when threading into the replacement battery shell. That clean engagement helped avoid any sense of forcing, and the final fit felt solid.
Aligning the Barrel Component Perfectly
When refitting the barrel, alignment matters. If the barrel sits slightly off, the bottom flap can appear closed but still leak air or dust. Follow this approach for a perfect fit:
- Hold the barrel straight in front of the Dyson body and line up the guides
- Slide slowly and listen for the clip as the barrel engages
- Visually check that gaps are even all around
- Close the bottom flap and press along the seal to confirm full lock
If you do not hear the clip, pull the barrel back and try again. Do not force the flap closed on an unclipped barrel. That can strain the latch over time and lead to a loose seal.
Battery Indicator Behaviour
Some replacement batteries include an LED indicator on the side. Although behaviour can vary by brand, typical indicators show a few bars or colours corresponding to the charge level. Here is how to use the indicator effectively:
- Check the indicator before a cleaning session to confirm there is enough charge for the job
- After a short run, glance at the indicator to gauge how much capacity remains
- Place the vacuum on the charger and observe the indicator change, confirming charging starts correctly
If the indicator does not light, confirm the battery is seated correctly. Some units only show the indicator in response to a button or when attached to the charger.
[IMAGE: A close up photo of a Dyson V8 cordless vacuum on a clean workbench. The barrel is extended with the bottom flap open, showing the red clip. Next to the vacuum is a replacement battery pack with a visible LED level indicator on the side, three new silver screws arranged neatly, and a Phillips head screwdriver with a magnetic tip. Soft natural light illuminates the scene, highlighting the dust free surfaces and the alignment tracks on the barrel.]
Cleaning the Barrel and Cyclone for Better Performance
While the battery swap is the main job, a quick clean of the barrel and cyclone can boost performance. Follow these steps without adding much time:
- Tap the barrel gently over a bin to release any trapped fine dust
- Brush around the seal and the red clip to clear dust that can interfere with latching
- Wipe the clear barrel with a microfibre cloth to remove smears
- Use a light puff of compressed air in the cyclone vents to dislodge loose particles, being careful not to force dust deeper
A clean barrel improves airflow and helps the seals work better. It also keeps the inside looking tidy, which makes future maintenance more pleasant.
How Long the Replacement Takes
On average, the swap takes fifteen to twenty minutes, including a short clean. The process is simple once you understand the layout and the clip position. If you encounter tight screws, add a few minutes for careful removal. A measured approach avoids damage and ensures the new battery seats perfectly.
Real World Testing and Observations
After installing the new battery, I tested on hard floors and short pile carpet. The trigger response was immediate. There was no hesitation in the motor, and the suction felt strong. The LED indicator was easy to see and gave a quick sense of remaining charge. With a full charge, the run time matched expectations for a Dyson V8 in standard mode, with a noticeable improvement over the old battery that had started to wobble and cut out. If you switch to high power mode, expect a shorter run time, but the consistency should still be improved compared to a worn battery.
Common Questions
Do I need to calibrate the new battery
Most modern lithium batteries do not require calibration. However, a full charge before the first use helps the indicator read accurately. Charge to full before your first cleaning session.
Can I reuse the original screws
You can, but the new screws are usually better matched to the replacement battery casing. They tend to seat more cleanly and reduce the chance of thread wear.
Why did the vacuum not start immediately after the swap
The battery might have shipped with a very low charge. Place the unit on the charger for a short period and try again. Also confirm the battery clip is fully engaged and all screws are snug.
Is there anything else to replace when swapping the battery
Check the filters. If they are due for a wash, clean them and let them dry completely before reinstalling. A clean filter helps airflow and can make the motor run more efficiently.
Disposal and Recycling of the Old Battery
Do not throw the old battery in general waste. Lithium batteries must be recycled properly. In the UK, take the battery to your local council recycling centre or drop it into a battery recycling point at major retailers. Many supermarkets and hardware stores provide battery bins near the entrance. If you are unsure, check your council website for guidance on battery disposal.
Final Checks Before You Put the Tools Away
- Confirm the vacuum powers on and runs smoothly
- Check the barrel is clipped and the flap seal is clean
- Verify the LED indicator shows a level and the unit accepts charge
- Store the spare screws and your driver in a safe place for future maintenance
With the battery replaced and the barrel cleaned, your Dyson V8 is ready for regular use again. The job is simple, and once you have done it once, future maintenance will feel even easier. As with any hands on work, take your time, trust the process, and listen for those key clips and cues that tell you everything is seated correctly.
Aftercare and bedding in the new battery
With the new battery fitted and the screws seated, a little aftercare goes a long way. The first few charge and discharge cycles help the battery management system learn your usage pattern and give you a more accurate indicator. Think of it as bedding in rather than calibrating. The aim is steady, sensible use and full charges on a reliable power source.
I recommend running three gentle cycles over the first week. Charge to full, use the vacuum for your usual cleaning, then place it back on the dock without letting it sit empty for hours. This normal routine is kinder to lithium cells than a deep drain to zero followed by a long wait.
- Place the vacuum on the charging dock and let it reach full before the first run. Confirm that the charge light behaves as expected.
- Use it on normal power for general cleaning rather than the highest setting for the whole run.
- When the indicator shows low, finish the current area and return it to charge. Do not aim for a hard stop.
- Repeat this pattern for a few cycles and observe if the indicator becomes more consistent.
This steady approach also surfaces any minor fit issues early. If you notice a brief cutout when you bump the vacuum or when you tilt it, pause and check the battery clip, bottom screws, and barrel alignment. A tiny tweak can remove the irritation and restore that solid feel.
That frame shows the vacuum sitting on the dock with the indicator lit. If your lights differ from this in brightness or timing, it can indicate a charger tolerance issue or a dock contact that is not fully seated. Wipe the contacts on both the dock and the battery face to make sure your first cycles are clean.
Understanding indicator lights and behaviours
Indicator lights can be confusing, especially with compatible batteries that include a side bar display. It is worth knowing how the Dyson V8 communicates state so you can make sense of what you see when you pull the trigger or place the vacuum on charge.
On the dock
On the dock, a steady charge light means power is flowing. When you first place the vacuum, it may blink once or twice before settling into a steady glow. When charging completes, some units reduce the brightness or switch off. Others hold a dim steady light. Both behaviours are acceptable.
On the trigger
When you pull the trigger, a compatible battery with a side indicator may light up with bars for a few seconds. Full bars mean a healthy state of charge. As you approach the end of a run, the bars drop to one then the light may flicker or turn off entirely. This is normal and is simply the management system protecting the cells from an unhealthy deep drain.
Flashing warnings
A fast flash on the trigger with no power often indicates a trip condition. Common causes are a blocked airway, a filter that is overdue for a clean, or a loose battery connection. The system prefers to cut power rather than let the motor strain against a blockage. Correct the cause and try again.
This frame captures the moment the trigger is pressed and the indicator flashes. Use it as a reference for timing. If your unit flashes then shuts down instantly, check the bin and cyclone paths for a dense clump of dust. A quick tap and brush can be enough to prevent the trip condition.
If run time is still shorter than expected
Even after a fresh battery, it is possible to see short runs if another part of the system is limiting airflow or causing excessive load. Here is a practical checklist that addresses the likely culprits without specialist tools.
- Remove the floor head and test suction at the wand. If suction is strong at the wand, the floor head may be obstructed.
- Inspect the brush bar for wrapped hair and thread. Clean it thoroughly and spin it by hand to confirm smooth rotation.
- Check the seal at the bottom flap and around the barrel. A poor seal reduces efficiency and eats into run time.
- Wash the filters if they look dark or feel clogged. Allow a full twenty four hours to dry.
- Verify the charger is delivering steady power. Try a different wall socket away from multi adapters.
- Confirm that your battery screws are snug but not over tightened. A loose battery can cause intermittent cutouts under load.
When you address these small issues, the difference in performance is tangible. The vacuum sounds cleaner, the suction feels more direct, and the battery seems to last longer even at the same reported capacity. That is the compounding effect of a tidy airflow path.
Cleaning and minor maintenance while you are there
A battery swap is the perfect moment for a light service. You have the bin open and access to areas that are usually hidden by the barrel. A few minutes of cleaning can save you a future trip condition and it contributes to the consistent run you are looking for.
Cyclone and barrel
Tap the cyclone gently over a bin to dislodge fine dust. Use a soft brush to remove any lint from the vents. Wipe the clear barrel inside and out so you can easily see future clogs at a glance. Clean the red clip area to keep that satisfying click when you refit the barrel.
Filters
Remove the main filter and the smaller post motor filter. Rinse both under the tap until the water runs clear. Do not use soap. Shake off excess water and leave them on a dry cloth in a warm airy space for a full day. Never refit a damp filter. Moisture reduces airflow and can lead to a musty odour.
Contacts and screws
Wipe the battery contacts with a dry lint free cloth. If there is visible residue, a tiny dab of isopropyl alcohol on a cotton bud helps, followed by a dry wipe. Do not flood the contacts. Check the screws for any visible debris in the threads. If your replacement kit includes new screws, keep the old ones in a labelled bag for emergency use.
[IMAGE: A clean, high resolution close up of a Dyson V8 handheld vacuum laid on a workbench with the clear bin swung open, the battery removed and placed beside three shiny new screws, a Phillips screwdriver, a small soft brush, and a microfibre cloth. The red release clip on the bin is visible, the bottom flap is open, and the lighting is bright and even to show dust removal and proper alignment points.]
A layout like this keeps your workspace organised and makes it easy to spot a missing screw or an out of place seal. When everything is visible and tidy, refitting becomes almost automatic.
Choosing a quality replacement battery revisited
If you have not purchased a battery yet or you are deciding between options, there are a few practical points worth emphasising. The right choice saves money and time and it can feel better in the hand as you use the vacuum.
- Capacity: Higher capacity promises longer run time, but it can add weight. If you do long sessions, the extra capacity is worth it. For quick daily touch ups, a standard capacity is often ideal.
- Indicator: A side bar indicator is useful if you like to check at a glance without docking. It is a small convenience that pays off in routine use.
- Screws included: A kit that includes fresh screws simplifies the job. Threads seat more cleanly and you avoid using tired screws from the old battery.
- Warranty: Look for a written warranty from a seller with real support. A responsive seller willing to handle returns is more important than a vague promise.
- Compatibility: Confirm the battery is explicitly listed for Dyson V8 models. Avoid listings that claim one size fits many across different series.
- Seller reputation: Buy from a reputable store or a verified marketplace seller. Counterfeit batteries can look similar but have poor cells and unreliable protection circuits.
If you value a simple life, pay slightly more for a well reviewed battery with a clear warranty and support. It aligns with the spirit of getting things done with minimal hassle.
Cost and value analysis
A fresh battery extends the life of the vacuum and sidesteps the cost of a complete replacement. In the UK, a compatible battery can be a fraction of the price of a new unit. It also saves time because you do not need to research a new model, adapt to new accessories, or dispose of a large appliance.
Consider the total value. You spend time on a careful swap, clean the unit, and restore performance. You get a noticeable improvement in run time and consistency. The household routine benefits. On top of that, you avoid adding a large appliance to waste and the planetary footprint is lower. Practical and principled at the same time.
Compatibility across the Dyson V series
It is tempting to assume that batteries across the Dyson V series are interchangeable. They are not. The V6, V7, V8 and later models use different shapes and connectors. A V8 battery is a specific fit for the V8 frame and screw positions.
Before you buy, check the listing carefully and match it to your model number. If you already purchased and the fit feels wrong, do not force it. Return the battery and request the correct model. Forcing parts that are not compatible risks damage that is harder to fix than a straightforward battery swap.
Storage and charging habits for longer life
Once your vacuum is back on form, sensible habits extend the life of the battery. The two extremes to avoid are heat and deep discharge. Heat is the enemy of lithium and deep discharge stresses cells.
- Keep the dock in a cool, dry space away from direct sunlight and radiators.
- Avoid leaving the vacuum fully empty for days. Charge it after use.
- If you will store it for a month without use, charge to around half and place it in a temperate room.
- From time to time, let the battery discharge to a sensible low level during normal cleaning then return to charge. This keeps the indicator honest without a harsh deep drain.
These small habits add up. You do not need to micromanage the battery. Consistent, sensible use is enough for the management system to keep the cells healthy.
Safety reminders that are worth repeating
Electric safety and battery care are not just for technicians. A few common sense reminders keep everything safe and smooth at home.
- Do not open the battery casing or attempt to repair cells. Replacement is the correct approach.
- Never charge a battery that is warm from heavy use. Let it cool to room temperature first.
- If you spot swelling, a strange sweet odour, or heat while idle, stop using the battery and take it to a recycling centre for safe handling.
- Use the official dock or a properly rated charger. Do not attempt clever substitutions.
- Keep batteries away from metal objects that could bridge contacts in a drawer or tool bag.
These points are simple but powerful. They protect your home and they respect the chemistry inside the cells.
Advanced troubleshooting if power is intermittent
If your vacuum still cuts out after a battery swap and a clean, consider a deeper check. Most issues are simple, but a few edge cases may need attention.
Trigger switch feel
Press the trigger and hold it for ten seconds. Does the power dip when your finger is steady. A worn trigger switch can cause intermittent power. This is less common, but if it happens, the fix is a service rather than a user project. A local repair shop can test and replace the trigger assembly if needed.
Dock connections
Place the vacuum on the dock and check that the alignment is square. If the dock is tilted on a wall or the mounting screws are loose, the contacts may touch weakly and charge slowly or not at all. Adjust and tighten the dock plate so the cradle supports the vacuum evenly.
Airflow path
Remove the wand and look through it against a light. If you see any debris stuck in the narrow section, use a flexible bottle brush to clear it. Sometimes a small item lodged in the wand produces a strange diminished suction that masks as a battery fault.
This frame shows the battery being slid into place. If you see intermittent power after this step, double check that the clip is fully engaged and the back screw is snug. A battery that is a fraction of a millimetre short of fully seated can behave differently when you tilt the vacuum upward.
Accessory checks and suction performance
Floor heads, mini motor heads, and soft rollers all introduce mechanical load. A hair wrap on a motor head can increase load enough to bring a tired battery to an early cutout. With a fresh battery you may not notice immediately, but it still reduces efficiency.
- Pop the end cap on the brush bar and pull the bar out. Clean hair and fibre wraps along the whole length.
- Spin the bar in your fingers. It should rotate smoothly without wobble or sticky spots.
- Inspect the contact pins on the head. Wipe them gently so the connection is clean.
- Check the gasket along the bottom of the head for wear. A poor seal leaks air and reduces suction.
Once your heads are clean and the battery strong, the vacuum regains that crisp, eager feel. It is satisfying to press the trigger and hear a smooth spin up with solid suction straight away.
Practical runtime expectations across modes
After a battery swap, it helps to recalibrate your expectations for run time in different modes. The normal mode is designed for a good balance between suction and endurance. The high power mode is there for stubborn dirt and quick bursts. Use it judiciously.
- Normal mode: Ideal for general dust and regular floor cleaning. Balance and efficiency are strong and run time is healthy.
- High power mode: Best for spot cleaning on deep carpet or around tricky edges. It delivers punch but drains faster. Use it in short bursts.
- No head attached: When checking suction at the wand, remember that the load is lighter. Run time in this test does not reflect real use with a motor head.
Think of the vacuum as a tool with different gears. Select the gear that matches the job and the battery will serve you well.
A simple, repeatable test routine
To benchmark your new battery and catch any surprises early, a simple repeatable test helps. You do not need lab equipment. A kitchen timer, a consistent cleaning route, and a notebook or a note on your phone are enough.
- Pick a typical cleaning route in your home and stick to it for the test.
- Use normal mode only for consistency.
- Start a timer when you pull the trigger and stop when the indicator shows low or the suction dips.
- Record the minutes, any pauses, and whether you switched heads.
- Repeat the test after three normal charge cycles and compare.
If the numbers improve slightly after the first few cycles, that is normal. If they remain short or vary widely, revisit the checklist for airflow or consider the charger as a variable.
When a battery swap does not fix it
There are edge cases where a brand new battery does not solve the problem. These usually fall into a small set of causes. The good news is that they are identifiable with simple checks.
- Motor obstruction: A rare case where debris near the motor intake reduces flow at the core. If you suspect this, a professional service is wiser than a deep home disassembly.
- Worn trigger assembly: As described earlier, intermittent contact can cut power. Test by holding steady and listening for dips.
- Faulty charger: Swap the charger for a known good unit or test voltage if you have a meter. If the charger provides weak or inconsistent current, the battery will never reach a true full.
- Dock misalignment: A skewed dock can feel normal but touch weakly at the contacts. Re mount square and test again.
If you reach this point and the simple fixes do not work, balance your time against the cost of a service. A small bench fee can be worth it to diagnose a rare fault correctly.
Tips for a cleaner fit and a quieter feel
Beyond power and run time, the quality of the fit affects the feel of the vacuum in use. The Dyson V8 has a pleasing click and a solid structure when assembled well. A few details enhance that feel.
- Seat the barrel without rushing. Align the guides and push until the clip sounds off. A second touch ensures it is genuinely locked.
- Check the bottom flap. If it falls open easily when nudged, the latch may have dust in it. Clean it and verify the seal is crisp.
- Listen for rattles. If you hear a rattle near the battery, a screw may be a touch loose. Snug it gently.
- Balance the vacuum in your hand. If it feels front heavy, check that the head is properly attached and the wand is fully seated.
These small touches make everyday cleaning feel smoother and more controlled. It is the difference between a tool you tolerate and a tool you enjoy using.
Frequently asked questions, expanded
Do I need to run the battery to empty to learn capacity
No. Normal use with full charges and routine cleaning is fine. The indicator learns enough from standard cycles. Avoid deep drains.
Can I mix old and new screws
You can, but it is better to use the fresh screws that come with most kits. They seat more cleanly and you avoid the quirks of worn threads.
Is a side indicator battery better
It is a convenience rather than a performance upgrade. If you value quick visual checks without docking, it is worth it. Performance is mainly about capacity and cell quality.
What if the vacuum smells musty after cleaning
That usually means a damp filter. Remove and dry the filters for a full day. Do not use the vacuum with damp filters.
Can I replace the battery and filters in the same session
Yes. Replace the battery, then wash the filters and leave them to dry. Use the vacuum without the filter only for brief tests. Wait until the filters are dry before normal use.
Why did the indicator show full but the vacuum stopped quickly
This can happen if the charger did not deliver a true full charge or if the airflow is restricted. Re check your dock alignment and clean the cyclone and filters.
Real world results and reflections
After a battery swap and a quick service, the Dyson V8 feels renewed. The trigger response is immediate, suction is strong, and the indicator behaves more predictably. On normal power, you can cover a typical two bedroom flat without the anxiety of a mid run cutout. On high power, you have the punch to lift stubborn grit from the entry mat or around the skirting edges without watching the clock nervously.
In my experience, the blend of a fresh battery, clean filters, and tidy accessories restores confidence. You stop thinking about the vacuum and get on with the job. That is the goal of a practical fix. A small investment of time yields tangible daily benefit.
A note on environmental impact
Replacing a battery rather than a whole vacuum is not only cost conscious. It reduces waste and keeps a perfectly good appliance in service. When you recycle the old battery through a proper channel, you close the loop responsibly. As an everyday consumer, these choices add up.
Keeping records for future reference
Jot down the date of your battery swap and the cycle count or general usage pattern. Note the seller and the warranty period. If the battery performs well, you will have a quick reference for future purchases. If there is a problem, a dated note makes any support conversation easier.
- Date of install and seller name
- Battery capacity stated on the listing
- Indicator type if present
- Notes on charger behaviour and run time
A small note in your phone or a sticky label inside a cupboard is enough. It is a simple habit that removes friction when you need information later.
Where to place the dock for everyday convenience
The right place for the dock improves your chances of consistent charging. Pick a spot where you naturally return the vacuum after use. A hallway cupboard or a utility room works well. Ensure the wall is solid enough to hold the dock screws and that the cable has a clear path to a socket without strain.
Position matters for airflow too. If the dock is near a source of fluff, like a laundry area, a quick wipe of the contacts now and then keeps them clean. This small touch prevents that annoying scenario where you think it is charging but the contact was just off.
The satisfaction of a solid click and a smooth run
There is something pleasing about a well assembled tool. The Dyson V8 rewards attention to detail with tactile cues. The click of the barrel, the close of the bottom flap, and the smooth spin up of the motor tell you that everything is in harmony. For me, that is a small joy in everyday work. You nurtured a practical asset and it responds with reliable service.
Final checks and a simple routine for the week ahead
To wrap up, give the vacuum a final glance and set your routine for the week.
- Battery seated with an audible clip and screws snug
- Barrel aligned and bottom flap sealed cleanly
- Filters washed and drying for twenty four hours if needed
- Dock mounted square and charging behaviour observed
- Accessories cleaned and contact pins wiped
Next week, do one normal run from full, record the time casually, and return to charge. If everything feels good, you are back to normal in a calm, confident way. That is the essence of simple, practical maintenance on a tool that you use daily.

If this article helped you in any way and you want to show your appreciation, I am more than happy to receive donations through PayPal. This will help me maintain and improve this website so I can help more people out there. Thank you for your help.
HELP OTHERS AND SHARE THIS ARTICLE
LEAVE A COMMENT
I am an entrepreneur based in Sydney Australia. I was born in Vietnam, grew up in Italy and currently residing in Australia. I started my first business venture Advertise Me from a random idea and have never looked back since. My passion is in the digital space, affiliate marketing, fitness and I launched several digital products. You will find these on the portfolio page.
I’ve decided to change from a Vegetarian to a Vegan diet and started a website called Veggie Meals.
I started this blog so I could leave a digital footprint of my random thoughts, ideas and life in general.
If any of the articles helped you in any way, please donate. Thank you for your help.
Affiliate Compensated: there are some articles with links to products or services that I may receive a commission.