Ever dropped your phone and found the dreaded crack on the rear camera lens? It’s one of those heart-sinking moments that can make you feel like your device is doomed. My son has been there and he ended up with a shattered lens after he dropped his phone coming out of the car. Thankfully, the Oppo A52 is easier to repair than it looks! Let’s dive into how you can replace that glass lens without the drama saving you time, money, and maybe even a few tears!
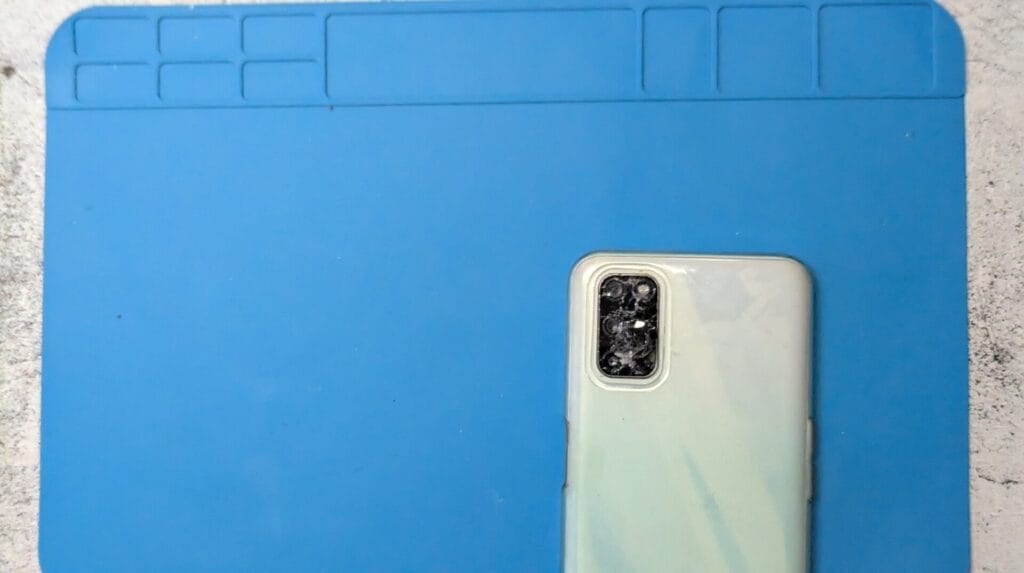
Understanding the Importance of the Rear Camera Lens
When we think about smartphones, what often comes to mind are the sleek designs and powerful processors. But have you ever considered how important the rear camera lens is? It’s not just a tiny piece of glass; rather, it’s a vital element for any photographer, amateur or professional!
The Role of the Rear Camera Lens
The rear camera lens significantly impacts the quality of the photos we take. It’s like the eye of our smartphone, capturing life’s moments with clarity. Imagine snapping a picture at a family barbecue. If the lens is dirty or scratched, the memories in that photo might be ruined. That’s why a clean lens is paramount for taking clear photos.
Consequences of Damage
So, what happens if your rear camera lens is damaged?
- Poor Photo Quality: Even a minor crack can lead to blurry or distorted images. You might notice colours looking washed out or details disappearing.
- Water Damage Risks: If the lens has cracks or chips, it may not seal properly, making your camera susceptible to water intrusions. Imagine taking your phone out in the rain, and it’s ruined because you neglected a small crack!
The Cost to Repair
Now, you might be wondering whether to call a professional or attempt a DIY repair.
- Professional Repairs: Relying on experts can ensure it’s done right. However, this route can be quite expensive, often costing $100 or more.
- DIY Repairs: If you’re handy and a bit adventurous, you can purchase a replacement lens for about $10 on eBay, just like I did with the Oppo A52. It’s essential to verify the model before ordering!
Gathering Your Tools and Supplies
Before diving into the exciting world of phone repairs, it’s vital that we gather our tools and supplies. You don’t want to get halfway through the process and realise you’re missing something crucial. So, let’s break it down:
What You’ll Need
- A small screwdriver: This is essential for removing the old lens. Preferably, a precision screwdriver for small screws.
- Adhesive: You’ll need this to attach the new lens securely. Useful options include super glue or specialty phone repair adhesive.
- A replacement lens: Make sure it’s designed specifically for the Oppo A52. Fit is everything here!
Choosing the Right Replacement Lens
Choosing a replacement lens isn’t just about finding any old glass. It’s about finding the right one for your Oppo A52. Check compatibility! Can you imagine using the wrong lens? Not only would it look terrible but it could also cause damage to your camera.
Where to Buy Your Tools
Now that you know what you need, where do you get these tools? Here are some options for you:
- Reliable online retailers: Websites like eBay or Amazon often have everything you need, including affordable parts.
- Local shops: If you prefer checking items physically, consider visiting local electronics stores or repair shops. They might even have suggestions for your repair process!
Also, make sure to check for part compatibility before purchasing. It saves time, money, and a whole lot of hassle!
As we prepare for our repair journey, let’s remember that having the right tools at hand increases efficiency and minimizes the risk of making mistakes mid-repair. It’s so much easier to work when everything is organised!
So, are you ready to tackle that lens replacement? Let’s get started! Here’s a video that guides you through the process:
Step-by-Step Guide to Remove the Old Lens
Replacing a camera lens can seem daunting. But with a bit of patience and precision, you can do it yourself. I’ve been there, fumbling through a repair job, and trust me—taking it slow pays off. Let’s dive into how to remove the old lens, step by step.
1. Gather Your Tools
Before we start, you’ll need a few things:
- A small screwdriver
- Glue remover (optional)
- A clean microfiber cloth
- Brush or compressed air for cleaning
2. Remove the Glass Cover
First up, you’ll want to remove the glass cover. This may sound straightforward, but it’s crucial to be gentle. Using a small screwdriver, carefully pry off the glass. Make sure to work slowly. Why? Rushing can lead to damaging surrounding parts – and you don’t want that!
As I learned the hard way, patience is vital. I once rushed this step and ended up needing to replace more than just the lens. So, let’s take a deep breath and move on.
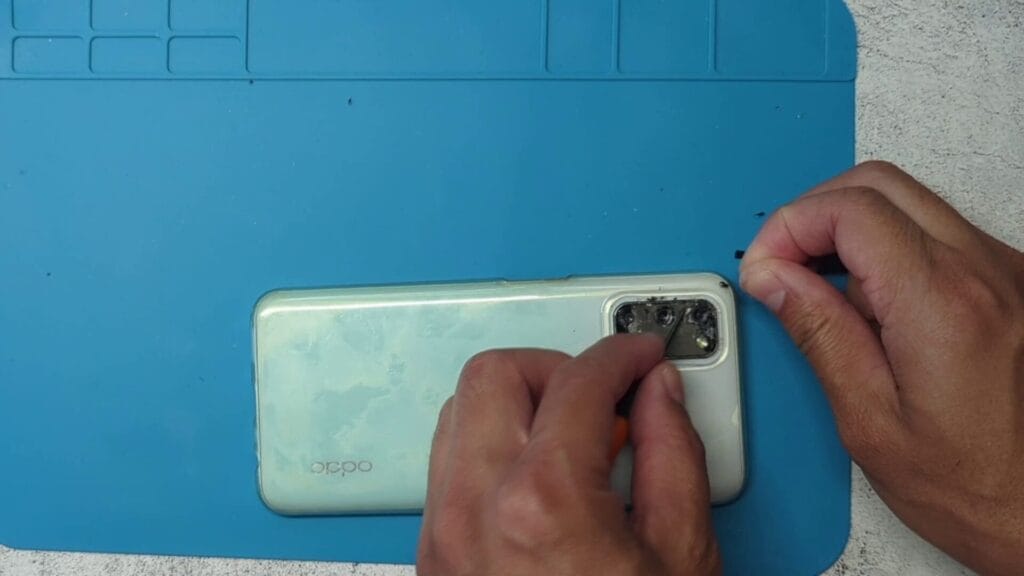
3. Scraping Off the Old Adhesive
Once the glass cover is off, you might see remnants of old adhesive. It’s essential to scrape this off without harming any adjacent components. I usually use a plastic scraper for this task. If you’re not careful, you might scratch other parts. And trust me, that’s a nightmare scenario.
Have you ever had tiny fragments left behind? I find that using a brush or compressed air helps sweep away any stubborn bits. Keep that workspace clean!
4. Importance of Cleanliness in Preparation
Now that we’ve scraped away the old adhesive, cleanliness is key. Before placing the new lens, ensure the area is spotless. You wouldn’t paint on a dirty wall, right? The same goes here! Any leftover gunk can affect the adhesive bond and, in the end, the quality of the camera.
Remember, this isn’t just about getting by. It’s about making sure your camera functions properly after the repair. Taking time to do this step right pays dividends later.
In my experience, I’ve seen and felt firsthand the difference it makes when you take care at the beginning of a project. Every detail counts.
Installing the New Camera Lens with Confidence
Installing a new camera lens can seem daunting. However, with a bit of confidence and the right steps, we can make it happen smoothly. Let me take you through the process.
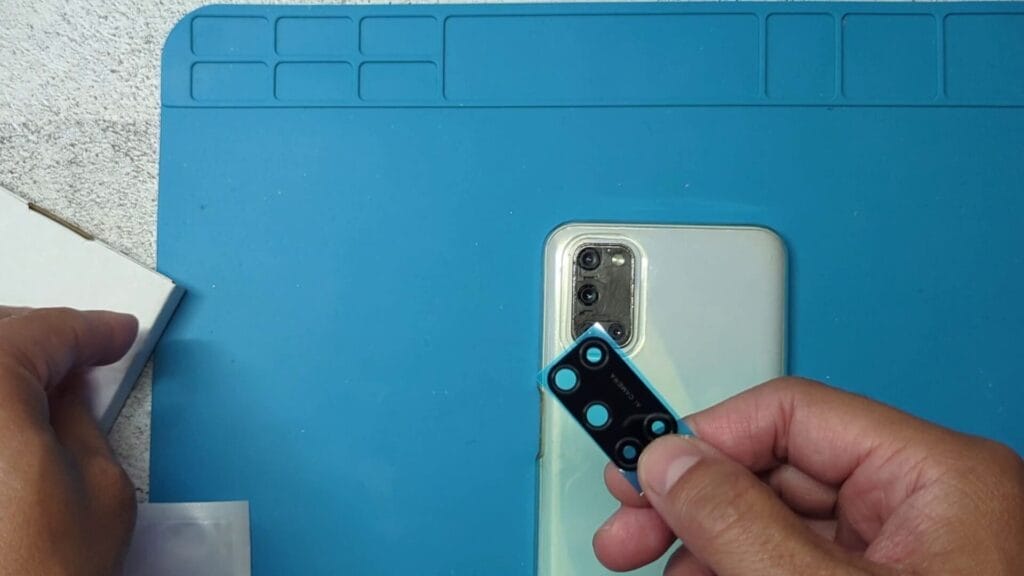
1. Aligning the New Lens
First things first, alignment is crucial. Take a moment to line up the new lens accurately with the camera holes. A misalignment here can lead to poor photo quality or even damage to the internal components. Think of it like lining up furniture in a room—it just has to fit properly.
- Check the camera openings on your device.
- Unpack your new lens carefully.
- Position it over the camera holes to see if everything aligns as it should.
If things don’t line up perfectly, avoid forcing it. Just adjust gently until everything matches up well.
2. Sealing with Confidence
Once you’re happy with the alignment, it’s time to focus on sealing and adhesive application. Use a strong adhesive for a durable bond. I’ve often found that a small amount goes a long way, so don’t oversaturate! Remember, a messy application can lead to leaks or residue on your photos later.
- Apply your adhesive evenly around the lens area.
- Be careful not to let it touch the sensor or other delicate parts.
- Once done, press the lens firmly into place.
Just like putting glue on a craft project, it’s about finding that perfect balance!
3. Cleanliness is Key
Before securing the new lens, ensure you have cleaned the surface thoroughly. Any dust or residue can spoil the installation. I always take a moment to meticulously check for any leftover fragments from the old lens. Trust me, it’s worth it!
- Wipe down the surface with a microfiber cloth.
- Use compressed air to blow out any stubborn particles.
Taking these steps not only ensures that the lens sticks properly the first time but also minimizes the risk of potential mistakes.
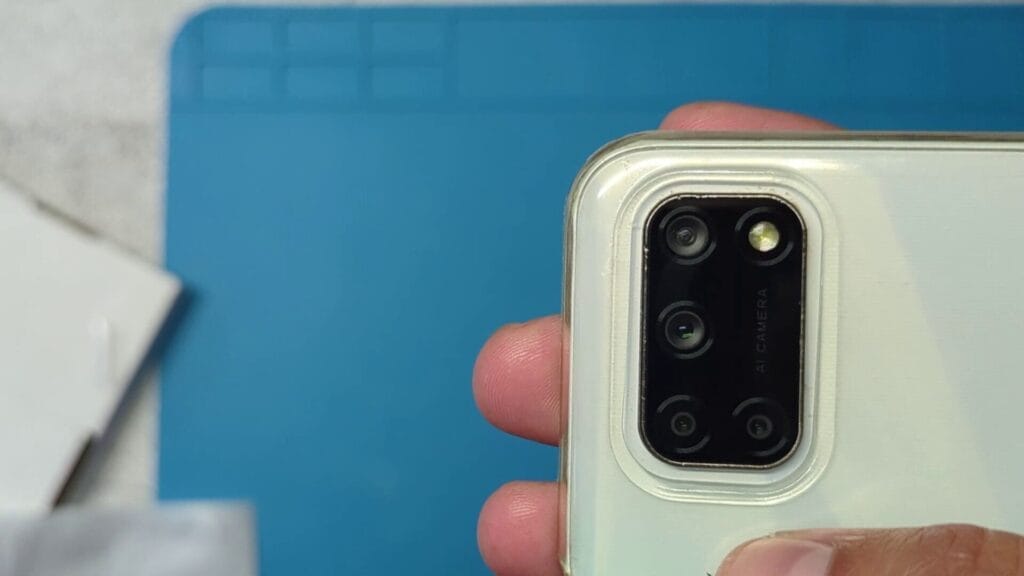
Testing Your Repair and Reflecting on the Experience
After completing your DIY repair, it’s time for the real test: checking if everything works as it should. It can feel exhilarating and scary at the same time. Will the new lens capture stunning visuals, or have we missed something? Let’s walk through how to effectively test your new lens.
1. How to Test Your New Lens Effectively
- Check the Alignment: First off, snap a few pictures from different angles. If the photos look sharp and clear, then you’ve likely nailed the installation.
- Use Natural Light: Natural light is your best friend when testing. Observe how the lens captures images in various lighting conditions.
- Try Different Settings: Don’t shy away from testing the lens in different modes – Portrait, Night, Landscape. This ensures the lens functions well across settings.
2. Troubleshooting Tips if Camera Quality is Lacking Post-Repair
- Inspect for Dust: A speck of dust can ruin a shot. Examine the lens and clean it gently if needed.
- Check the Seal: Ensure that the lens is properly sealed. An improper fit may affect photo quality.
- Review Adhesive Quality: Weak adhesive might leak light. Ensure the adhesive is intact around the lens.
It’s all about patience. Sometimes things don’t work out, but it’s okay. In the words of a wise blogger,
3. My Thoughts on the Satisfaction of DIY Repairs
There’s something uniquely fulfilling about a DIY repair. It’s more than saving a few bucks. It’s about learning, gaining confidence, and feeling accomplished. Each repair adds value to your skills and can be quite empowering. When you fix something, you make it your own.
Not to mention, DIY repairs can save you a pretty penny! Many would rush to a professional, but with a bit of guidance and patience, who’s to say we can’t do it ourselves? I encourage you, yes you, to dive into your repair projects and share those experiences. It can inspire others to tackle their challenges!
Testing your repair isn’t just a checkoff point; it’s the finale of your hard work. Even if something isn’t perfect, remember, that each experience teaches you more for the next repair. So grab that camera, start testing, and enjoy the fruits of your labour!

If this article helped you in any way and you want to show your appreciation, I am more than happy to receive donations through PayPal. This will help me maintain and improve this website so I can help more people out there. Thank you for your help.
HELP OTHERS AND SHARE THIS ARTICLE
LEAVE A COMMENT
I am an entrepreneur based in Sydney Australia. I was born in Vietnam, grew up in Italy and currently residing in Australia. I started my first business venture Advertise Me from a random idea and have never looked back since. My passion is in the digital space, affiliate marketing, fitness and I launched several digital products. You will find these on the portfolio page.
I’ve decided to change from a Vegetarian to a Vegan diet and started a website called Veggie Meals.
I started this blog so I could leave a digital footprint of my random thoughts, ideas and life in general.
If any of the articles helped you in any way, please donate. Thank you for your help.
Affiliate Compensated: there are some articles with links to products or services that I may receive a commission.


