There are moments in creative work when a single change transforms frustration into flow. For many editors working in Wondershare Filmora, jitter during playback has been one of those nagging problems that breaks concentration and chips away at confidence. The great news is that the latest update has delivered the relief long overdue. With version 15.2.8, playback smoothness has finally taken a meaningful step forward, and the difference is not subtle. When the timeline feels stable and responsive, you think less about the tool and more about the story you are telling. That is exactly what this fix enables.
The journey to this point has been a bit of a slog. It involved testing different builds, comparing behaviour, and checking whether jitter had been addressed in practice rather than in theory. Earlier versions left many of us doing laps through preference panels and creating workarounds to coax acceptable real time playback. The awaited improvement did not land where we first hoped, and it was easy to feel hesitant about investing yet more time in another round of tweaking. The moment you see version 15.2.8 in action though, you realise a substantial change has occurred under the hood. Timeline performance is now aligned with the promise of effortless editing, and the steps to enable it are both straightforward and reliable.
What jitter looks and feels like during playback
Jitter presents as uneven motion, the sensation that frames are not arriving in a consistent rhythm. It can show up as micro stutter during pans and camera movement, as choppy playback when you stack effects and transitions, or as momentary pauses that make audio feel detached from the visuals. You press play and watch the timeline, and despite a modest project, the playhead seems to hesitate. The eyes pick up on the inconsistency immediately. Even when the frame rate counter reports numbers that look fine on paper, jitter exposes an underlying mismatch between decode timing, render preparation, and display refresh.
The creative impact is significant. Smooth playback is not a luxury, it is a foundational tool for judging pacing, matching music beats, aligning dialogue, and fine tuning the cut. When motion is irregular, you spend energy guessing rather than confirming. Decisions take longer. Edits are less confident. You begin to postpone certain refinements because the feedback loop is too noisy to trust. This is why the change in version 15.2.8 matters so much. It restores the immediate kinesthetic certainty that good editing depends on.
Why earlier builds struggled and how this update shifts the balance
Video playback inside an editor is a dance between decoding the footage, compositing layers, applying effects, and sending well paced frames to the screen. If any piece of that dance stumbles, jitter creeps in. In prior builds of Filmora, the combination of decode timing and composition with heavier timelines sometimes meant that frames were prepared a touch late. The schedule inside the playback engine was tight enough that a few milliseconds of delay accumulated into visible stutter, especially with camera movement or high detail scenes. Users attempted to compensate by lowering preview quality, pre rendering sections, or simplifying effects, but those tactics did not address the core timing issue.
Version 15.2.8 corrects the rhythm. Hardware acceleration for playback is now used more effectively, and the coordination inside the performance pipeline has been tightened. When you enable the updated playback acceleration, the decode work moves to capabilities that are specialised for that job, while composition and colour work benefit from more orderly scheduling. The result is frames that arrive predictably. This means pans feel like pans, music syncs to motion with conviction, and your eyes do not catch distracting hiccups during routine review.
How to activate the settings that make the difference
The behaviour improvement is present in the build, but you need to verify your preferences so Filmora uses the hardware acceleration for playback. The setup is quick and replicable, and it ensures the software is leaning on the right components of your system.
- Open Filmora and confirm you are on version 15.2.8 in the About panel. If you are not, update first. The fix is specific to this release and later.
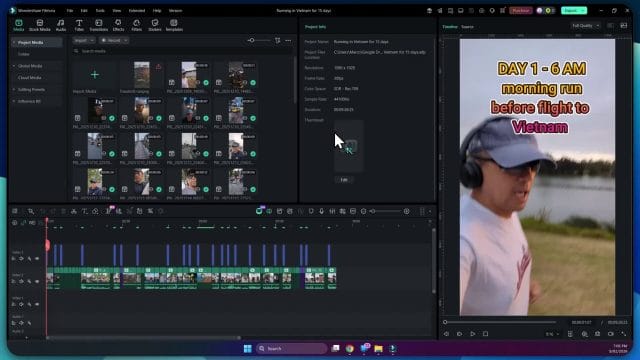
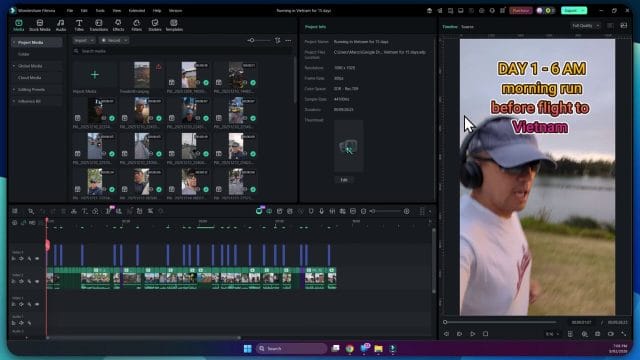
- Go to Preferences and select the Performance section. This area controls how Filmora manages playback, render caching, and device acceleration.
- Locate the options related to hardware acceleration for playback. Enable them. These options tell Filmora to use the specialised video decode and presentation features of your graphics solution.
- Apply the settings and close the panel. Return to your timeline and press the play button to experience the difference directly.
This is not a cosmetic preference. It is the switch that unlocks the smoother behaviour present in the new build. When the option is active, the decode path gains a level of determinism that helps the entire pipeline stay on beat. If you have been living with jitter, the sense of relief when you press play after enabling this acceleration is immediate. Motion will finally look like motion.
Press play and look for these signals of improvement
Once your preferences are set, use a few simple checks to confirm that playback is truly improved. You want to ensure the change is not just a feeling but a real difference in timing and responsiveness.
- Play a section with camera movement. Pans and tilts reveal jitter quickly because the eyes track continuous motion. If the movement feels uniform and the background does not shudder, you are seeing the improvement.
- Scrub through a dense portion of the timeline. Layers and effects can upset weak playback behaviour. With the updated acceleration, the playhead should respond predictably, and audio should stay in lockstep.
- Watch the first second after pressing play. In jitter prone builds, the initial movement sometimes lagged behind your command. The new release locks in quickly, which you will feel as immediate flow.
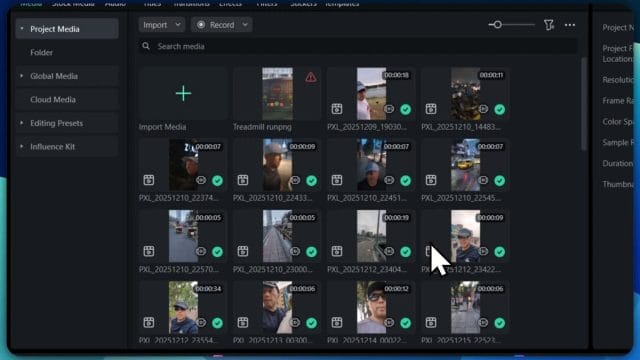
- Test a few different clips. Mix phone footage, camera files, and screen recordings. Consistency across media types suggests the decode pathway is being handled with care.
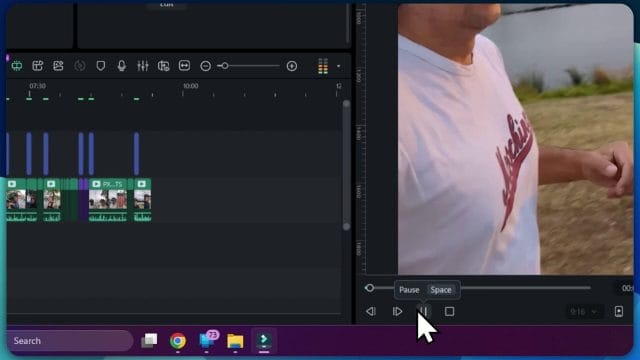
These are practical cues you can use in your own projects to verify that the fix is real. The best confirmation is not a chart, it is the quiet feeling that your creative attention is no longer being pulled away by stutter. When you reach for the spacebar and the timeline simply runs, you know the update is working.
If you tested previous versions, this is the one worth keeping
There is a reason some editors hesitated to test yet another build. Time spent checking fixes is time not spent editing. Earlier versions did not land the fix that many hoped for, and it was rational to consider waiting for a more mature solution rather than walking through the same steps again. Version 15.2.8 breaks that pattern decisively. It is worth upgrading because it changes your day to day experience. Once installed and configured, it does not require extra rituals to behave. It simply delivers smoother playback.
This is not about theoretical performance measured under perfect conditions. It is about practical improvement in the situations editors actually face. Quickly stacking a few effects for a social clip. Lining up a transition with a melody. Reviewing b roll against a voiceover. Editing a screen capture tutorial with text overlays. All of these now feel more stable when you press play, and you do not need to build proxies or render preview files for every minor tweak. You get more done with less fuss.
Understanding hardware acceleration for playback
Hardware acceleration is the practice of assigning specific tasks to components designed to execute them quickly and efficiently. In the context of video playback, it means using capabilities in your graphics solution to decode compressed frames and present them with precise timing. Your central processor is flexible but not specialised for video decode. Your graphics hardware often includes dedicated blocks for this job, and those blocks are exceptional at moving frames reliably through the pipeline.
In Filmora 15.2.8, the way the software engages these features has been refined. The decode work is more consistently offloaded to the right module, and the coordination between that module and the composition stage is more disciplined. As a result, your system spends less time juggling competing tasks and more time simply delivering the frames you want to see. The benefit shows up not only as smoother motion but also as steadier resource usage. Spikes are fewer and smaller, which is exactly what you want during real time editing.
System preparation that complements the fix
The update is powerful on its own, but a few system practices amplify its effect. Think of these as simple housekeeping steps that remove friction and let the software breathe.
- Update graphics drivers to the latest stable release. Driver improvements often include decode timing and presentation tweaks that align well with an editor using hardware acceleration.
- Use a balanced power plan on a laptop. Aggressive power saving can introduce latency in component response, which makes frame timing less predictable. A balanced plan is a good compromise during editing.
- Close background tasks that compete for graphics resources. Streaming players, games, and some assistance tools may hold decode pathways open, which can interfere with timeline playback.
- Keep your media on a fast drive. Jitter sometimes hides an input problem. If your footage is on a slow external drive, move it to a solid state drive to eliminate read delays.
None of these are complex, and they avoid the need for heavy technical tinkering. Combined with Filmora 15.2.8, they create an environment where frames are prepared and delivered without drama.
Project settings and preview choices that enhance smoothness
Even with robust acceleration, your preview strategy matters. Filmora offers preferences that trade preview detail for speed, and using them judiciously can make editing feel effortless without compromising final export quality.
- Set playback quality to a sensible level. For dense timelines, a half resolution preview often looks perfectly fine while lowering the preview render burden. You can raise it for colour critical checks when needed.
- Use render preview for challenging moments. For complex compositing, quickly render a short region so that you can judge movement and timing without stress. The updated playback engine will handle most moments without this, but it remains a valuable tool.
- Enable and manage proxy files if your footage is extremely heavy. High resolution media from recent cameras can be demanding. Proxies do not change export quality, they only make preview easier. Filmora handles proxy management smoothly.
- Check timeline frame rate matches your footage or creative intent. Mismatch can produce subtle irregularities that feel like jitter. Set the timeline to the rate you intend to deliver.
With these choices in place, the combination of acceleration and sensible preview setup delivers a timeline that feels responsive. You edit at your own pace, and the software keeps up.
Working with variable frame rate footage
Footage captured on phones and some screen recorders is often variable in frame rate. That means frames per second fluctuate according to content, brightness, and motion. During decoding, variable frame rate media can appear uneven even when the editor is behaving correctly. The new release does a better job of smoothing playback, yet there are additional tactics that help when you rely on variable frame rate sources.
- Transcode to a constant frame rate using a reliable tool before import. This gives Filmora a steady stream of frames to decode, which improves the experience across the board.
- For screen capture clips with cursor movement, consider a slightly higher constant frame rate for preview. The cursor reveals timing issues quickly, and a steady rate makes it easy to judge.
- Avoid mixing too many variable frame rate clips with different characteristics in the same sequence. Consistency helps any playback engine keep its place.
The idea is not to over engineer your footage, but to remove avoidable sources of irregular timing. Filmora 15.2.8 rewards this discipline with pleasing motion and reliable sync.
Audio and motion sync during playback
Jitter during video often goes hand in hand with audio feeling disconnected. When frames are late, audio appears to run ahead or behind the visual action. The human brain is sensitive to this mismatch. With the current update and acceleration enabled, audio sync behaves more predictably during timeline review. Dialogue lines match mouth movement, music hits align with cuts, and sound effects land on the intended frames.
To push this even further, use a few simple habits during editing. Place visible markers for important beats, and check those points with the new smooth playback. If you add time remapping effects, rehearse the segment a couple of times to verify sync. With the jitter issue resolved, these checks will feel satisfying because the feedback from the timeline is accurate. You will find yourself making finer adjustments because you can trust what you are seeing and hearing.
Transitions, titles, and motion graphics under the new behaviour
Transitions and titles are areas where jitter used to be especially unpleasant. Alpha blending, motion easing, and textured elements created a composition load that had to be handled with precision. The improved pipeline in 15.2.8 offers that precision more often. Cross dissolves glide, slides and wipes adhere to their curves, and animated titles maintain clean motion even in busy scenes.
When you design motion graphics inside Filmora, test your sequences at a couple of playback qualities to find the balance that feels most natural on your system. Use easing that complements the story, and let the surprise of the motion carry the message rather than being distracted by jitter. The change in playback behaviour will invite you to explore more ambitious title work because you can actually see what you have created as it will appear later.
Colour work and preview discipline
Colour grading places a different kind of demand on playback because it touches every pixel of every frame. Filmora is built to apply colour transformations efficiently, and the new acceleration path does not diminish that. If you work with multiple adjustment layers or heavy look transforms, the updated engine retains a steady cadence when you press play.
To keep the experience smooth, use a preview strategy that matches your intent. If you are auditioning looks and tweaking subtle curves, temporarily lower preview resolution to make every change feel immediate. When you are checking for banding or noise after grading, allow a moment to pre render a short section at full preview quality. The whole point of the jitter fix is to give you control over timing, so take advantage of it by choosing the right preview context for each creative move.
Long form projects and timeline navigation
In larger projects, the cumulative weight of clips, markers, and effects used to expose playback irregularities more quickly. Navigating across a long timeline with confidence is a core requirement for documentaries, course videos, and narrative pieces. The stability in 15.2.8 makes this less of a worry. The playhead moves with intent, and the response when jumping between sections feels snappy rather than tentative.
Organise long form work with bins and colour labels so that you can approach each section without loading the entire project into preview at once. Use the search tools to isolate sequences, and rehearse transitions between scenes with acceleration fully active. You will feel that the software is a partner rather than a hurdle. That shift in sensation is worth more than any technical note because it frees you to focus on structure and pacing.
Export quality versus preview, and how to interpret differences
It is important to remember that timeline playback is a preview of the project. It is designed to be fast enough to allow editing while still representing the visual intent. Final export uses a different pathway, tuned for accuracy and compression quality. With the jitter issue addressed in preview, you may notice that the gap between what you see while editing and what you export is smaller than before. That is excellent. It means your decisions are better informed and fewer surprises appear at the end.
If you do see differences, treat them as natural results of two different goals. Preview wants speed and interactivity. Export wants fidelity across devices and platforms. Use short exports of tricky sections to confirm that motion and sync match your expectations. The more you work in version 15.2.8, the more comfortable you will become with how preview and export relate.
What to do if you still encounter jitter
While the fix is robust, there will always be edge cases. If jitter appears in a project after updating and enabling acceleration, work through a simple sequence of checks. Each step narrows the cause and usually resolves the issue.
- Confirm you are on version 15.2.8, not an earlier build. Updates can occasionally stall or be blocked by a system prompt. Check and reinstall if needed.
- Verify that hardware acceleration for playback is still enabled. Some preferences reset after updates, and it is easy to miss a box that matters.
- Update your graphics driver. If a driver is months old, timing quirks can surface that were already fixed upstream.
- Move the specific clip to a fast local drive and test again. Media on network shares or slow externals can produce symptoms that look like jitter.
- Temporarily disable heavy background applications. Even a cloud sync client can preoccupy resources enough to disrupt preview timing.
- Transcode one problematic clip to a constant frame rate and retest. If the issue disappears, you have a footage characteristic to manage rather than an editor fault.
These steps are humble but effective. They respect the path that frames travel from storage through decode to display, and they give you control over each stage. Many editors find that the first two checks resolve the issue immediately because the improvement in Filmora is present once the preferences reinforce it.
Confidence returning to the edit bay
Software improvements often feel abstract until they touch a daily moment. Pressing play is such a moment. When it works cleanly, your hands, eyes, and ears settle into a rhythm that turns editing into one continuous gesture. Version 15.2.8 restores that gesture inside Filmora. It does so without asking you to learn complex new behaviours. You switch on the acceleration, and your timeline simply becomes easier to inhabit.
This matters not because it ticks a box on a feature list, but because it shifts the psychology of editing. You will trust your preview again. You will make bolder cuts because you can test them without friction. You will build transitions that rely on the audience feeling the motion rather than just seeing it. The fix takes a technical burden off your shoulders, and that is one of the best gifts a tool can give an artist.
A note on communicating improvements
It is tempting to keep improvements to yourself and move on quietly, but there is value in sharing what works. If version 15.2.8 changes your editing experience for the better, let peers know. Help colleagues who had put Filmora aside because of playback issues give it another chance. The community becomes stronger when small technical barriers are dismantled, and stories of regained smoothness carry weight in that process.
Looking ahead with practical optimism
Every editor wants to trust that their tools will not throw them off balance. The fix for jitter in Filmora points toward a philosophy of keeping the experience stable and graceful. It invites optimism that future updates will continue in that direction, refining the path from decode to display even further. In the meantime, 15.2.8 is the release to install, configure, and use daily. It changes the way your timeline feels under your fingertips, which is the most tangible improvement any editor can ask for.
Make sure you upgrade, enable hardware acceleration for playback in the Performance preferences, and test with scenes that used to expose the issue. The difference will be obvious. The play button will feel like a reliable gateway into your story rather than a coin toss. That is the fixed behaviour we have been waiting for, and it is finally here.
Beyond the basics: deeper tuning for flawless previews
The instant improvement in Filmora 15.2.8 is easy to feel once you enable hardware acceleration and point the timeline at a challenging section. If you want to extract every last drop of smoothness and keep that cadence even as you stack effects, there are a few deeper adjustments that help the playback engine maintain pace, especially when your edits grow in complexity.
Preview scale versus cumulative load
Playback quality is not just a blunt throttle. It is a way of managing the relationship between decode cost, composition cost, and the demands of certain filters. A balanced strategy keeps motion convincing while freeing resources for time critical operations. Here is how to approach it:
- If your footage is high resolution and you have multiple effects, try half resolution for general editing. This preserves motion smoothness while lowering the texture size the compositor must push through the pipeline.
- For colour work and sharpness checks, briefly switch to full resolution on short segments to confirm fine details. Then return to half or quarter for timeline navigation and decision making.
- If a specific effect weighs heavily on playback, consider temporarily disabling only that effect while you develop the sequence. Re enable it for review passes and final checks.
Because 15.2.8 delivers steadier frame pacing, you will find that lower preview scales are no longer a crutch but a straightforward way to keep creative momentum without sacrificing judgement accuracy.
Composition order and track discipline
Even with a stronger playback engine, the composition order can influence how easily the system keeps a steady cadence. You can help Filmora by maintaining tidy tracks and clear layer priorities.
- Keep frequently animated layers on their own tracks. This reduces the chance of unexpected overlaps and makes the render order predictable.
- Align graphic elements to grid or guides when possible. Clean transforms simplify the maths the compositor must resolve.
- When fusing multiple overlays, consider pre rendering the group if the combined motion is tricky. A brief render creates a lightweight clip for everyday preview while you polish the surrounding edit.
These habits will make your timeline faster to read and faster to play, which in turn compounds the gains of 15.2.8.
Measured use of visual intensity
Aggressive blur, glow, sharpen, and noise can add cost beyond simple color adjustments. The new build still handles them more gracefully, but you can keep playback silky by limiting extreme settings during exploratory phases.
- Use moderate levels while you find the right look, then step up values in short review passes when you are ready to commit.
- If multiple stylised effects are stacked across several clips, stagger them across the timeline rather than clustering all heavy shots in one block. This spreads demand across play sessions.
- For long form edits, reserve dense stylisation for key moments to prevent fatigue in both the viewer and the playback engine.
By pacing visual intensity you keep motion and sound aligned, allowing the creative feel to guide choices rather than technical friction.

Practical workflows that benefit most
The fix is not only measurable. It changes how you work in everyday scenarios. Below are common workflows where the smoother cadence is particularly transformative, with tips to keep the experience consistent from initial assembly through to delivery.
Social video assembly with dynamic graphics
Short form sequences often blend quick cuts, animated titles, and bold transitions. In prior builds, preview jitter could make those rhythmic moves feel unreliable until you pre rendered or exported. Filmora 15.2.8 lets you build, audition, and refine without that drag.
- Set preview to half resolution for general cutting. This keeps text animation and swipes smooth enough to judge timing in context.
- Use markers to nail beats against music, then nudge transitions by a frame or two while listening to the track. The new cadence lets your ear and eye agree more often without loopholes.
- For sections with heavy motion blur, try a brief pre render of that set piece only. Then you can continue cutting the rest in real time while referring to the polished block as a timing anchor.
The result is less waiting, fewer rough proxies, and a clearer sense of pace as you design the hit moments that drive engagement.
Screen capture tutorials and training pieces
Cursor movement, pop up windows, and overlays are tricky when preview cadence stutters. Those micro errors turn a crisp tutorial into a fuzzy experience. With 15.2.8, cursor paths and scroll actions hold steady, making it easier to evaluate legibility and pacing.
- If the tutorial is captured at a high frame rate, set the timeline frame rate to match. The playback engine now keeps pace far more reliably, so you can reflect natural cursor feel without workaround.
- Reduce preview scale when applying callout animations or magnification. Smooth motion matters more than pixel perfect crispness at this stage.
- Once the instructional flow is set, do a short export of a challenging section that includes zooms and annotations. Confirm that motion remains natural and that text is sharp where it matters.
Users often notice the improvement immediately. Your accuracy rises and you spend less time fighting timing oddities while adding clarity aids and interactive cues.
Documentary and interview edits with layered b roll
When you blend A roll, cutaways, and lower thirds with colour work, preview jitter makes it hard to keep the emotional thread intact. 15.2.8 stabilises motion enough to trust the relationship between voice, scene, and pacing during assembly.
- Build a timing spine with interview anchor points, then place b roll against those points. Play through longer sections to confirm the flow without pausing to diagnose micro stutters.
- Apply colour adjustments broadly first, then refine shot by shot. The engine now holds cadence even while you sweep through corrections, which accelerates decision making.
- If you add noise reduction or heavy film grain, consider limiting those effects to the final pass. This keeps everyday preview nimble and protects the narrative line while you work.
The overall editing process becomes smoother, grounded by steady motion and predictable response. You may find yourself more willing to experiment with pacing because each play confirms your intent instead of raising technical questions.
Behaviour across different systems
The playback fix is broad, but systems differ in how they deliver the benefit. Understanding those differences helps you set realistic expectations and tune for your environment.
Desktop GPU versus integrated laptop graphics
On a desktop with a modern dedicated GPU, Filmora 15.2.8 takes full advantage of specialised decode blocks and a mature driver stack. Dense timelines with several layers play predictably, and you can often stay at half resolution even with colour and stylisation on top.
Thin laptops with integrated graphics still gain a lot, especially in the consistency of frame delivery. You may need to lean a little more on quarter resolution during intense design phases, and it is wise to keep the power plan balanced to prevent throttling. The steady cadence remains, but the ceiling for heavy compositing is lower, so preview scale and effect discipline matter a bit more.
External monitors and adaptive refresh settings
Higher refresh panels can make smoothness more obvious, but they can also introduce a mismatch if the panel tries to adapt during playback. If you see rare oddities on a variable refresh display, consider fixing the monitor refresh to a value that divides cleanly by your timeline frame rate. This kind of alignment helps the eye read motion consistently on play and pause.
Storage topology and media access
The playback engine now budgets decode and composition intelligently, but it still relies on timely media access. Place source clips on fast local storage. Avoid editing directly from a cloud drive. External solid state drives are fine if they connect through a fast port and do not share bandwidth with other heavy peripherals. Slow fetch can add latency that free upgrades cannot hide, especially with high bitrate footage.
Effects, plug ins, and the new cadence
Third party effects and add ons can vary in how they compute frames. 15.2.8 improves coordination between decode and composition, which often helps external filters as well. A few practices keep everything aligned.
Check default quality modes in add ons
Some plug ins ship with draft quality modes that use lighter maths during preview. If a filter looks soft during play, check its settings. If you need full fidelity during an important review, you can raise its preview quality briefly, then return to a lighter mode for everyday editing. This can be more efficient than increasing global preview resolution for the whole timeline.
Pre render heavy stacks only when necessary
With the improved engine, pre renders can become targeted rather than habitual. Identify the few shots where combined effects and transforms are genuinely heavy. Pre render those short sections as reference blocks. Continue to edit the surrounding story with live playback. This approach keeps your project lively and reduces time spent waiting on long pre renders.
Titles, motion graphics, and easing consistency
Editors often complained that transitions and titles would look right only after export. Now easing curves feel true during preview, which changes how you design motion. Experiment with more nuanced acceleration and deceleration. Play through your sequence several times with music to feel how titles breathe with the track. The steadiness of 15.2.8 gives your judgement a stable foundation.
Time remapping, speed ramps, and cadence
Speed changes amplify any flaw in timing. The fix in 15.2.8 really shines when you shape slow motion, bursts, and complex ramps because the preview now mirrors intended cadence far more accurately.
Anchoring with audio markers
When you build speed ramps against music hits, set markers at key beats, then drag timing points to align with those markers. Play through and adjust by a frame or two. Because preview jitter is reduced, each small nudge maps clearly to how the beat feels, and you will reach the right ramp shape faster.
Reverse moves and freeze frames
Reverse and freeze operations rely on predictable frame access and composition. The new build keeps these operations smoother in preview, which means you can judge the feel of a reverse more accurately before export. Freeze frames now sit with audio in a way that looks natural during assembly, removing the guesswork that used to push editors into premature renders.
Conforming slow motion footage
If you use high frame rate source clips, conform them to timeline frame rate or apply time remapping as needed. Filmora 15.2.8 handles these decisions more convincingly in preview. You will notice that movement retains fluidity even while you seek and trim, which speeds up your ability to find the right moment in the action and commit to a rhythm.
Case studies: everyday wins you can replicate
It helps to picture the difference with examples. Here are short narratives that show how the new cadence changes practical outcomes across typical projects.
Sports highlight reel with fast cuts
A four minute highlight reel mixes crowd shots, sideline commentary, and on pitch action. In prior builds, editors had to pre render quick sequences to verify flow and alignment with chants and music. With 15.2.8, they set preview to half resolution, enabled acceleration, and tested the most difficult sequence of a thirty second clip with four layers of overlays and a title. Motion held steady. They focused on timing against the beat, finished assembly, and exported without the intermediate renders they previously relied on.
Product launch teaser with micro animations
A teaser relies on tiny movements around a phone, subtle glow, and text reveals. The new build lets the team audition easing settings in place, play back transition shapes, and adjust micro animations to feel right with the sound design. They only pre rendered one seven second hero move to confirm combined glow and motion blur at full resolution. Everything else stayed live, saving hours across revisions.
Educational series built from screen captures
An instructor produces ten minute segments with plenty of cursor movement, zooms, and callouts. In the past, jitter made pointer tracking tricky, pushing them to export test files for every complex segment. With 15.2.8, they aligned timeline frame rate to the capture, set quarter resolution during heavy annotation, and play checked long sections in one go. The pointer stayed smooth and legible. They exported at the end with only one short test for a zoom heavy passage.
Wedding highlight with cinematic transitions
Soft transition blends, gentle slow motion, and sprawling colour work often stress a timeline. The fix stabilised preview enough to keep the edit immersive. The editor played through the vows sequence with colour adjustments and text overlays active, felt the timing against the score, and used short pre renders only for two transitions with complex feathering. The rest stayed live, and choices felt trustworthy throughout.
Export alignment and delivery confidence
The gap between preview and export is smaller than it used to be. It is still wise to treat export as a distinct path, but you will be pleasantly surprised at how often the preview accurately represents timing, especially for motion and interplay with audio.
Choosing export settings that mirror the preview
Set export frame rate to match the timeline. Choose a bitrate appropriate for your destination while keeping the codec efficient for motion. For complex motion graphics, consider a slightly higher bitrate to preserve subtle changes in gradients and glow. You can use the same section you reviewed in preview as a test export to verify both motion and compression behaviour.
Micro pass quality checks
Rather than exporting a full project to find issues, use micro passes focused on segments that combine complex motion and audio timing. The new steadiness lets you trust most of the timeline, so these short checks are enough to catch rare anomalies. If a section shows unexpected softness at full resolution, adjust export settings or slightly alter effect values to reduce strain on compression while keeping the look.
Delivering to platforms with transcoding quirks
Some destinations apply their own processing that can subtly affect motion and sharpness. Upload a private copy of a tricky segment to your platform of choice to confirm that timing feels right after their processing. The result will usually match your Filmora export closely thanks to the improved cadence in preview and export alignment. If a platform adds its own smoothing or sharpening, use that preview to tweak contrast, or minor blur, before publishing the final cut.
Diagnosing rare edge cases methodically
While 15.2.8 fixes the jitter for the vast majority of scenarios, you may see rare hiccups in particularly intense setups. A methodical approach helps isolate the source and return the timeline to smooth play.
Confirm basics, then isolate by halves
- Verify the version and hardware acceleration settings again. Small changes during an update can unset options.
- Update GPU drivers and reboot. The combination of a new build and a fresh driver stack often clears latent issues.
- If a section stutters, mute half the tracks and play. If the stutter disappears, re enable tracks in smaller groups until you find the cluster that triggers the issue.
This halves method reduces the time you spend guessing and points you quickly to a filter, a clip, or an overlay that needs adjustment.
Rebuild caches and recreate a short test project
Clear preview and render caches for the project. Then recreate a tiny version of the problem section in a new project file using the same assets. If playback is smooth in the fresh project, copy the working section back into the main timeline or rebuild the layer that caused the issue. This practice avoids chasing ghosts in an older project state and leverages the stability of the new build.
Transcode only the troublesome clips
If one clip consistently misbehaves, transcode it to a constant frame rate intermediate. The new playback engine handles mixed sources better than before, but a particularly irregular clip may still benefit from conforming. Replace just that clip and test again. You retain the speed of your project while removing the outlier that was stealing cadence.
Team workflows and shared projects
In collaborative environments, consistency is crucial. Filmora 15.2.8 makes shared timelines feel more predictable, which is a quiet but meaningful gain for teams working across varied machines.
Version alignment and shared settings
Make sure all contributors run the same version and share performance preference profiles. Using a common baseline for preview scale, acceleration settings, and cache behaviour keeps play results similar across stations. When the preview feels the same for everyone, decision making speeds up and revisions feel less subjective.
Stable templates and reusable patterns
Design template projects for common formats and motion patterns. When those templates play smoothly by default, editors spend more time on content and less on technical triage. The new build turns templates into truly reusable tools because their preview behaviour remains consistent as you replace media and add titles.
Shared storage and proxy strategy
If the team uses shared storage, ensure that high bitrate footage is accessible from fast volumes. Keep a proxy strategy for very heavy sources, but remember that you will rely on proxies far less. Focus proxies on only the clips that prove difficult in practice. This reduces storage sprawl while the improved engine carries most of the load in live preview.
Colour management, monitoring, and perceptual smoothness
Smooth motion is not just a technical phenomenon. It is also a perceptual experience shaped by colour contrast, brightness, and display characteristics. A few adjustments can make the already improved cadence feel even cleaner to the eye.
Grading with adaptive contrast
When you push contrast very high, micro movement in textures can appear sharper, which sometimes amplifies any small timing flaw. Use gentle contrast and controlled highlight roll off during early passes, then gradually increase to the final look as you confirm motion is steady. This approach supports the improved cadence by keeping perception aligned with reality.
Display calibration for motion
Calibrated monitors reduce unexpected flicker and banding that can distract from motion quality. If a secondary monitor is used for preview, check its refresh and colour profile against your main display. The more consistent your viewing conditions, the more accurately you will read the improved cadence in Filmora and carry those perceptions through export.
Known limits and sensible expectations
No system is perfect. The 15.2.8 build fixes jitter to a degree that changes day to day editing, but it cannot eliminate every form of motion complexity. Heavy noise, deep glow stacks, and rare codec oddities will still benefit from targeted pre renders or careful effect moderation. That said, the balance has shifted in favour of live editing. You will spend more time deciding and less time waiting.
Where pre renders still help
- Complex composites that combine multiple blurs, glow, and custom motion paths.
- Transitions that blend several clips with advanced feathering and colour overlays.
- Long sequences of slow motion with intricate speed ramps and pitch corrected audio.
These scenarios are no longer painful, but a short pre render or a test export remains a prudent way to confirm final finesse.
A quick checklist to keep previews smooth
- Update to Filmora 15.2.8 and confirm in About.
- Enable hardware acceleration for playback in Performance preferences.
- Update GPU drivers and reboot.
- Keep source media on fast local storage.
- Use half resolution for general editing and quarter when the timeline is very dense.
- Place heavy overlays on their own tracks and keep transform values tidy.
- Use markers to align motion and audio, especially for speed ramps.
- Transcode only the clips that remain irregular, prefer constant frame rate.
- Do short test exports for sections that combine complex motion and stylised effects.
Frequently asked questions
Do I still need proxies for high bitrate footage
Far less often. Filmora 15.2.8 makes live playback reliable in many cases that previously required proxies. Use proxies only for extraordinary clips that resist smooth preview even after you adjust scale and confirm acceleration.
Will the fix help projects created in older versions
Yes. Open your existing project in 15.2.8, enable acceleration, and test the same problem sections you remember. You will likely see motion steadiness return. If a section was built around earlier workarounds, simplify where possible to take advantage of the new cadence.
How does the fix affect audio lag or desync
Smoother video timing makes audio alignment more reliable. You will find that dialogue, music hits, and sound effects land where you expect during preview. Always review after major time remapping, but the default behaviour is now far more trustworthy.
What if my laptop still stutters on busy sections
Check the power plan, close background apps that use GPU resources, and lower preview resolution during intensive phases. The cadence improvement remains, but you may need to balance your settings against the hardware limits of a thin machine.
Does adaptive sync help or hinder
Adaptive refresh can make motion feel very smooth but may introduce a mismatch if the panel changes its rate during preview. Fix the refresh to a steady value that divides cleanly by your timeline frame rate to keep motion perception consistent while you edit.
Should I match timeline frame rate to every clip
Match the timeline to the intended delivery and the dominant footage. For screen captures with high frame rates, consider a timeline that respects the capture rate if the cursor motion is a central focus. For mixed projects, use a frame rate that suits the story and the destination, and conform outliers as needed.
Final guidance and confidence for the road ahead
The most important shift in Filmora 15.2.8 is not technical jargon. It is the way you feel when you press play. Motion flows. Audio sits where it should. Your hands and eyes find the story without stopping to fight the tool. That is the mark of a practical improvement, not a checkbox feature.
Lean into the new cadence. Build more ambitious sequences. Stack titles and transitions with creative intent rather than fear of preview potholes. Test only the sections that warrant it and keep your everyday editing live and responsive. You will deliver faster and with greater confidence because the gap between what you see and what you export is smaller and steadier.
If you have colleagues who gave up on live preview in the past, invite them back. Show them the difference on a dense timeline. Share the practical steps to enable acceleration, update drivers, and set preview quality wisely. The return of predictable motion is a quality of life upgrade that matters for everyone who cuts video day to day.
Update, play through your most demanding sequence, and feel the improvement. The smoothness in Filmora 15.2.8 is not a trick. It is a dependable foundation for creative work that lets you focus on the decisions that shape the story rather than the glitches that once blurred it.

If this article helped you in any way and you want to show your appreciation, I am more than happy to receive donations through PayPal. This will help me maintain and improve this website so I can help more people out there. Thank you for your help.
HELP OTHERS AND SHARE THIS ARTICLE
LEAVE A COMMENT
I am an entrepreneur based in Sydney Australia. I was born in Vietnam, grew up in Italy and currently residing in Australia. I started my first business venture Advertise Me from a random idea and have never looked back since. My passion is in the digital space, affiliate marketing, fitness and I launched several digital products. You will find these on the portfolio page.
I’ve decided to change from a Vegetarian to a Vegan diet and started a website called Veggie Meals.
I started this blog so I could leave a digital footprint of my random thoughts, ideas and life in general.
If any of the articles helped you in any way, please donate. Thank you for your help.
Affiliate Compensated: there are some articles with links to products or services that I may receive a commission.