The Magic Mouse 2 is a striking piece of hardware, best known for its incredible design and the unique features it brings to the table. However, it is primarily tailored for macOS users. As an enthusiastic tech user who frequently bounces between platforms, my exploration of the Magic Mouse 2 on Windows 11 turned out to be an adventure filled with moments of joy and frustration. I previously wrote an article on how to get the Magic Mouse 2 working on Windows 11: CAN YOU CONNECT THE APPLE MAGIC MOUSE 2 WITH WINDOWS 11? A lot of you appreciated the article and video however most kept asking how to get the scrolling working. So in this article, I decided to create a guide on how to get this working.
Understanding the Features of the Magic Mouse 2
First off, it’s essential to appreciate what makes the Magic Mouse 2 unique. Apart from its sleek, minimalist design, this mouse is equipped with touch-sensitive surfaces that enable gestures such as swiping and scrolling with just a flick of a finger. Here’s a quick rundown of its standout features:
- Touch-sensitive Surface: Unlike traditional mice, the Magic Mouse 2 allows you to use gestures like swiping between pages or scrolling through long documents seamlessly.
- Rechargeable Battery: With a built-in rechargeable battery, you can say goodbye to disposable batteries. A quick charge usually lasts for weeks.
- Bluetooth Connectivity: This allows for a wireless experience without the hassle of tangled cords.
- Compatibility with Gestures: While primarily intended for macOS, many of its gestures can be customised with third-party applications on Windows.
Why Use a Magic Mouse 2 with Windows 11?
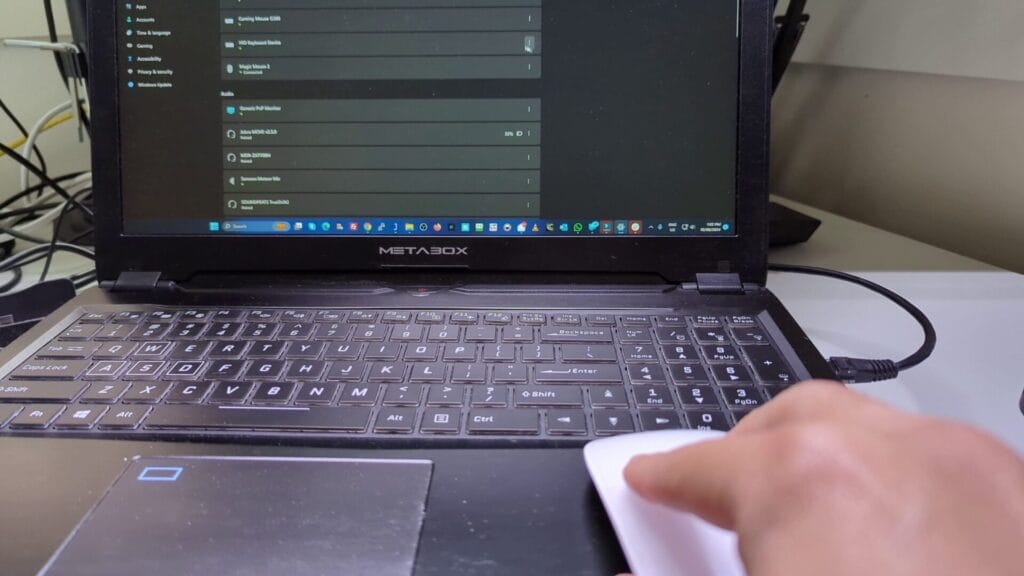
So, why would someone choose a Magic Mouse 2 for their Windows 11 device? The answer lies in its elegance and versatility. Although the Magic Mouse 2 is designed with Apple’s ecosystem in mind, it still provides a level of sophistication rarely matched by standard mice. When I first attempted to integrate it with my Windows 11 laptop, I was a bit sceptical. But my curiosity outweighed the doubts. The clunky feeling that can accompany some Windows interfaces was notably offset by the refined design of the Magic Mouse 2—it’s like pairing fine wine with a delicious home-cooked meal.
Troubleshooting Scrolling Issues
After spending countless hours exploring various forums and articles, I landed on what seemed to be the solution. I discovered that by downloading specific drivers, I could enable the scrolling feature and truly harness the power of the Magic Mouse 2 on Windows. So, if you find yourself facing similar issues, here’s a step-by-step guide based on my experiences:
- Visit the recommended website to download a zip file containing the necessary drivers.
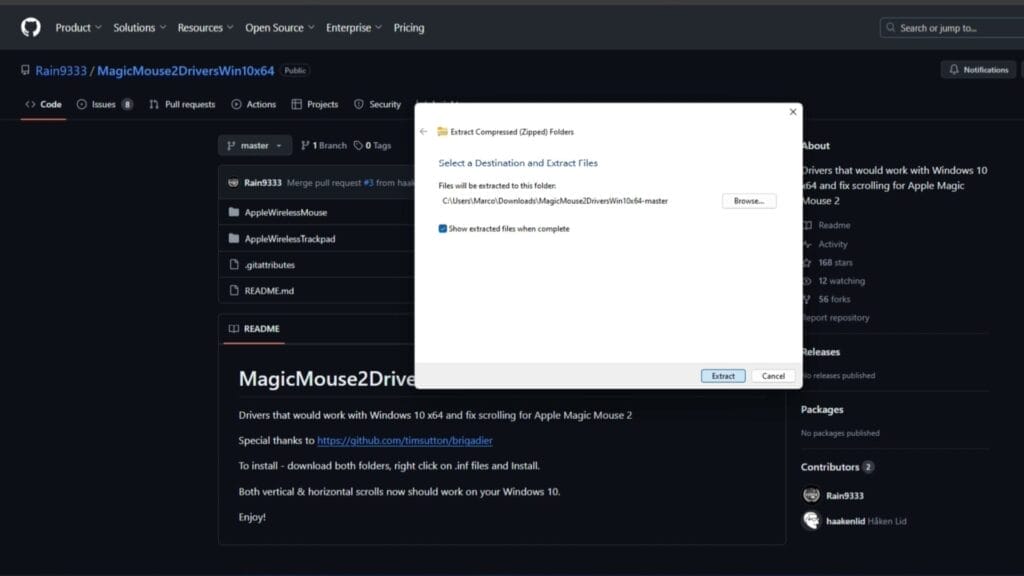
- Extract the files to their default location.
- Navigate to the extracted folder and locate the “Magic Mouse drivers” folder. Inside it, you will find two subfolders.
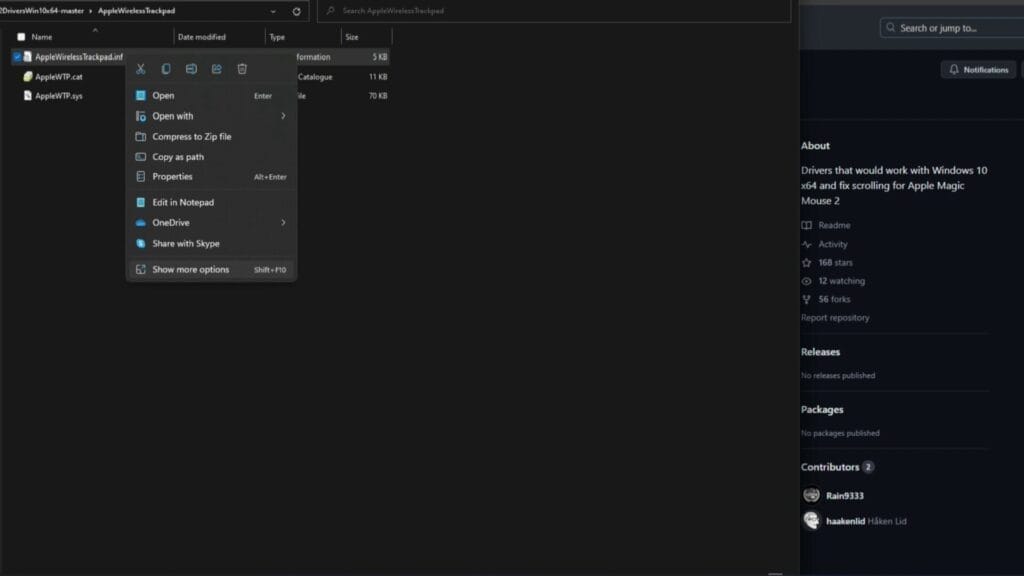
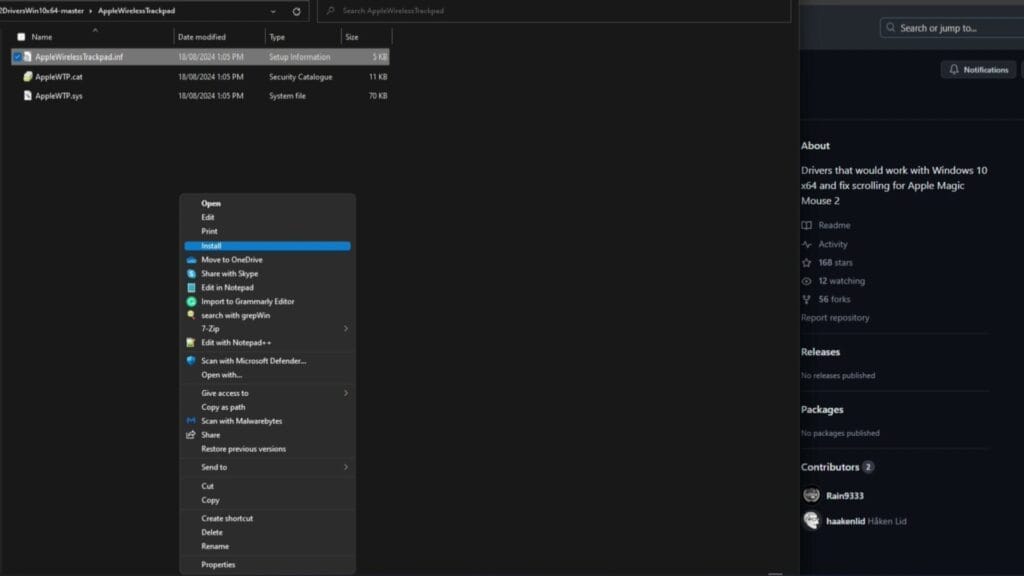
- Open the “Apple wireless trackpad” folder first. Inside, right-click on the INF file, select “show more options,” and then click “Install.”
- Repeat the same process for the second folder, “Apple wireless mouse.”
- After these installations are complete, do a quick restart of your computer for good measure.
Although I didn’t initially see any visual feedback during the installation, I was assured that the installation was taking place in the background. And believe me, once the drivers were in place, scrolling transformed from being non-existent to fluid and responsive. The moment I felt that smooth scroll beneath my fingertips was a triumphant one—I had finally overcome the technical barrier that stood between me and my Magic Mouse 2’s full potential.
Through this process, I encountered some minor frustrations as I tried alternative solutions before settling on this path. I often found myself experimenting with third-party applications to unlock additional features, and although I had mixed results, the journey itself was quite enlightening.
Alas, my experience with the Magic Mouse 2 has been a mixed bag, filled with anticipation and unexpected challenges. While the hurdles of connecting and enabling all of its features can be daunting at first, the payoff is definitely worth it for those who appreciate design and functionality. As I continue to use this elegant piece of technology on my Windows machine, I look forward to the continual learning it offers on this adventure across platforms.
Step-by-Step Guide to Enable Scrolling
Enabling scrolling on a Magic Mouse 2 while using Windows 11 can seem daunting, but let’s break it down into manageable steps. I’ll share my own experiences throughout the process, which hopefully will make it easier for you to follow along.
Download and Extract the Necessary Files
The first step is to obtain the necessary files that will allow your Magic Mouse 2 to function as intended.
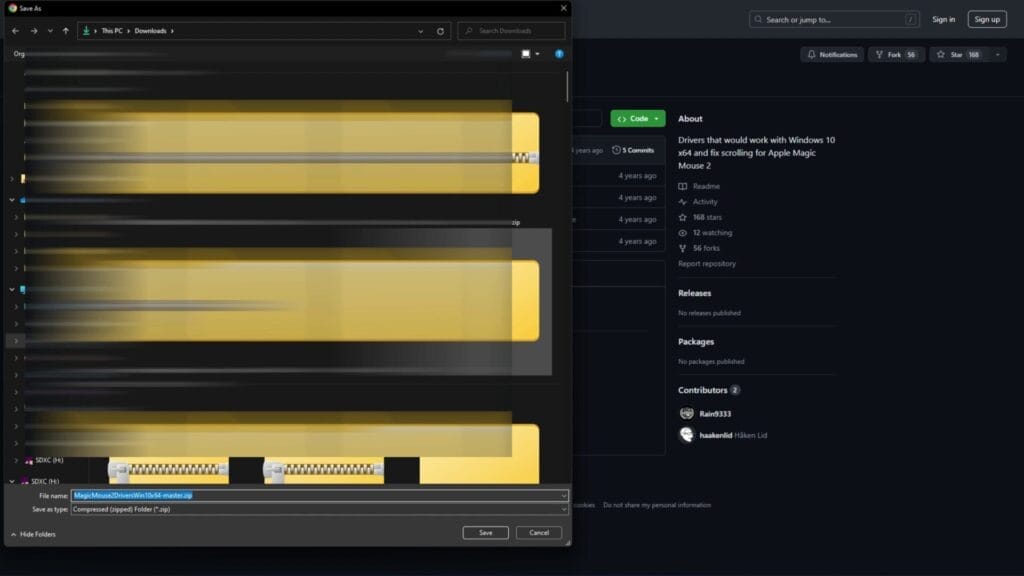
- Start by clicking the above link to download the zip file specific to the Magic Mouse 2. It will directly download the zip file from the website https://github.com/Rain9333/MagicMouse2DriversWin10x64
- Once you’ve downloaded the zip file extract the files from the zip folder. I initially overlooked this step, thinking I could skip it without consequence.
To extract the files:
- Right-click on the zip file and select ‘Extract All…’.
- Choose the default location or a folder where you prefer to keep these files organized.
- Once the extraction is complete, navigate to that folder. Inside, you’ll find named folders that hold the drivers you’ll need.
Install the Appropriate Drivers for Functionality
With the files extracted, we’re now ready to install the drivers, which is a fundamental step in getting the scrolling functionality activated. Within the extracted folder, you’ll see a folder called “Magic Mouse Drivers.” I found that the installation process itself is quite simple, yet the steps must be followed precisely.
- Access the first subfolder labelled “Apple wireless trackpad.” Inside this folder, you will find an INF file.
- Right click on the file and select Show More Options
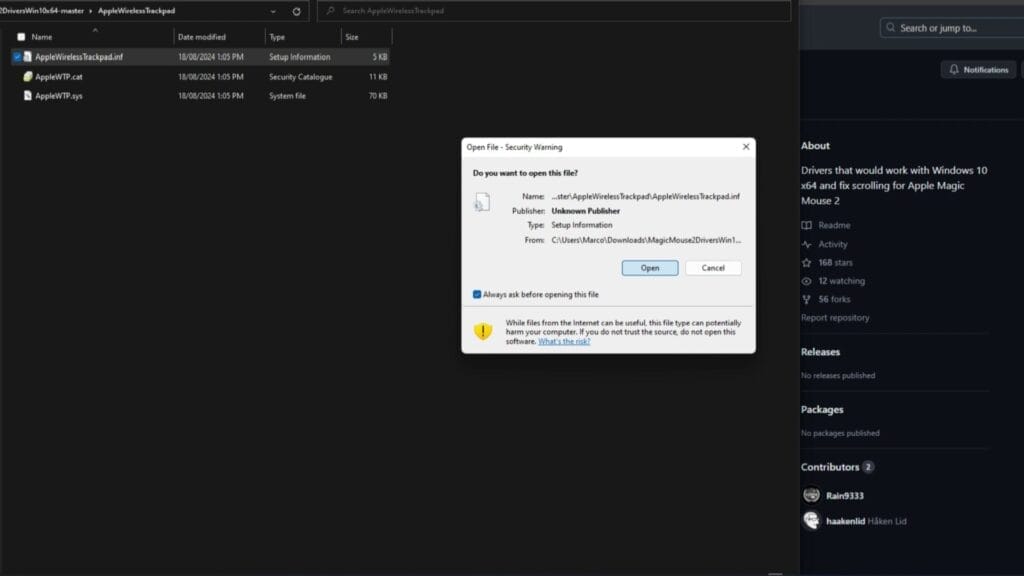
- I remember feeling a tinge of doubt at this point since there was no immediate feedback after the installation began. But I assure you—this is entirely normal, and the drivers are indeed being installed in the background.
To install the driver:
- Right-click on the INF file and choose “Show more options.”
- Select “Install.”
- After a brief moment, the installation should be completed silently.
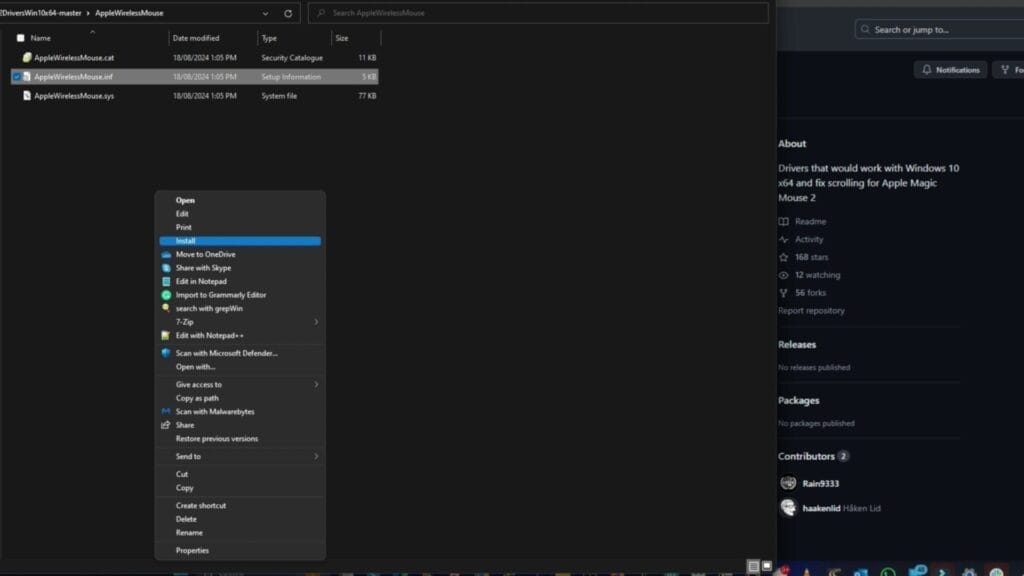
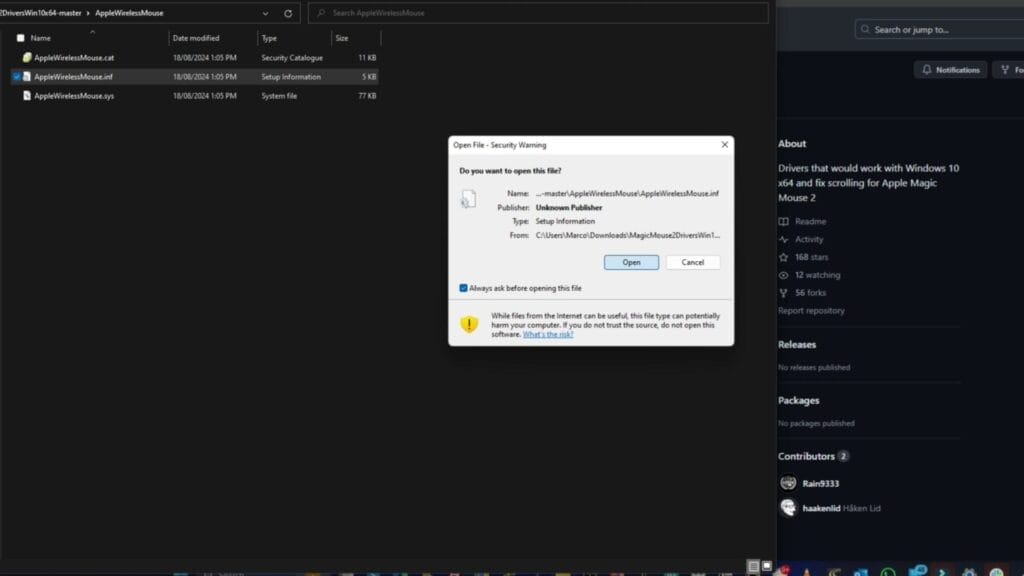
Next, navigate to the second folder labelled “Apple wireless mouse” and repeat the installation process for its INF file using the same steps. It’s vital to follow each step cautiously to ensure that the drivers are integrated correctly into your system.
Verifying Your Installation and Testing Scrolling
After completing the installation for both drivers, I found it essential to verify whether the scrolling function actually worked. I’ve faced moments in the past where everything appeared functional, only to discover scrolling was still a dud. So, don’t skip this testing phase!
- Start by opening a webpage or document on your computer.
- Try using the Magic Mouse to scroll through the content. You should feel the smooth scrolling action beneath your fingers as you glide across the mouse.
If you find that scrolling is not functioning after installation, don’t be discouraged; it may simply require a reboot of your computer. Sometimes, the changes need a little nudge to take effect. Rebooting often clears up any temporary glitches that could be preventing your mouse from responding as intended. Just make sure that the Magic Mouse 2 cursor moves when it is turned on and then test the scrolling.
Here’s a video showing you these steps on how to enable scrolling for the Apple Magic Mouse 2 on Windows 11:

If this article helped you in any way and you want to show your appreciation, I am more than happy to receive donations through PayPal. This will help me maintain and improve this website so I can help more people out there. Thank you for your help.
HELP OTHERS AND SHARE THIS ARTICLE
LEAVE A COMMENT
I am an entrepreneur based in Sydney Australia. I was born in Vietnam, grew up in Italy and currently residing in Australia. I started my first business venture Advertise Me from a random idea and have never looked back since. My passion is in the digital space, affiliate marketing, fitness and I launched several digital products. You will find these on the portfolio page.
I’ve decided to change from a Vegetarian to a Vegan diet and started a website called Veggie Meals.
I started this blog so I could leave a digital footprint of my random thoughts, ideas and life in general.
If any of the articles helped you in any way, please donate. Thank you for your help.
Affiliate Compensated: there are some articles with links to products or services that I may receive a commission.