There is a particular kind of frustration that strikes when a familiar bit of kit stops working and you decide to take a closer look. In this case a Kingston sixty gigabyte SSD had given up the ghost, and the first instinct was to open it up and see what was going on inside. That impulse is entirely understandable. Solid state drives feel approachable compared to mechanical hard drives. There are no moving parts, the casing looks neat and tidy, and for many of us curiosity wins. Yet as this little story shows, opening an SSD is not always straightforward and sometimes not even necessary. Let us walk through the experience, what went wrong, and how you can approach similar situations with a clear plan.
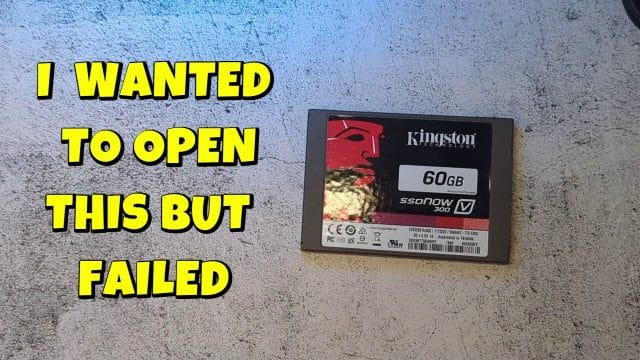
Seeing the Kingston label and the compact casing, the immediate thought was simple. The drive was no longer working, so why not open it and check the internals. Perhaps a loose connector, perhaps a cracked solder joint, or maybe something obvious sitting there waiting to be fixed with a gentle touch. In reality, the inside of a modern SSD is a highly integrated board with a controller chip, multiple NAND flash memory packages, and usually a small buffer or power management component. There are no user serviceable parts in the ordinary sense. You will not find a cable to reseat or a switch to toggle. Still, there are good reasons someone might want to open an SSD. Curiosity, learning, a teardown to see the chip set, or salvage of the casing for another project. Before you decide, it helps to know what you are looking at and what you hope to achieve.
Kingston produced a range of sixty gigabyte SATA SSDs over the years. Some are entry level models with basic controllers designed for everyday computing, others are mid range with better performance and endurance. Regardless of model, common failure causes include controller malfunction, firmware corruption, power issues, and on rare occasions physical damage to the PCB. When a drive fails and the system no longer detects it, opening the casing will not reveal much that can be repaired without professional equipment. Nevertheless, the process of attempting to open the drive is instructive in its own right, and it reveals how manufacturers secure their enclosures.
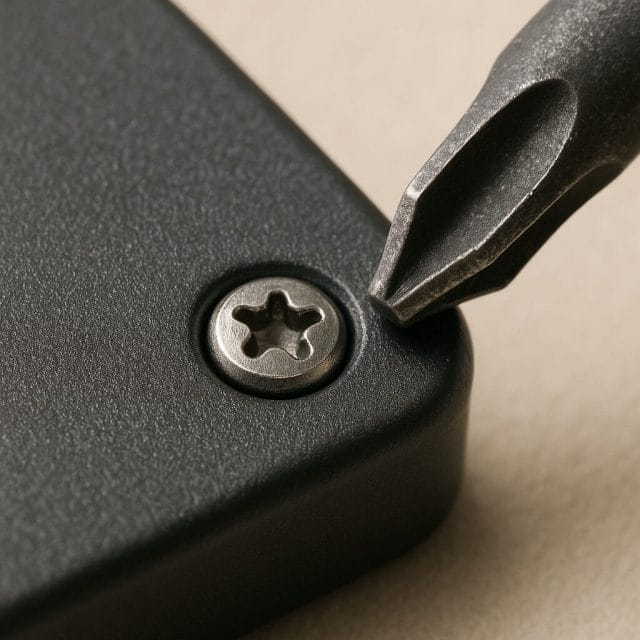
First glance at the back and the mystery of the screws
The next step in the story was practical. Flip the drive over, look for screws, and fetch a screwdriver. Many of us have a small set of precision drivers tucked away, and often they are enough for laptops, phones, and small electronics. With the SSD on the table and the back of the unit facing up, the search focused on the fasteners holding the casing together.
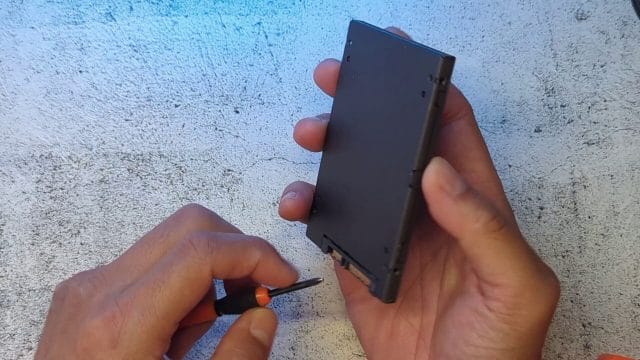
At this point the reality of modern electronics construction starts to bite. Some SSD enclosures use tiny Phillips screws that a PH00 or PH000 driver can handle. Others use Torx screws, often T5 or T6. A few employ so called security patterns such as a Torx variant with a centre pin, or even tri wing screws designed to discourage casual opening. Certain models skip screws altogether and rely on tabs folded into place, adhesive strips, or a top shell that slides into grooves. Once you find a screw head, the pattern matters. A Phillips head has a simple cross. A Torx head looks star shaped. A security Torx has that star with a pin in the middle so a standard Torx driver will not seat. A tri wing looks like three blades rotated around a centre point. Without the exact driver tip, you risk stripping the head and making things worse.
In this case, the screwdriver that was at hand did not match. The tip would not sit properly in the head, and that slight wobble tells you all you need to know. If you push on, you will likely round the head and lock yourself out anyway. There are also hidden screws to consider. Manufacturers sometimes tuck fasteners under labels, warranty stickers, or rubber pads. Before you try to force anything, examine every face of the casing, run a fingernail along seams, and look for evidence of adhesive or clips. A good magnified view helps, and that is where the next part of the attempt came in.
Zoom in and still stuck
A closer look can be revelatory. Zoom in, adjust the light, angle the drive so the screw head is clear, and try to make out the exact pattern. Even with patience, that does not magically conjure the right tool. If your kit lacks the appropriate driver, you are simply not going to get that screw out cleanly.
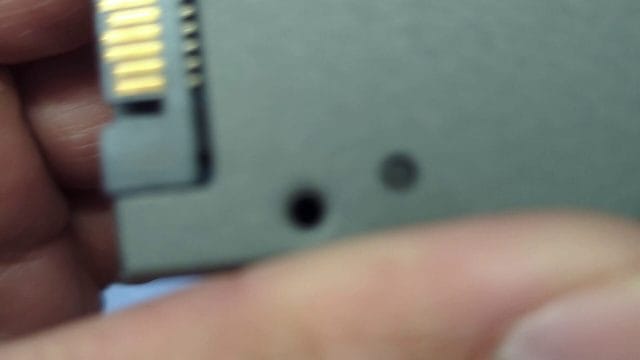
When you realise you do not have the right tool, the temptation is to improvise. A flat blade pressed diagonally into a cross head, a small hex pressed into a star pattern, or a dab of rubber to add friction. All of these are poor choices. They can damage the screw and the casing, and they can slip and injure your fingers. The safer approach is to pause, identify the screw type, and obtain the correct driver. A precision kit that includes PH000, PH00, PH0, Torx from T4 through T8, and security Torx bits is an excellent investment for anyone who tinkers with electronics. The kit often comes with a magnetic handle, a flexible extension, and a spudger for gentle prying. With the right tool, screws are simple. Without it, they are a roadblock.
In the moment, the conclusion was brute and honest. No suitable screwdriver, no entry, and the project was declared a failure. The drive was destined for the bin. Before you go that far, it is worth stepping back and thinking through non destructive checks and next steps that might save you time and protect your data.
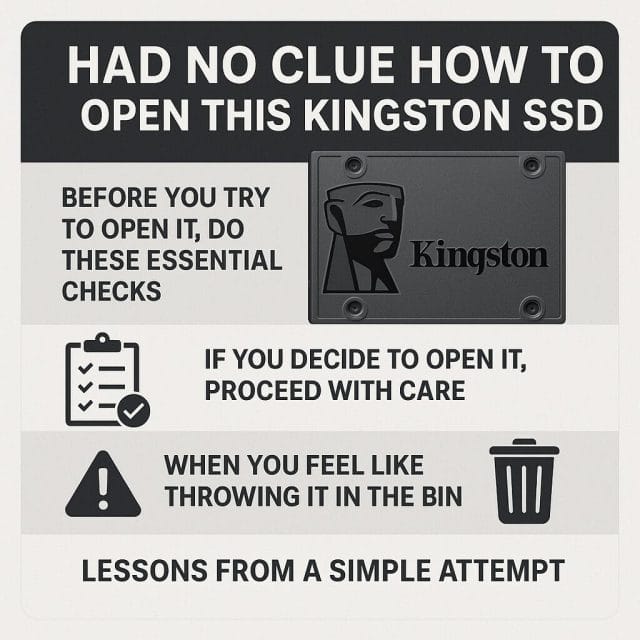
Before you try to open it, do these essential checks
Opening an SSD is rarely necessary for diagnosis. You can perform a series of simple checks that may restore functionality or at least confirm the nature of the fault. These steps are safe and require minimal equipment.
Confirm power and connectivity
- Use a known good SATA data cable and a known good power connector. Swap cables and ports to rule out a bad lead or header.
- Test in another machine if possible. Some issues are related to a specific motherboard or BIOS setting rather than the drive.
- Enter the BIOS or UEFI on boot and check whether the drive is detected. If it is missing, try different SATA ports, and ensure AHCI mode is enabled, as some systems behave differently in legacy modes.
If the drive appears intermittently, note that behaviour. It may indicate a power delivery issue or a firmware glitch rather than a permanent hardware failure.
Check software level indicators
- Use a SMART monitoring tool that supports SSDs. On Windows, CrystalDiskInfo is now common. On Linux, smartmontools can read SMART through smartctl. These tools can sometimes read basic information even when the drive is unstable.
- Update the firmware using the official Kingston utility, if the drive is still recognised. Firmware bugs can cause lock ups or detection issues, and updates can resolve them.
It is important to remember that SSDs manage wear with internal processes like TRIM and wear levelling. When the controller fails hard, software tools cannot communicate with the drive, and recovery becomes specialist work.
Try an external USB adapter
Connect the SSD via a USB to SATA adapter. This isolates power and data paths, and it can bypass quirky behaviour on a motherboard controller. If the drive mounts under USB but not internally, you have a hint about the system rather than the storage. If it is absent under both, the drive may be dead.
Data recovery reality check
For spinning hard drives, data recovery can sometimes be attempted at home with cloning tools and careful handling. For SSDs, the situation is different. Data is spread across multiple memory chips with complex mapping that the controller coordinates. If the controller fails, those maps are inaccessible. Professional data recovery specialists use chip off methods, reading raw NAND dumps and reconstructing data with proprietary tools. This is not a do it yourself task. If the data is crucial, do not power cycle the drive repeatedly. Every attempt can make matters worse if the controller is unstable. Seek professional help early.
If you decide to open it, proceed with care
There are legitimate reasons to open a failed SSD even if repair is not feasible. You might want to learn, document a teardown, or salvage parts like the metal casing for an art project. If you go ahead, do it properly.
Gather the right tools and prepare the workspace
- A precision screwdriver kit with Phillips PH000 to PH0 and Torx T4 to T8, plus security Torx bits.
- A plastic spudger and a thin guitar pick for prying without scratching metal surfaces.
- An anti static wrist strap and a grounded work area to avoid electrostatic discharge.
- A bright directed light and magnification such as a head loupe or a USB microscope.
- A small tray or magnetic mat to keep tiny screws organised.
Unplug the computer and discharge any residual power. If the SSD was in a laptop, remove the battery or disconnect it where possible. Work patiently and resist force. If a seam does not budge, there is likely a hidden clip or adhesive.
Inspect and identify the fasteners
Examine every side of the enclosure. Look for screws near the ports, under labels, or inside recessed holes. If you suspect adhesive, gently warm the casing with a hair dryer to soften glue. Do not overheat the drive, and keep the airflow gentle. Once you have identified the screw pattern, use the exact bit and apply steady pressure while turning. The right driver makes the process safe and controlled.
Opening techniques for tabbed or glued shells
If the casing has tabs, insert a thin plastic pick into the seam and slide it along. You should feel the clips release one by one. Avoid metal blades which can gouge the shell and short components if they slip. For glued covers, work the spudger around the perimeter and lift gradually. Do not pry near the connector area where internal boards may sit close to the edge.
What you will find inside
Inside a Kingston SSD, you will almost always see a single board. The controller is a square or rectangular chip with its model number visible. The NAND packages sit as black rectangles in rows. There may be an array of tiny capacitors and a power management chip. Some drives include small power loss protection capacitors, but budget models tend not to. There is no spinning media, no actuator, and nothing to lubricate or adjust. For educational purposes, take photographs and note the part numbers. You can look up controller families to learn about performance characteristics and firmware histories.
Reseating and cleaning is rarely a fix
Unlike a desktop graphics card, there are no user replaceable connectors inside an SSD. Dust rarely plays a role. The only cleaning you should consider is an external wipe of the casing before reassembly. If the drive stopped working, internal reseating will not bring it back.
When you feel like throwing it in the bin
The final sentiment in the story was simple. No tool, no progress, bin it. While we have all felt that, take a moment to consider two important factors. Data security and environmental responsibility.
Keep your data safe even on a dead drive
If the SSD contained sensitive information, do not dispose of it casually. Many consumer SSDs do not have hardware encryption enabled by default, and even when they do, leaving a failed drive intact is not good practice. To protect your data, you can physically destroy the NAND packages. This is a one way action.
- Wear eye protection and use a rotary tool to cut through the chips. The goal is to break the silicon dies inside the packages.
- Alternatively, remove the board and use a centre punch to shatter each chip. Multiple strikes per package ensure destruction.
- Drilling through the chips can also work, but ensure the drill bit passes through the package rather than just the PCB.
Do not rely on degaussing. Magnets do nothing to flash memory. Do not attempt to bake or freeze the drive. Myths abound, and none are helpful.
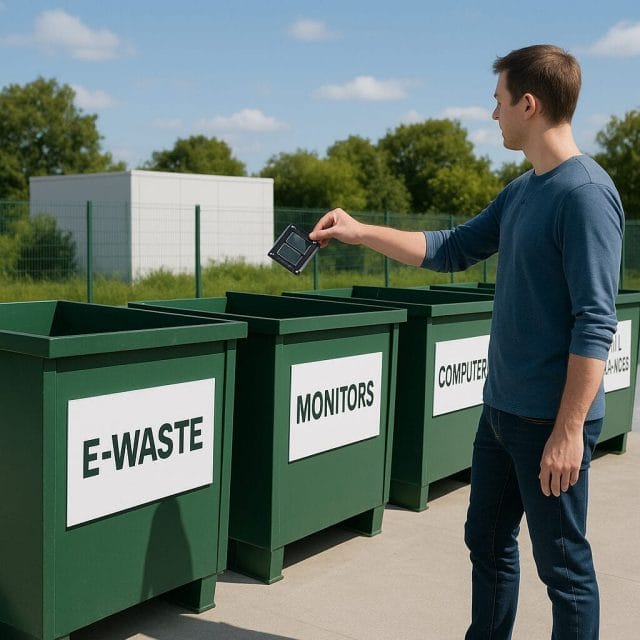
Recycle responsibly
Electronics should not go into general waste. SSDs contain metals and components that should be processed properly. Most local councils and many electronics retailers offer e waste recycling. Take the drive to a proper recycling point, and if you have destroyed the chips for data security, inform the staff that the item has been physically disabled. Responsible disposal keeps hazardous materials out of landfill and supports the recovery of useful metals.
Lessons from a simple attempt
The story began with a straightforward plan. Open the Kingston SSD and see what is inside. It ended with a blocked screw head and a feeling of defeat. What can we learn from this
- Preparation matters. A modest investment in a comprehensive precision driver kit saves time and damage.
- Visual inspection is useful, but without the right tool it changes nothing. Identify the fastener first, act second.
- Value your time. Non destructive checks often tell you more than opening an SSD ever will.
- Respect the limits of home repair on solid state storage. If data is critical, professional recovery is the only realistic route.
- Dispose of failed electronics responsibly and protect your data before you do.
By transforming a moment of frustration into a structured process, you will handle future failures with confidence. Not every broken piece of tech is an invitation to pry it open. Sometimes the best tool is patience and a plan.
If you find yourself staring at an uncooperative screw again, remember this experience. There is no shame in pausing, getting the right driver, or deciding to walk away and address the problem from another angle. The right approach saves your equipment, your fingers, and sometimes even your data.

If this article helped you in any way and you want to show your appreciation, I am more than happy to receive donations through PayPal. This will help me maintain and improve this website so I can help more people out there. Thank you for your help.
HELP OTHERS AND SHARE THIS ARTICLE
LEAVE A COMMENT
I am an entrepreneur based in Sydney Australia. I was born in Vietnam, grew up in Italy and currently residing in Australia. I started my first business venture Advertise Me from a random idea and have never looked back since. My passion is in the digital space, affiliate marketing, fitness and I launched several digital products. You will find these on the portfolio page.
I’ve decided to change from a Vegetarian to a Vegan diet and started a website called Veggie Meals.
I started this blog so I could leave a digital footprint of my random thoughts, ideas and life in general.
If any of the articles helped you in any way, please donate. Thank you for your help.
Affiliate Compensated: there are some articles with links to products or services that I may receive a commission.