If you’re using Supabase Auth to handle sign ups, password resets, or magic links, you’ll know it sends a handful of transactional emails on your behalf. Out of the box, those emails are delivered from Supabase’s default SMTP infrastructure and carry very generic “from” details. That’s functional, but it’s not ideal for brand consistency or deliverability. In this guide, I’ll walk you through configuring your own custom SMTP settings in Supabase so your users receive emails from your domain with your branding — and I’ll share best practices and troubleshooting tips along the way.
Note: You’ll see “Supabase” referred to here; it’s sometimes misspelt as “Superbase” in conversation. We’re talking about the open-source backend platform: Supabase.
Why configure custom SMTP?
Before we dive into the steps, it’s worth understanding why this matters.
- Brand trust and consistency: When emails come “from” your domain (e.g., no-reply@yourdomain.com) with your display name and logo, users are more likely to recognise and trust them.
- Deliverability: Dedicated email providers (like Postmark, SendGrid, Mailgun, or Amazon SES) let you authenticate your domain with SPF, DKIM and DMARC. That helps inbox providers validate your messages, keeping them out of spam folders.
- Control and observability: With your own SMTP, you control the sender reputation, can monitor bounces and complaints, and work with your provider’s analytics.
By default, the emails Supabase sends are intentionally generic. That’s fine for experimenting, but once you’re in front of real users, you’ll want your identity front and centre.
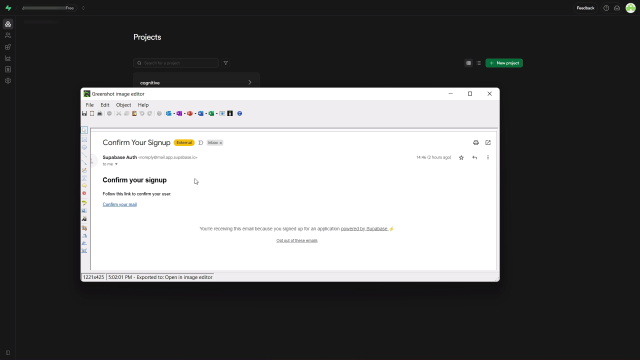
The screenshot above shows a typical generic email: it gets the job done, but it’s missing your brand’s tone and trust signals. Let’s fix that.
What you’ll need before you start
To configure custom SMTP in Supabase, you should have:
- An account with a transactional email provider (e.g., Postmark, SendGrid, Mailgun, Amazon SES). Avoid personal inbox providers like Gmail for production — they’re not designed for app-generated emails and often throttle or block SMTP access.
- A verified domain configured with your provider. This usually involves adding DNS records:
- SPF: A TXT record authorising your provider to send on behalf of your domain (e.g.,
v=spf1 include:sendgrid.net ~all). - DKIM: One or more CNAME records provided by your email provider for cryptographic signing.
- DMARC: A TXT record to set a policy for handling spoofed mail (e.g.,
v=DMARC1; p=quarantine; rua=mailto:dmarc@yourdomain.com).
- SPF: A TXT record authorising your provider to send on behalf of your domain (e.g.,
- SMTP credentials (host, port, username, and password or API key). Some providers call the password an “SMTP token” or “server API key”.
Tip: Always generate an app-specific password or SMTP token rather than using your main account password, and store it securely.
Step-by-step: Enabling custom SMTP in Supabase
Once you’re logged into the Supabase dashboard and have selected your project, follow these steps.
1) Open Project Settings and go to Authentication
From your project dashboard:
- Click Project Settings in the left-hand navigation.
- Select Authentication.
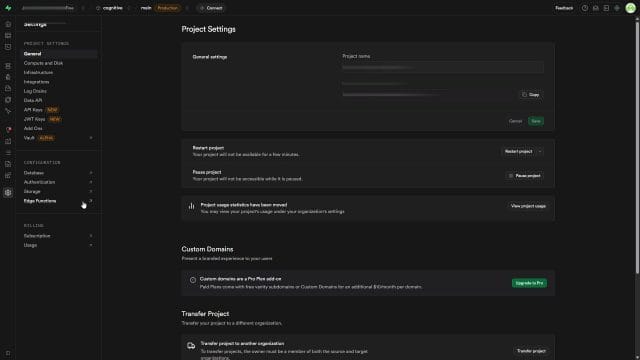
Within Authentication, you’ll find everything related to user sign-up, sign-in and email flows.
2) Navigate to the Emails section and open SMTP settings
Inside the Authentication area, locate the Emails tab or section. There you’ll find a subsection for SMTP settings. Supabase lets you enable custom SMTP and enter your provider’s details.
The ability to use custom SMTP has been available on free plans, though pricing and plan features can change over time. If you don’t see the option, check Supabase’s current plan documentation.
3) Fill in your SMTP credentials
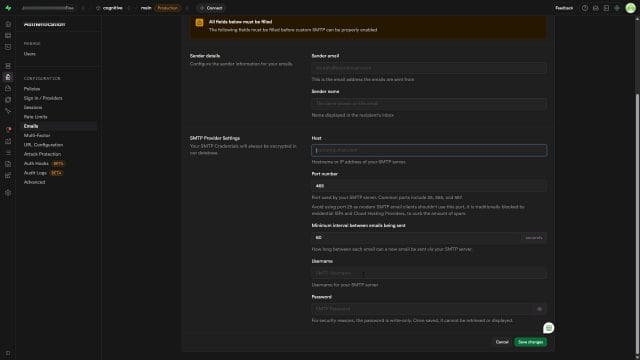
The form typically asks for:
- Sender email: The email address your users will see as the “from” address (e.g., no-reply@yourdomain.com). This should use the domain you’ve verified with your provider.
- Sender name: The friendly name that appears in mail clients (e.g., Your App Name).
- Host: The SMTP server hostname provided by your email provider (e.g., smtp.sendgrid.net, smtp.mailgun.org, email-smtp.eu-west-1.amazonaws.com).
- Port: Common ports are 587 (STARTTLS), 465 (implicit TLS/SSL), and occasionally 25 (not recommended for production). Most providers recommend port 587.
- Username: Often the full SMTP username provided (sometimes your account email, sometimes a specific SMTP user string).
- Password: Your SMTP password or token. Keep this secret; treat it as you would any production credential.
Security tip: If your provider supports it, prefer STARTTLS on port 587 or TLS on port 465 for encrypted transport. Plaintext port 25 is unreliable and insecure.
After entering the details, click Save. From now on, Supabase will send Auth emails through your provider, using the sender identity you specified.
What changes once custom SMTP is enabled?
Three immediate improvements:
- From identity: Recipients will see your domain and sender name instead of a generic Supabase address.
- Deliverability: With SPF and DKIM aligned to your domain, inbox providers can better trust your messages.
- Brand flexibility: You can now safely customise email templates without worrying that generic sending will undermine trust.
Remember: SMTP settings alone don’t change the content or layout of the email. If you want to change the copy, add your logo, or tweak link text, use Supabase’s email template editor (under Authentication → Templates). There you can customise subjects and bodies for confirmation, magic link and password reset flows.
Choosing the right SMTP provider
Not all SMTP providers behave the same. Consider:
- Deliverability reputation: Providers like Postmark and Amazon SES are known for strong deliverability and transparent reporting.
- Ease of setup: SendGrid and Mailgun offer straightforward wizards for DNS and domain verification.
- Regional endpoints and data residency: For compliance or latency, choose providers with EU/UK endpoints if needed.
- Pricing and quotas: Ensure your chosen plan covers your anticipated volume and growth.
- Event webhooks: If you want to track bounces, complaints, or opens, pick a provider with robust webhooks and a clear dashboard.
Avoid using personal inbox SMTP (e.g., Gmail/Outlook consumer accounts). These often have sending caps, may block automated mail, and lack the deliverability tooling you need.
Testing your configuration
After saving your SMTP settings, you’ll want to verify that everything works end to end. Here are safe ways to test:
- Create a fresh test user in your app and sign them up. You should receive the confirmation email from your custom sender.
- Trigger a password reset flow from your app’s sign-in page to confirm that template and links are working.
- Use your provider’s logs to confirm messages are accepted, delivered, or deferred. If messages aren’t showing up in your provider, re-check the SMTP host, port, username, and password in Supabase.
If you’re not receiving emails:
- Check spam/junk folders and promotions tabs.
- Confirm the “from” email matches a verified domain with your provider.
- Ensure SPF and DKIM records are published and propagated (DNS changes can take up to 24 hours).
- Review your provider’s sending limits — some require manual approval before production sending.
Troubleshooting common issues
Authentication failures (invalid credentials)
Double-check the username and password/token. With some providers (e.g., Amazon SES), your SMTP “username” is not your email but an SMTP-specific string. If in doubt, regenerate credentials in your provider’s console and paste them again into Supabase.
Port and encryption mismatches
Try the recommended configuration from your provider:
- Port 587 with STARTTLS is the most universally supported.
- Port 465 with implicit TLS is also common.
Make sure firewall rules on your network or host aren’t blocking outbound SMTP ports.
SPF/DKIM/DMARC misalignment
If Gmail or Outlook marks your mail as suspicious, your DNS may be incomplete. Ensure:
- SPF TXT contains an include for your provider (e.g.,
include:mailgun.org). - DKIM CNAME records are added exactly as provided, with the correct hostnames and values.
- DMARC policy is set appropriately (
p=noneis fine while testing; move toquarantineorrejectonce validated).
Use your provider’s DNS checker to validate.
Bounces due to “From” address
Don’t use free-mail addresses (e.g., @gmail.com) as your sender domain. Many providers enforce DMARC policies that prevent third-party servers from sending with those domains. Always use your own domain that you’ve verified with your SMTP provider.
Rate limits and warm-up
New sending domains and IPs sometimes face throttling. If you plan to send at scale, warm up gradually and monitor bounce/complaint rates. Your provider may offer automated warm-up features.
Branding your emails beyond SMTP
Switching SMTP gives you control over the envelope; customising templates polishes the content. In Supabase:
- Go to Authentication → Templates to edit the copy and layout for:
- Email confirmation (sign-up verification)
- Password reset
- Magic link / OTP sign-in
- Insert your logo, adjust tone and include a clear, human-friendly call-to-action.
- Set descriptive subjects (“Confirm your email for ExampleApp”) to improve open rates.
- Provide context and support links so users know why they received the email.
Accessibility tips:
- Use meaningful link text (“Confirm your email”) rather than raw URLs.
- Maintain readable contrast and font sizes.
- Include a plain-text alternative if you’re sending HTML; many providers handle this automatically if you supply both versions.
Security best practices
- Generate an SMTP token specifically for your Supabase project and rotate it periodically.
- Enable two-factor authentication on your email provider account.
- Restrict access: If your provider supports IP allowlisting or scoped credentials, use them.
- Monitor for anomalies: Sudden spikes in volume or bounce rates might indicate abuse or issues in your app’s flows.
A quick recap of the process
Here’s the flow we followed:
- Choose and set up a dedicated SMTP provider; verify your domain and add SPF/DKIM/DMARC records.
- In Supabase, open Project Settings → Authentication → Emails → SMTP settings.
- Enter sender email and name, SMTP host, port, username and password/token, then Save.
- Test by signing up a user and triggering a password reset; check your provider’s logs for delivery status.
- Customise templates for branding and clarity, and keep monitoring deliverability.
Once configured, all Auth-related emails sent by Supabase will come from your chosen sender, carrying your brand identity and benefiting from your provider’s deliverability infrastructure.
Final thoughts
Email is a critical touchpoint in your user journey. A well-configured SMTP setup in Supabase does more than change a “from” address — it strengthens trust, improves deliverability and helps you present a consistent brand experience. With a reputable provider, properly authenticated domain, and thoughtful templates, you’ll reduce friction in sign-ups and sign-ins, and keep your users on track.
If you’re just starting out, don’t overcomplicate it: pick a reliable provider, follow their DNS wizard, paste the credentials into Supabase, and test. As your volume grows, you can refine your DMARC policy, add bounce processing, and iterate on content. Small improvements compound quickly when they’re attached to core flows like onboarding and account recovery.
Happy sending — and here’s to cleaner inboxes and clearer user journeys.

If this article helped you in any way and you want to show your appreciation, I am more than happy to receive donations through PayPal. This will help me maintain and improve this website so I can help more people out there. Thank you for your help.
HELP OTHERS AND SHARE THIS ARTICLE
LEAVE A COMMENT
I am an entrepreneur based in Sydney Australia. I was born in Vietnam, grew up in Italy and currently residing in Australia. I started my first business venture Advertise Me from a random idea and have never looked back since. My passion is in the digital space, affiliate marketing, fitness and I launched several digital products. You will find these on the portfolio page.
I’ve decided to change from a Vegetarian to a Vegan diet and started a website called Veggie Meals.
I started this blog so I could leave a digital footprint of my random thoughts, ideas and life in general.
If any of the articles helped you in any way, please donate. Thank you for your help.
Affiliate Compensated: there are some articles with links to products or services that I may receive a commission.