Few things derail a productive day faster than rifling through a tangled mess of leads, dongles and adapters to find the one connector you actually need. Whether you’re a travelling professional, a student hopping between lecture halls, or simply someone who likes their tech kit tidy, a cable organiser case promises sanity in the chaos. In this review, I’ll walk through a hands-on unboxing and real-world testing of a compact pouch designed to store different types of cables neatly and securely. I’ll expand on how it’s laid out, what to put where, and some best-practice tips for keeping your core kit streamlined without sacrificing readiness.
[1pc Multi-Pocket Travel Organizer] 1pc Lycra Travel Cable Organizer Case – Multi-Pocket Electronic Accessories Box for Cables, Chargers, Memory Cards – Portable Tech Gear Pouch for Office and Travel Essentials
👉 item link: https://marcotran.com.au/ex/caseorganiser
🎉 Coupon price[AU$3.73]
As in the video, I’ll also call out the useful screenshots that show key moments, and explore the logic behind which cables made the cut, which didn’t, and why. If you’d like to pick up the same organiser, the original video includes a link in the description and a reminder at the end to check it out.
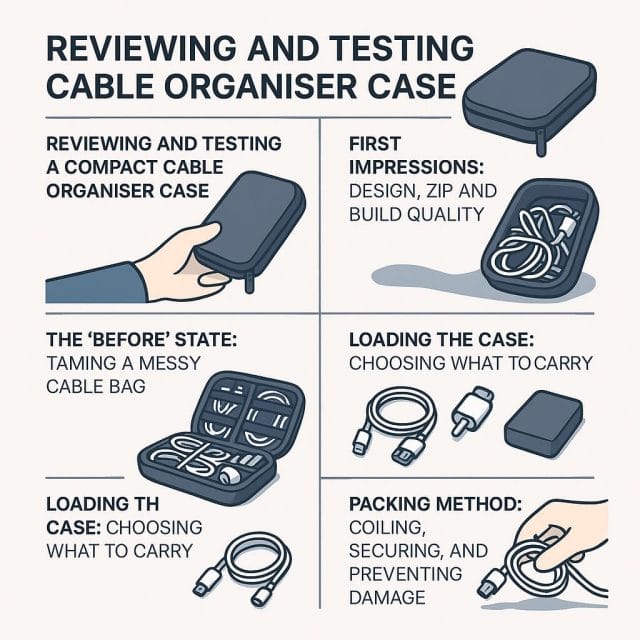
First Impressions: Design, Zip and Build Quality
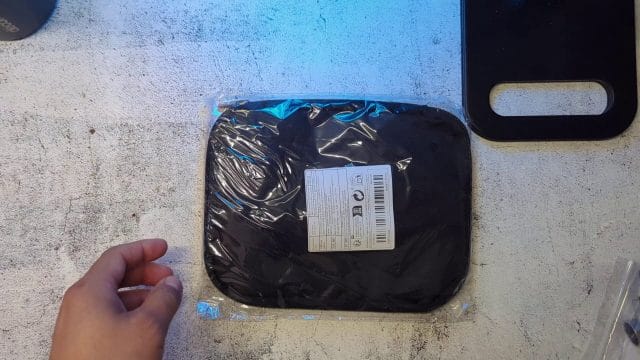
On unboxing, the first thing you notice is the case’s simplicity. It’s clearly designed with practical compartmentalisation in mind rather than as a fashion statement. The fabric feels robust enough for daily use, with a slight texture that suggests it can handle being tossed into backpacks and briefcases. There’s a zip closure running around the edge, and a modest cover flap that helps keep contents from pressing directly against the zip. That small detail matters: it reduces the chances of cables catching or fraying when you open and close the pouch.
A minor hiccup on first inspection was the zip itself: it looked slightly open or misaligned. This is a fairly common quirk with non-branded zippers, where the slider can momentarily fail to rejoin the coils. Fortunately, a gentle close and pass along the track snapped everything back into place instantly. Practical tip: if this happens to you, don’t force the zip; guide the slider back to the start of the track and ease it along. If you want to up-spec, zips from reputable manufacturers (YKK, for instance) are often smoother and more durable, but for a lightweight organiser the supplied zip seemed decent.
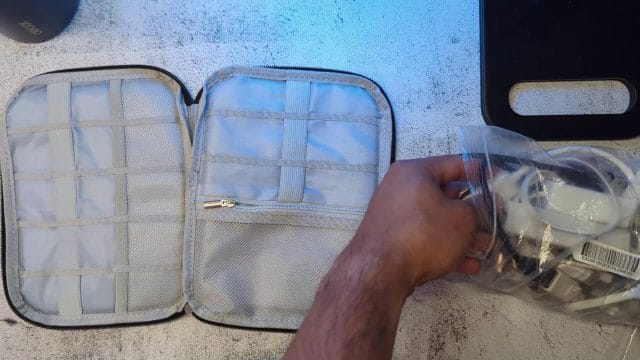
The “Before” State: Taming a Messy Cable Bag
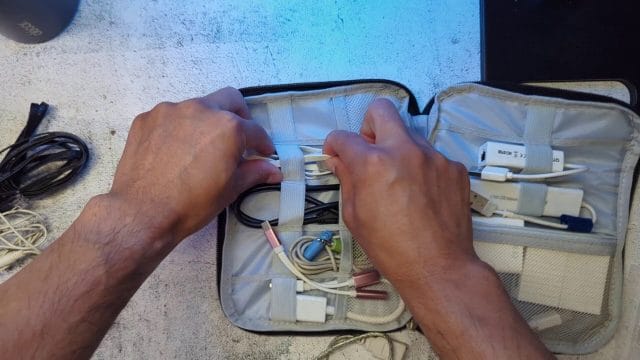
Before loading the organiser, the video shows the status quo: a very simple, very messy bag containing an assortment of unbundled leads and adapters. This is the default for many of us—everything tossed together, no subdivisions or ties, and a lot of unnecessary duplication. It’s not just visually chaotic; it costs time and introduces risk (bent pins, kinks, strained sheathing). The organiser’s first job, then, is to bring order to that chaos with compartments that make logical groupings obvious.
Among the first items pulled from the old bag was a network extension adapter (an RJ45 inline coupler). Its purpose is to join two Ethernet cables end-to-end to extend overall length, handy when your cable falls just short of the wall port or when you’re bridging across a room temporarily. These couplers are small, cheap and travel-friendly, but it’s worth noting a few details:
- Performance depends on the rating (Cat5e, Cat6, Cat6a). Match the coupler to your cables for best results.
- Use quality cables without damaged boots or corroded connectors to avoid link instability.
- For permanent runs, a single longer cable is preferable, but for ad hoc setups a coupler is perfectly acceptable.
Working Through the Adapters: Video, USB, and Ethernet
Next up: a VGA to display cable, alongside other video-related adapters. VGA is an older analogue standard; many modern displays and laptops have moved on to HDMI and DisplayPort, and Apple machines to USB-C/Thunderbolt. A VGA-to-something adapter is still useful if you’re presenting at venues with legacy projectors. Clarify what “display” means for your setup: you might need VGA-to-HDMI, VGA-to-DVI, or VGA-to-DisplayPort, and the direction matters (some adapters only convert one way).
There was also a USB network adapter (a USB-to-Ethernet dongle). These are invaluable for slender ultrabooks that skip the RJ45 port. When picking one, consider:
- Driver support across your OS (Windows, macOS, Linux).
- Throughput: for Gigabit, ensure the adapter specifies 1000 Mbps and supports full-duplex.
- Form factor: low-profile designs fit better in organiser cases and don’t snag on fabric.
An HDMI to display cable also featured. HDMI remains the most ubiquitous digital standard for monitors, TVs and projectors, so carrying a short, good-quality cable plus an adapter (HDMI-to-DisplayPort or USB-C-to-HDMI) covers most scenarios. If you’re regularly driving a high-resolution setup, check for HDMI 2.0 or 2.1 compatibility and keep cable length conservative—shorter runs reduce signal degradation.
Audio and General-Purpose Leads
A straightforward 3.5 mm audio cable (male TRS on both ends) went into the organiser. Even though many devices now rely on Bluetooth, an analogue cable is still gold for plugging into mixing desks, powered speakers, older cars, or for testing audio paths. Note the difference between TRS (stereo) and TRRS (stereo + mic): if you need mic support (for headsets), make sure the cable matches your device’s pinout.
The transcript mentions a “Mal” USB to USB—likely a male-to-male USB cable. A cautionary note: male-to-male USB cables can be risky if used to connect two powered USB ports directly, potentially causing damage. Their safe use cases are specific (for certain devices or enclosures that require them). If you don’t have a clear, documented use for a male-to-male cable, consider leaving it out of your everyday kit.

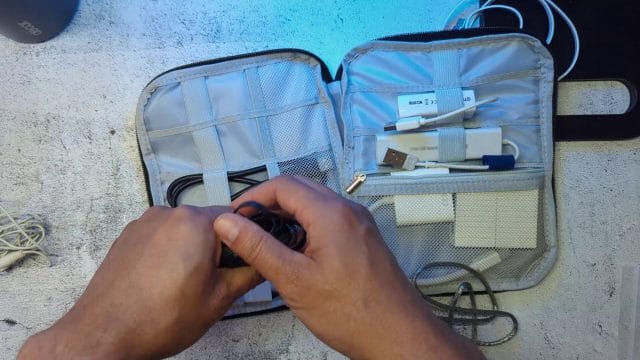
Inside the Case: Compartments and Capacity
The organiser’s layout is nicely straightforward. On one side, there are five elasticated compartments (initially thought to be six, but confirmed as five). On the other side, three more compartments. Finally, at the bottom, a zipped pocket for the smaller, fiddlier items that could otherwise slip free—think flash drives, dongles, couplers, card readers, SIM tools, and spare fuses.
This arrangement lends itself to a simple grouping strategy:
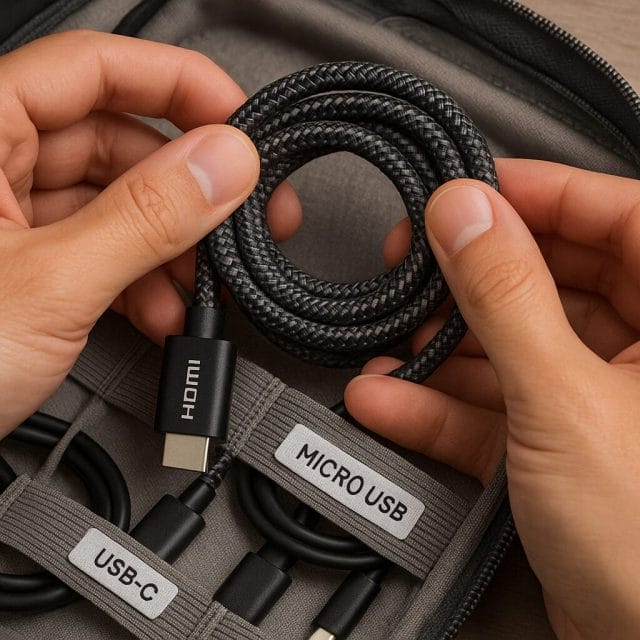
- Left side (five slots): core data cables you reach for most often—USB-C, USB-A to Micro-USB, USB-A to USB-C, HDMI, and a short Ethernet patch lead.
- Right side (three slots): backup or specialty leads—audio cable, multi-tip USB cable, USB extension.
- Zipped pocket: adapters, couplers, and small network tools (RJ45 inline coupler, USB-to-Ethernet dongle).
Elastic slots work best for cables around the 0.5–1.2 metre range. Very thick or stiff cables can be awkward, but with sensible bundling and an “over-under” coil they’ll slip in. The zipped pocket is a lifesaver for preventing tiny metal ends from scraping openly against fabrics and other cables.
Loading the Case: Choosing What to Carry
The beauty of an organiser is that it forces you to think about what you actually need. As the video notes, some items are rarely used and can be removed to reduce clutter. Here’s a practical walk-through of what went in and why.
Network Essentials
Alongside the RJ45 coupler, a short Ethernet patch cable went into the kit. If you never carry a full-length network cable, a short patch lead plus a coupler can be enough to bridge the gap in a pinch (assuming there’s a spare cable on site). Ideally, keep a 0.5–1 metre patch lead; Cat6 is a good general choice for stability and speed.
A second network adapter was earmarked for removal—duplication is unnecessary and adds weight. Aim for one primary adapter and one lightweight backup only if your work absolutely depends on it.
Bulkier Cables: Fitting a 1.2 Metre Lead
One cable was noticeably thicker, at about 1.2 metres. That’s close to the upper end of what these slots manage gracefully. The trick is to coil cleanly, press the bundle gently into the compartment, and ensure the loop doesn’t distort the organiser’s shape. A few minutes spent getting the coil right saves frustration later.
When deciding between long and short cables, ask what your day-to-day scenarios demand. If you rarely need a long run, swap a thick 1.2 metre cable for a thinner, shorter one. You’ll save space and weight while still covering most routine tasks. In the video, the choice to favour the thinner, shorter Ethernet cable over the thicker one is a good illustration of this principle.
Flexible All-Rounders: Multi‑Tip USB Cable
The organiser includes a multi-tip USB cable, the kind that branches into multiple connectors (commonly USB-C, Micro-USB, and Lightning). These are incredibly handy for travel: one cable can charge a phone, a camera, a set of headphones, or a power bank. Quality varies, so look for reinforced strain relief, braided sheathing, and tips that seat securely without wobble. A multi-tip cable reduces redundancy and simplifies your loadout.
Note: in the video, one item initially thought to be part of the multi-tip set turned out to be another network cable—easy to confuse in a messy bag. The organiser helps prevent that by grouping like with like.
USB Extension Cable
A USB extension cable went into the kit to extend reach temporarily—perfect when a desktop USB port is tucked awkwardly behind a monitor or when you’re testing devices on a bench. Keep extensions short (1–2 metres) to reduce signal attenuation. For USB 3.0 devices, ensure the extension specifies SuperSpeed compatibility.
Micro‑USB and Legacy Connectors
There’s also room for a USB to Micro‑USB lead. While Micro‑USB has been largely replaced by USB‑C, legacy devices—some action cams, older battery packs, barcode scanners, and budget peripherals—still rely on it. If you frequently encounter such kit, include a robust Micro‑USB cable with tight-fitting connectors.
Packing Method: Coiling, Securing, and Preventing Damage
Organisation isn’t just where things go—it’s how you pack them. Here are practical tips that dramatically reduce wear and tear:
- Use the over-under coiling method for medium-length cables. It prevents twists and preserves the cable’s natural lay.
- Avoid tight kinks near connectors. Stress at the plug is the fastest route to intermittent failures.
- Employ small Velcro or reusable ties to keep coils together. They occupy almost no space and stop cables from unravelling in the pouch.
- Group by function: power, data, video, audio. This reduces rummaging and speeds up deployments.
- Place heavier adapters in the zipped pocket. They won’t rub against cable sheaths or press into delicate leads.
Testing the Kit: Practical Use Cases
Once packed, it’s worth validating each item to ensure your organiser isn’t carrying dead weight. Here’s a sensible test plan for the cables and adapters featured:
Ethernet Coupler + Patch Cable
- Plug two cables into the RJ45 coupler and connect to your router and laptop.
- Check link speed in your OS (Gigabit vs Fast Ethernet). If you’re using Cat6 cables and a Cat6 coupler, you should typically achieve Gigabit over short distances.
- Run a quick network speed test or transfer a large file to confirm stable throughput.
While you wouldn’t use a coupler for long permanent runs, for pop-up networks and field work it’s perfectly adequate.
USB-to-Ethernet Adapter
- Plug into a USB port on your laptop; confirm drivers load automatically or install them if needed.
- Connect to a switch/router and verify DHCP assigns an IP address.
- Test by pinging your gateway or loading a bandwidth test page.
HDMI/Display Connections
-
- Connect your laptop to a monitor or projector with your HDMI cable or adapter.
- Check display resolution and refresh rate. If you require 4K output at 60 Hz, verify your cable and adapter support HDMI 2.0+
- Wiggle-test the connectors to ensure they seat firmly without dropouts.
Audio Cable
- Test with a phone or laptop into powered speakers. Listen for hum or crackle (which can indicate cable or ground issues).
- If you need microphone support, confirm whether your cable and device are TRRS-compatible.
USB Extension
- Use the extension to connect a USB flash drive or peripheral to a desktop. Confirm reliable detection and speed.
- For USB 3.0 devices, check transfer speeds are as expected; if not, the extension may be limiting performance.
Zipping It Up: Closure and Ease of Use
With everything in place, the case zipped up nicely—no bulging, no fighting the zip, and no obvious snag points. That’s the test of an organiser’s capacity: it should close cleanly and maintain shape without compressing cable coils into awkward angles.
Bear in mind, though, that overpacking thick or rigid cables can strain the zip and deform the case. If you notice resistance when closing, reassess the largest items or split heavy kit into a secondary pouch.
Organisation Philosophy: Less Redundancy, More Readiness
The video sensibly flags removing duplicate adapters—there were two network adapters in the initial pile, and one would likely suffice. That’s a broader principle worth adopting: every item should earn its place. Ask:
- Do I use this monthly? If not, does it serve a clear emergency role?
- Is there a more compact or multi-purpose alternative (e.g., a multi-tip cable)?
- Does this duplicate capability already covered by another item?
By pruning redundancy, you keep the pouch lighter, faster to navigate, and less likely to jam with odds and ends you’ll never use. A smaller kit is often a more effective kit.
Practical Tips to Get the Most From a Cable Organiser
- Label discreetly. A tiny tag or coloured tie can indicate cable type quickly (blue for Ethernet, red for HDMI, green for audio, etc.).
- Create a packing list. Note what your “complete set” includes and tape it inside the cover. It helps you spot missing items before leaving.
- Add a silica gel packet. It’s a simple way to keep moisture at bay, especially if you’re travelling in humid climates.
- Review quarterly. Cables fray, standards change, and your kit evolves. Replace worn leads and retire outdated adapters.
- Keep high-use items accessible. The most-used cable should live in the easiest slot to reach.
- Prioritise braided cables. They often resist abrasion better in tight organisers.
- Don’t forget spares. A spare USB-C charging lead and a second HDMI adapter are reasonable if they’re compact.

Materials and Durability: What to Look For
While the case in the video handled the day-to-day test capably, there are a few general quality cues worth noting when you choose any organiser:
- Fabric: Nylon or polyester with a tight weave resists scuffs. Water-resistant coatings add protection against spills.
- Elastic: Firm, wide elastic keeps cables in place without crushing coils. Loose elastic leads to slippage.
- Zip: Smooth action with no snag points. If you find misalignment, reseat gently; consistent issues may indicate a cheaper track.
- Stitching: Straight, reinforced seams at stress points prevent early fray.
- Pocket lining: A softer lining protects delicate connectors and stops metal edges from scratching.
Durability is not just about the case—it’s about how you use it. Avoid overstuffing, and don’t force the zip. Keep connectors capped where possible, and coil cables so they don’t press awkwardly against the pouch’s corners.
Safety Considerations
It’s easy to treat cables as benign, but a few safety points bear repeating:
- Male-to-male USB cables: Only carry if you have a documented, safe use case. Connecting two powered ports directly is risky.
- Audio adapters: Be careful with phantom power in audio rigs; using the wrong adapter can damage consumer electronics.
- Video standards: Passive adapters don’t convert signals; ensure you have an active converter if you’re bridging incompatible formats (e.g., VGA to HDMI).
- Ethernet: While low-voltage, ensure connectors are intact; cracked boots can lead to poor contact and sporadic link loss.
Who This Organiser Is For
- Field technicians and IT support: Quick access to network tools, video adapters and test leads.
- Teachers and presenters: Ready-to-go HDMI and audio connections for any classroom or conference room.
- Digital nomads: A compact, tidy kit for travel that covers charging, networking and display needs.
- Gamers and streamers: Adapter and cable storage for consoles, capture cards, and multiple displays.
If your profession depends on reliable connectivity and quick setup, a well-thought-out organiser can shave minutes off every job and reduce the friction of relocating your workspace.
Pros and Cons
Pros
- Compact and straightforward design with a logical compartment layout.
- Elastic slots accommodate a variety of cable sizes up to ~1.2 metres.
- Zipped pocket keeps tiny adapters secure and prevents abrasion.
- Encourages rationalisation—less clutter, faster access.
- Affordable way to protect cables and prolong their life.
Cons
- Very thick or rigid cables can be awkward to fit and may strain the zip.
- Zipper quality, while workable, may not match premium brands.
- Limited capacity for bulky power bricks—better kept in a separate pouch.
- No built-in labelling—users must add their own system for quick identification.
Final Thoughts: A Neat, Effective Upgrade
From a jumbled bag to a thoughtfully packed, zipped-up organiser—this case did exactly what it promised. The combination of five compartments on one side, three on the other, and a protective zipped pocket gives you a flexible canvas to build a kit tailored to your workflow. The subtle quirks (like a momentarily misbehaving zip) are easily managed with care, and the benefits—faster setups, fewer lost adapters, and less cable damage—are immediate.
The real win is the mindset shift. Choosing shorter, thinner cables where appropriate, relying on multi-tip leads to cut duplication, and parking heavy adapters in the zipped pocket all lead to a leaner, more efficient kit. If you’re currently digging through a chaotic bag of cables, starting with an organiser like this is a modest investment that pays off every time you set up. And if you decide to buy one, the video includes a link in the description and a reminder at the end, so do watch through for the details.
To round out your kit, consider adding a few extra touches: a handful of Velcro ties, a silica gel packet, and a tiny laminated card listing the contents. With those in place, you’ll have a cable organiser that not only tidies your tech but also saves time and reduces hassle, day after day.

If this article helped you in any way and you want to show your appreciation, I am more than happy to receive donations through PayPal. This will help me maintain and improve this website so I can help more people out there. Thank you for your help.
HELP OTHERS AND SHARE THIS ARTICLE
LEAVE A COMMENT
I am an entrepreneur based in Sydney Australia. I was born in Vietnam, grew up in Italy and currently residing in Australia. I started my first business venture Advertise Me from a random idea and have never looked back since. My passion is in the digital space, affiliate marketing, fitness and I launched several digital products. You will find these on the portfolio page.
I’ve decided to change from a Vegetarian to a Vegan diet and started a website called Veggie Meals.
I started this blog so I could leave a digital footprint of my random thoughts, ideas and life in general.
If any of the articles helped you in any way, please donate. Thank you for your help.
Affiliate Compensated: there are some articles with links to products or services that I may receive a commission.