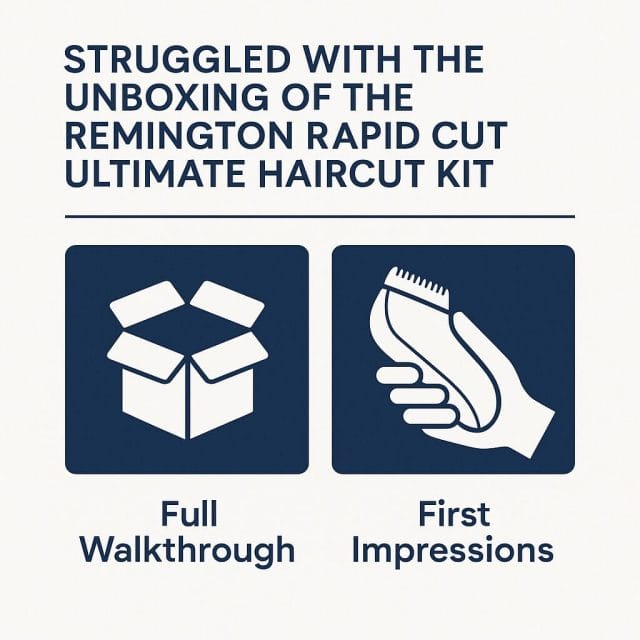
Cutting your own hair at home is a brilliant way to save time and money, but your success depends largely on choosing the right tool. In this article, I’ll take you through an unboxing and first impressions of the Remington Rapid Cut Ultimate Haircut Kit. This model has been widely praised for buzz cuts and short hairstyles, with a distinctive curved, wide blade designed to make home haircuts quicker and more intuitive. I’ll expand on every part of the experience: from the packaging and accessories to the heads, combs and charging options, along with practical tips for getting a clean buzz cut. If you’ve ever wrestled with packaging or felt overwhelmed by a heap of attachments, you’ll feel right at home here.

First Look: Tight Packaging and an Unexpected Mini Challenge
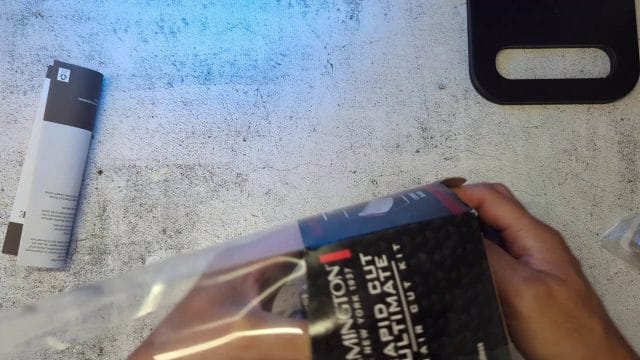
The Remington kit arrives nicely packaged, with everything tucked into compartments and protective pockets. It looks neat and reassuringly secure — but that security can also make the initial unboxing surprisingly tricky. If you’ve not done this before, you might find the tightly packed layers and tabs a bit of a puzzle. There’s nothing wrong with you; it’s more a case of the packaging being designed to survive transit rather than to open effortlessly.
The key is to approach it methodically. If the top tray doesn’t lift easily, don’t force it. Consider opening the box from the bottom where there’s often a less rigid insert. A small pair of scissors can help you snip cable ties, heat-sealed bags or tight corner tabs. Take your time, and resist the urge to rip anything that looks like a structural part of the box — it’s better to slide items out than to prise them with brute force.
Once you start removing items, the logic of the layout becomes clearer. There’s a dedicated pocket for the comb, another for the clipper heads, and a pouch for the charger and cable. You may also find a travel bag folded and tucked into its own sleeve. It’s enticing to pull everything out at once, but it’s smarter to lay pieces out as you go, so you understand what’s what before you start snapping parts together.
The Star of the Show: Curved, Wide Blade and Palm-Fit Design
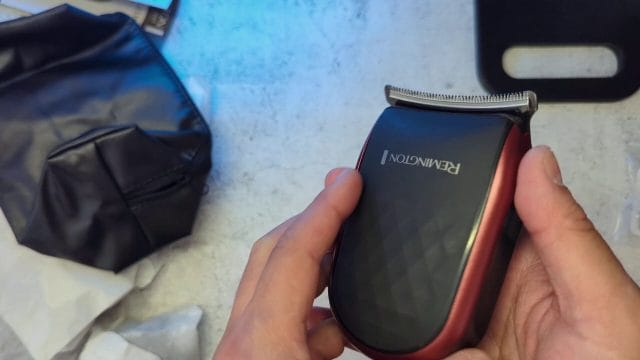
Once you have the main unit in hand, the design philosophy is immediately obvious. The Remington Rapid Cut Ultimate has a curved blade that’s notably wider than standard clippers, and the body is shaped to fit into the palm rather than being held like a traditional handle. This palm-fit approach aims to distribute pressure across your hand, keeping it steady and reducing fatigue during longer sessions. For short hair and buzz cuts, it’s particularly well-suited. The wider blade covers more scalp with each pass, so you reduce the number of strokes needed to get an even finish.
Curved blades are especially helpful for following the contours of your head. Traditional straight clippers can dig or skip along rounded areas, requiring careful angled passes. A curved blade wants to ride the curve, which helps maintain contact through each stroke. That can translate into fewer missed patches and a more consistent cut, which is exactly what you want when working without a barber’s mirror setup.
You’ll likely find two main heads included: a primary curved, wide blade for rapid coverage, and a narrower, straight head for detail work. The straight head acts almost like a precision trimmer for edges and tidying up around ears and the neckline. The unit typically has a simple lever or slider mechanism that allows you to swap heads. This modular approach makes it easy to move from bulk cutting to precise detailing without switching tools entirely.
Power and Performance: Two Speeds to Suit Your Hair Type
On the body you’ll find an on/off switch and a speed selector with two modes. The standard speed is smooth and controlled, ideal for regular maintenance cuts and fine sections. The higher speed ramps up efficiency for thicker or denser hair, where you want a bit more bite and faster movement through the strands. It’s reassuring to know you can adjust the pace based on your hair type and the area you’re tackling. Many kits arrive with some charge out of the box, so try a quick test: power the unit on, switch between the speeds, and gauge the noise and vibration levels. A wide blade can feel different than a narrow one, so you may want to practise on a small section first to get a feel for the angle and pressure.
Speaking of angle, hold the palm-fit clipper with your fingers resting along the body and your palm cradling the back. Let the curvature guide you; your wrist should remain fairly neutral while your arm does most of the positioning. Holding the unit confidently reduces chatter (that slight judder you feel when contact with hair is inconsistent) and keeps your lines clean.
Charging Options and Travel Readiness
The kit includes a charger and, notably, a USB-compatible option for the connector. That’s a practical touch, because you can bring a universal USB cable on trips rather than carrying a dedicated power brick. It simplifies travel and reduces cable clutter. If there’s a travel pouch included — and many sets provide this — pack the curved blade, your most-used guards, the charging cable, and the straight head for touch-ups. Keep the remainder at home unless you know you’ll need multiple lengths while you’re away.
As for battery life, most modern cordless clippers are designed to handle a full head without recharging, but it’s good practice to top up after use so you’re always ready to go. If you’re planning a complete buzz or a major length change, make sure the clipper is fully charged before you start. A dip in power can mean tugging on thicker sections, which nobody wants.
Attachments and Guard Combs: More Choice Than You Might Expect
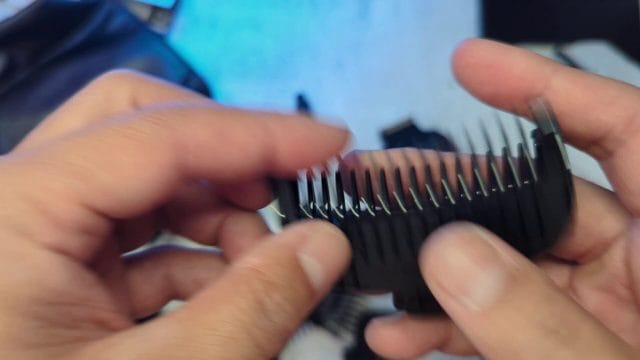
The Remington kit comes with a generous selection of comb attachments, including standard guards in familiar sizes and specialised side combs that are shaped to follow the contours around your ears. The side combs clearly mark left and right usage, helping you achieve symmetry and clean lines without guesswork. For many people, these are the accessories that turn a decent haircut into a professional-looking one, especially along the temple line and over the ears.
You’ll also find an array of ultra-short guards with fine increments — sometimes 1.5 mm, 2 mm, 2.5 mm, 3 mm, and upwards — designed for close cuts and uniform buzzes. In addition to those, there are medium and longer guards, with some marked in both millimetres and “number” sizes (for example, 6 mm often corresponds to a #2, 9 mm to a #3, and so on). The transcript mentions sizes like 18 mm and 25 mm too, which are useful if you prefer a textured short crop rather than a tight buzz.
If you’re the “number one all over” type, don’t let the sheer volume of attachments intimidate you. Think of them as options you may grow into. You might start with a #1 (typically around 3 mm) and later decide a #2 (about 6 mm) is softer around the edges, or experiment with blending at the sides. The kit’s breadth gives you room to explore styles without needing to buy extra guards later.
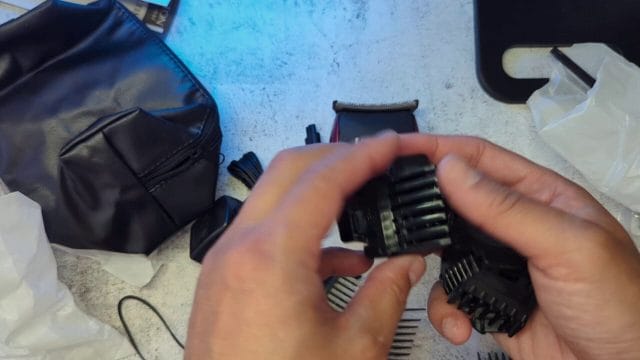
Attaching the guards is straightforward: align the guide comb with the blade, hook it on, and press until it clicks into place. Removal is the reverse — press at the catch and slide off smoothly. Don’t press too hard on the teeth; support the guard from the base instead. With the side combs, ensure you’re using the correct left or right piece, as indicated by the icon or text on the guard. A quick glance at the printed diagram in the packaging can also help you match shapes to the intended side.
Many kits include a standard comb and sometimes small maintenance items like a cleaning brush. Use the comb to lift hair against the direction of growth before clipping — it helps you catch any flat or stubborn strands. The cleaning brush is for removing fine clippings from between the teeth, especially if you’re cutting multiple heads or making several passes at different guard lengths.
Swapping Heads: From Rapid Coverage to Precision Control
One of the advantages of this kit is how easily you can swap between the curved, wide head and the narrow, straight one. The changeover is typically a slide or lever action: power the unit off, press the release or push down gently, and slide the current head off the body. Then align the new head and slide it on until it clicks. It’s simple and quick, which matters when you’re midway through a cut and want to tidy up a neckline or sharpen a sideburn.
Use the curved head for the bulk of the work — the top, crown, and back of the head — where the wider surface area speeds things up. Switch to the straight head for detail: the perimeter near your ears, the base of your neck, and any tricky patches where a narrower blade gives better visibility. If you wear facial hair, the straight head can usually double up for trimming beards and moustaches too, though you may prefer to keep dedicated facial tools for that.
How to Do a Clean Buzz Cut with the Curved Blade
Ready to put the kit to work? Here’s a simple approach to a uniform buzz cut using the curved, wide blade:
Preparation: Wash and thoroughly dry your hair. Clean, dry hair stands up better than oily or damp strands, making it easier for the blade to glide evenly. If you’ve not cut your hair before, sit near good lighting and have a handheld mirror to check the back as you go.
Choose Your Guard: If you normally go for a #1 all over, attach the equivalent guard (often around 3 mm). If you prefer ultra-short, experiment with the 2–3 mm guards mentioned in the kit. For a softer look, a #2 (about 6 mm) or #3 (9 mm) can be more forgiving.
Start at the Front: With the curved blade, begin at your hairline and work backwards, moving the clipper against the direction of hair growth. Keep slow, steady strokes. Don’t rush — the wider blade covers more area, but consistent pressure and speed are key to an even finish.
Work the Sides: Move to the sides and follow the curve of your head. The blade’s curvature helps to maintain contact. If your ears sit close to your head or you struggle around the temples, switch to the left/right side combs to tailor your passes more precisely.
Check the Crown and Back: Use your handheld mirror to examine the crown, which is often the trickiest area due to swirling growth patterns. Take short, overlapping strokes to catch any patches.
Detail and Clean-Up: Swap to the straight head for edging around the ears and neckline. Use the standard speed for control. If you need more cutting power through thicker sections, toggle to the higher speed briefly, then return to standard for fine touches.
Final Pass and Brush: Once you’re satisfied, brush away loose clippings. If any spots look slightly longer in bright light, revisit them with a light touch rather than pressing harder.
Maintenance: Keep the Kit Running Smoothly
Good maintenance helps retain cutting performance and prolongs the life of the blades. After each session, remove the guard and tap away loose hair. Use the cleaning brush to reach between the teeth. If your model includes blade oil (or if you have clipper oil), apply a drop along the edge when the unit is off, then run the clipper briefly to distribute the oil evenly. Wipe away excess with a soft cloth.
Store the clipper and attachments in the travel bag or a dry drawer. Avoid damp bathrooms where humidity can encourage corrosion. Coil the charging cable loosely rather than folding it sharply, and keep the USB connector covered or in its pocket so it doesn’t collect dust.
Second-Generation Improvements and Who This Kit Is For
This kit represents a second-generation design that builds on a popular first-gen model. The standout features — wider curved blade, palm-fit ergonomics, dual speeds and USB-friendly charging — suggest a focus on practical home use. For anyone with short hair, especially those who prefer a regular buzz cut, the curved blade is a genuine advantage. It’s quick, forgiving, and helps maintain contact on rounded areas. If you’re new to cutting your own hair, the modular heads and clear guard labelling lower the barrier, making it easier to move from a basic uniform cut to more refined edges and side work.
If you travel, the USB charging option and compact form factor make it an easy companion. If you like experimenting, the range of guard sizes allows you to try slightly different looks without a trip to the barber. And even if you’re the “number one all over” type, it’s surprisingly nice to have the precision head on hand for a tidy neckline and crisp edges.
A Note on the Unboxing Experience
It’s worth acknowledging the slightly awkward unboxing. Well-secured packaging is excellent for protecting tools, but it can be a bit of a wrestle at first. If you run into resistance, open the box from the bottom and use scissors to cut through stubborn tabs. Lay items out as you go, and don’t worry if it feels like a mini project. You’ll only do it once, and the sturdiness means everything inside arrives in top condition.
Final Thoughts
The Remington Rapid Cut Ultimate Haircut Kit is clearly designed with at-home buzz cuts and short styles in mind. The palm-held form and curved, wide blade make fast work of bulk cutting, while the straight head and large selection of guards handle detailing and personal preferences. Dual speed settings let you tailor performance to your hair type, and USB charging adds welcome convenience. If the packaging feels overly secure, consider it a minor hurdle; once you’re set up, swapping heads and guards is intuitive.
For anyone wanting a reliable, versatile kit for regular short cuts, this second-generation Remington is a strong contender. With a bit of practice — and maybe a chuckle at that first unboxing — you’ll find it becomes a straightforward, satisfying part of your grooming routine.

If this article helped you in any way and you want to show your appreciation, I am more than happy to receive donations through PayPal. This will help me maintain and improve this website so I can help more people out there. Thank you for your help.
HELP OTHERS AND SHARE THIS ARTICLE
LEAVE A COMMENT
I am an entrepreneur based in Sydney Australia. I was born in Vietnam, grew up in Italy and currently residing in Australia. I started my first business venture Advertise Me from a random idea and have never looked back since. My passion is in the digital space, affiliate marketing, fitness and I launched several digital products. You will find these on the portfolio page.
I’ve decided to change from a Vegetarian to a Vegan diet and started a website called Veggie Meals.
I started this blog so I could leave a digital footprint of my random thoughts, ideas and life in general.
If any of the articles helped you in any way, please donate. Thank you for your help.
Affiliate Compensated: there are some articles with links to products or services that I may receive a commission.