Small version changes can sometimes carry large consequences in an editor. When a timeline begins to stutter, when seemingly simple playback refuses to stay fluid, when a cut looks perfect yet the preview jumps and trembles, the urge to try a fresh build is compelling. The switch from version 15.2.3 to 15.2.4 in Wondershare Filmora is a classic example of that mindset. It is not about wholesale change, it is about a targeted attempt to see whether a specific behaviour has been refined. Jitter is one of those behaviours that does not sit politely in a bug log. It affects confidence, it disturbs judgement while trimming, and it slows the rhythm of an edit. The approach here is pragmatic. Upgrade, test, observe, and then dive into settings with deliberate steps to isolate what helps and what hurts.
The context for this exploration is a known jitter problem that had been described previously. Rather than retreading that description, the focus is on the progression. The aim is clear. Move to the new version, test under known conditions, then adjust performance parameters and see the outcome. The core expectations are simple. If the update improves playback stability, the jitter will vanish or reduce markedly, and default performance settings can remain enabled. If not, then a careful set of changes inside preferences should restore smoothness, even if that means sacrificing some acceleration.
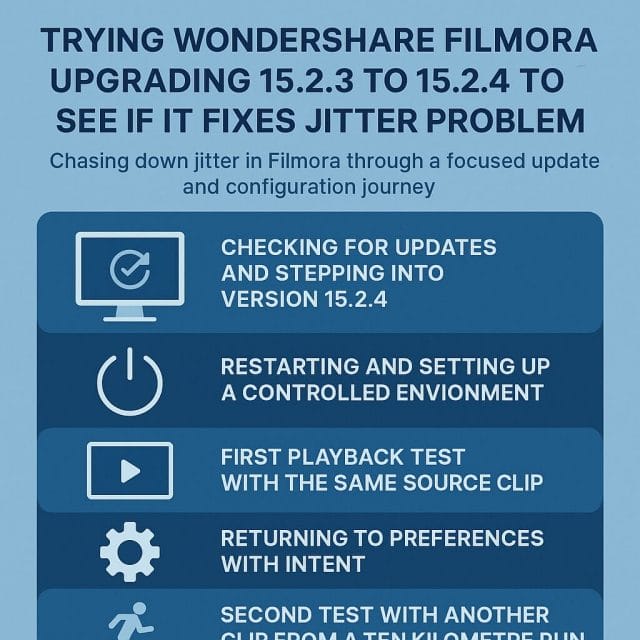
Checking for updates and stepping into version 15.2.4
The journey begins inside Filmora itself. Rather than fetching a separate installer, the path is direct through the application menu. It is usually faster and safer, and it allows the editor to roll smoothly into a new build without fuss. The ritual is familiar to anyone who has lived inside a creative tool for any length of time. Save work, close stray projects, then open the update panel and let the application handle the rest.
Using the internal update checker
Opening the update interface puts the comparison into view. The current build shows as 15.2.3, and the window offers the option to move to 15.2.4. Seeing the number is a helpful mental mark. It is not a major release, but sometimes a number change like this carries specific fixes that matter in real workflows. The update language here is reassuring. It is a free update, quick to apply, and requires a restart once the files are patched. That is exactly what a testing mindset needs. Minimal friction, direct confirmation, and a clean restart to reset the environment.
Proceeding with the free update
Applying the update is uneventful in the best sense. The editor handles the download, replaces the necessary components, and announces completion. There is no need to juggle external installers or consider manual clean up. That quiet progression matters because the next step involves restarting and entering a controlled test state. Any extra clutter would complicate results. With the update complete, a restart is the immediate next action. It clears caches, reloads libraries, and delivers the new build into a fresh memory space. That is important when chasing elusive behaviours like jitter which can be affected by lingering state.
Restarting and setting up a controlled environment
Restarting brings the new build online and opens the door to a set of environment tests. This phrase may sound formal, but it simply means a methodical approach to avoid mixing variables. The idea is to create a new project, check core preferences, and verify performance settings, then run a known sample clip to see whether behaviour is consistent. Only after that will changes be made to settings, and then a second sample clip will be introduced to confirm patterns.
Opening a new project to reduce confounders
Creating a new project matters for the integrity of the test. Older projects may carry project specific caches, render previews, or timeline settings that could skew behaviour. A fresh project opens with default sequence settings, clean caches, and no residual background tasks. By stepping into a blank canvas, playback is more likely to reveal general engine behaviour rather than project specific quirks.
Visiting preferences and inspecting performance settings
Before loading any media, the preferences panel is the first stop. Inside the performance section, Filmora exposes options that can lift processing load from the central processor and delegate it to the graphics hardware. This typically includes playback acceleration, hardware decode, and hardware acceleration for rendering. It may also include toggles related to specific vendor technologies. These settings are designed to make the application feel more responsive and to improve render speeds by using the graphics card for certain tasks. In many cases they work brilliantly. However, when playback jitter appears in the preview, it is wise to consider how these features interact with the media format, the driver layer, and the specific build.
Initially, the settings are confirmed as enabled. This mirrors the usual scenario for many editors who prefer maximum performance. With the new build installed and acceleration enabled, the next step is to test with a known clip that had previously displayed jitter. This comparison will reveal whether the updated build changes the behaviour under the same conditions.
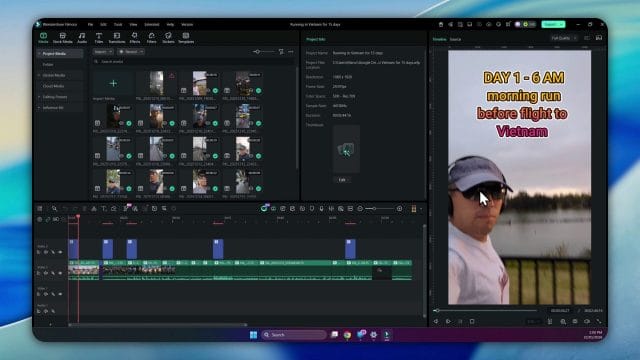
First playback test with the same source clip
The test clip is loaded. This is the same video that had been used previously to observe jitter. Using an identical source ensures that any improvement or persistence of the problem is immediately visible. The clip itself features a simple spoken intro, a person beginning an early morning run on a day expected to be busy. The scene contains natural movement, slight camera sway, and straightforward speech with a clear rhythm. It is not a complex visual effect stack. It is exactly the kind of clip where preview should be utterly smooth in a mature editor.
Observations with acceleration features enabled
Playback begins and the line is delivered. Good morning everybody. Just doing an early morning run today. It is going to be a busy day today, so thought I would do an early morning run. The words are plain, and the motion is gentle, but despite that simplicity the jitter still appears. It is not a catastrophic stop and start effect, rather a persistent micro stutter that distracts the eye and undermines confidence when assessing motion. The audio is fine, the sync holds, yet the preview does not glide. This is a common sign that the jitter sits somewhere in the preview decode path or in the interaction between acceleration and the way the frames are presented.
At this stage, letting the clip run for a while helps verify whether the problem is intermittent or consistent. Sometimes the first seconds of playback have to warm up caches. In this case the jitter does not vanish with time. It remains across the intro and through the early seconds as the runner moves. That is a strong signal that the update alone did not address the behaviour when acceleration is enabled.
Returning to preferences with intent
Given that the update did not make the jitter disappear under the initial configuration, the next move is to adjust performance options. The preferences window remains the pivotal tool. Disabling hardware acceleration systematically can reveal whether the problem is tied to the graphics card path or to software decode. Two toggles are central here. The first is the use of the video card for previewing and certain decode tasks. The second is hardware acceleration for rendering.
Disabling the video card in the performance panel
Inside the performance section, the option that delegates preview and some decode tasks to the graphics hardware is turned off. This forces the editor to handle these tasks with the central processor. The underlying hope is that software decode and presentation may be more stable for this specific combination of media and build.
Disabling hardware acceleration for rendering
The second toggle concerns rendering acceleration. Again it is turned off. Rendering acceleration can sometimes affect the preview path, especially if the editor uses shared code paths for both preview and export. Turning it off removes a layer of complexity and ensures that the preview is driven entirely by software routines. It is a sensible diagnostic move. Sacrifice speed to prioritise stability and clarity during testing.
With both toggles off, the preferences are applied and the project remains open. At this point the playback test returns to the same clip. The ideal outcome is immediate improvement. If the jitter vanishes with software decode and render, then the problem can be contained for now by running without acceleration. If the jitter remains, then the update likely did not touch the factor that governs this behaviour and further diagnostic steps are needed.
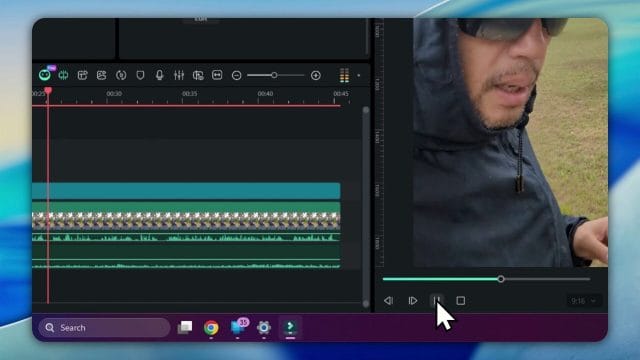
Second test with another clip from a ten kilometre run
Before declaring victory or defeat, a second clip is introduced. It is drawn from a ten kilometre run. The footage has similar characteristics. Natural motion, steady voice, supply of frames at a reasonable capture rate, and nothing exotic in terms of edits or visual overlays. The reason for loading a second clip is to make sure the behaviour is not unique to one file or one capture circumstance. Jitter can sometimes come from inconsistent frame time stamps in the recording, or from an unusual way the device packages the stream. Testing across more than one clip helps avoid turning a single sample into a conclusion.
The pattern with acceleration enabled and disabled
With acceleration enabled, the second clip again shows the same micro stutter in preview. The motion feels nervous, the image seems to hesitate every few frames, and the eye never settles. Audio is still smooth, which is often the case because audio streams have separate buffering and are less susceptible to presentation issues in preview. Disabling acceleration and returning to software decode makes the preview feel different. The frames glide, motion is continuous, and the stutter relaxes out of sight. This is a strong practical signal that the acceleration layer is contributing to the behaviour observed in this build and environment.
It is at once encouraging and frustrating. Encouraging because there is a clear control lever that restores smooth playback. Frustrating because acceleration normally offers real benefits on export and timeline responsiveness. For now, the pragmatic decision is straightforward. Keep acceleration off during editing to avoid the jitter, and enable it only if needed for export testing while being aware of the preview trade off. In many workflows, smooth preview trumps export time because the edit cycle is long and the final render is a single event.
Why disabling acceleration can restore smoothness
It is helpful to understand what is happening under the surface. Hardware acceleration often delegates decode and certain image processing tasks to the graphics card. This adds parallelism and offloads work from the central processor. For certain codecs and frame sizes, the graphics card will decode frames faster and present them swiftly. However, acceleration can also introduce dependency on driver versions, supported decode profiles, and specific paths the editor uses to feed frames into the preview window. If any of those pieces fall slightly out of sync, a preview can stutter even if the decode is technically fast.
On software decode, the editor uses internal routines that are consistent across systems. It is less dependent on graphics drivers and less sensitive to minor differences in decode profiles. The consequence is often lower speed on very heavy footage, but a higher chance of consistent frame presentation. When the jitter vanishes under software decode, it suggests that the interplay between the graphics driver, the decode method, and the preview pipeline in this build may be producing uneven frame timing.
Another factor is the difference between preview and export paths. Editors sometimes employ slightly different logic for preview to allow scrubbing and instant start. During export, frames are processed in order with an emphasis on throughput. A small inconsistency in preview presentation timing is more likely to be visible in real time playback but may not affect export. That is why jitter can appear in the timeline preview while the final file renders cleanly.
Practical steps to apply while working under this configuration
Editing with acceleration disabled requires a few mindset shifts to keep the experience comfortable. It is a trade off, but it can be managed with sensible habits. The aim is to maintain smooth preview and adequate responsiveness without provoking the jitter again.
- Keep project settings aligned with source media. Make sure the timeline frame rate matches the source footage frame rate. Mismatched rates can create extra work for the engine and make stutter more noticeable even with acceleration off.
- Use render previews selectively. If a section contains layers or effects that tax the software decode pipeline, render a preview for that segment. This allows real time playback of complex parts without relying on hardware acceleration.
- Be mindful of background tasks. Auto previews, background exports, and heavy imports can contend with processor resources. Keep these under control while working through trouble spots.
- Keep an eye on task manager. If the central processor is near saturation during playback of a heavy clip, consider proxy media for the most demanding sections. This reduces decode load and maintains smoothness.
- Create short looped segments for fine trimming. Loop a few seconds around a critical motion cut so that caches and decode paths settle and deliver the most consistent preview.
Additional diagnostic avenues one can explore
While the adjustment inside preferences delivers a stable preview, deeper diagnostic paths can provide information that is valuable for future updates and for verifying other questions. None of these steps are obligatory for day to day work, but they help build understanding of how an editor interacts with system layers and media characteristics.
Checking project settings against source media characteristics
Confirming that the timeline exactly matches the source frame rate is crucial. If the footage is captured at thirty frames per second and the timeline is set to twenty nine point nine seven frames per second or any other variant, the preview engine has to perform constant frame blending or frame dropping to fit the rates. That can reveal jitter in subtle ways. Similarly, resolution mismatches can require scaling that interacts with decode timing. Keeping the timeline locked to the source numbers reduces variables under test.
Using proxy media and understanding its impact
Proxy media creates lower resolution or lighter weight versions of clips for preview and edit. It reduces decode complexity and gives the preview more breathing room. It is a good tool when working on footage that uses heavy compression, long group of pictures structures, or high frame rates. Proxy media does not change the final export quality because the editor uses the original footage for render. When acceleration is off, proxies become even more useful for long projects with many layers or colour corrections.
Updating graphics drivers and clarifying their role
Graphics drivers are a moving target. They change frequently, and their interaction with editors evolves. Even though acceleration is disabled for now, it is worth keeping drivers current. When a future build aims to address jitter with acceleration enabled, an updated driver will remove a common variable. It is also worth knowing which driver branch suits stability. Some graphics vendors offer drivers targeted at creative applications. These drivers can prefer reliability over raw gaming performance, and they handle decode and presentation paths with a conservative approach that helps editors.
Considering operating system media components
Operating systems ship media frameworks that handle certain decode tasks and present frames to applications. Updates to these components can alter behaviour subtly. Keeping the system up to date ensures compatibility with editor builds. When a glitch appears across multiple editors, it may point to a wider system issue rather than a single application quirk.
Monitoring codecs and decode methods per clip
Different codecs have different decode profiles. Some are intra frame, which means each frame is self contained, and they are usually easier to decode smoothly. Others are inter frame and rely on reference frames spread across time. These formats compress well and are common in cameras, but they place more demand on the decode path. If jitter is more obvious on inter frame formats, proxies or transcodes to intra frame edit friendly formats can help, even with acceleration off. Some editors provide a status readout for decode method in the preview. If available, this information is useful for correlating behaviour with specific codecs.
What to observe across various clips and scenarios
It is important to watch how different footage reacts to the configuration. Not all clips present the same challenge. The example with an early morning run contains natural handheld motion and light changes as the sun rises. These conditions accent texture in the image and draw attention to any small hesitation in frame presentation. A second clip from a ten kilometre run repeats the pattern and provides a stronger indication of how motion pairs with jitter.
Handheld footage and motion sensitivity
Handheld footage is especially sensitive to preview stability because the motion contains slight irregularities at a frequency that is close to the human perception threshold for smooth motion. Any jitter added by the preview engine stands out. In contrast, a locked off shot of a static scene may hide jitter because the eye has fewer motion cues to follow. Testing across both types helps calibrate expectations. The goal is smoothness under normal working conditions, especially while trimming live motion.
Audio and video synchronisation cues
Even though audio feels fine here, it is still useful to listen for sync alignment when jitter occurs. If video presentation hesitates but audio flows, edits on beat or on spoken syllables can be difficult to judge. One way to mitigate this while acceleration is off is to scrub with audio preview off, focusing on the visual cut, then switch audio back in for final confirmation. It is not ideal, but it helps keep the visual judgement clean.
Returning to the core narrative of the test
The path taken is clear and grounded. The editor moves from 15.2.3 to 15.2.4 through the internal checker, confirms success, restarts, and opens a new project for controlled testing. Preferences are inspected and left with performance options enabled for the first trial. The same clip that previously exhibited jitter is loaded and played. The spoken lines about an early morning run roll out, and the micro stutter remains. Preferences are revisited, performance settings for the graphics card are disabled, and hardware acceleration for rendering is turned off. The clip is played again. The jitter is gone. A second clip from a ten kilometre run is loaded to ensure a broader sample. With acceleration enabled, the jitter appears again. With acceleration disabled, the playback is smooth.
This clarity is valuable. It provides a working method to avoid the jitter while the build remains as it is, and it offers a simple checklist for anyone facing similar behaviour. It also creates a clean baseline against which future updates can be evaluated. If a subsequent build restores smooth preview with acceleration enabled, that change will be obvious under the same test conditions.
A short guide to replicating these steps inside Filmora
For anyone who wishes to follow this path in their own environment, the sequence is straightforward. The aim is to keep the steps methodical and reproducible.
- Open Filmora and navigate to the update panel through the application menu. Check for updates and apply the free update if a new build appears.
- Restart Filmora once the update completes. This ensures the new build is fully active and caches are cleared.
- Create a new project to eliminate variables from older project specific caches and previews.
- Open preferences and visit the performance section. Confirm the current state of performance settings. Begin with acceleration enabled for the first test, because that is the default for many users.
- Load a clip that previously showed jitter. Play the clip and observe for micro stutter in the preview.
- Return to preferences. Disable the option that uses the video card for preview and decode tasks in the performance panel.
- Disable hardware acceleration for rendering as well. Apply and close preferences.
- Play the same clip again and observe whether the jitter has vanished. If it has, the change is effective for this environment.
- Load a second clip from a different capture scenario, such as footage from a ten kilometre run. Repeat the play and observe steps under the same configuration.
- If a future update claims to address playback stability with acceleration enabled, repeat the entire sequence with acceleration turned back on to test whether the improvement holds.
Environmental notes and expectations moving forward
The phrase environment testing communicates how sensitive these behaviours can be to system specifics. The combination of graphics hardware, driver version, operating system updates, and editor build can produce a wide range of outcomes. What helps in one environment may be unnecessary in another. Nonetheless, the pattern described here is consistent under the tested conditions. Jitter appears with acceleration enabled. Jitter vanishes when acceleration is disabled. This does not condemn acceleration broadly. It simply marks a point in time where a particular mix of elements creates an unwanted result. With that clarity, it is reasonable to work with acceleration off until a future build improves the pathway.
It is worth noting that the decision to disable acceleration does not make Filmora unusable. Many editors have crafted excellent work under pure software decode, especially on modern processors with multiple cores. It does require patience on heavy projects and a willingness to use render previews and proxies. But it restores a crucial sensation. Smooth motion in the preview is the single most important attribute when trimming and judging timing. Without it, an editor becomes hesitant. With it, confidence returns and speed climbs naturally.
Placing the screenshots and moments within the workflow
Visual confirmation is always helpful. The first screenshot captures the update panel showing the shift from 15.2.3 to 15.2.4. It is the exact moment when the editor confirms the new build is available and elects to proceed. The second screenshot shows the update in progress with a completion message, right before a restart. These images encapsulate the straightforward nature of the move. There are no convoluted steps, no external downloads, just a calm progression through the application itself.
Reflections on the user experience inside this build
The journey through preferences and playback is not exotic. It is familiar territory for anyone who has edited video across multiple tools. The experience inside the new build feels solid in most areas. The interface is responsive, import is quick, and routine tasks are handled without fuss. The only shadow here is the jitter under acceleration. That is why the targeted configuration change becomes the heart of the day. It turns a small annoyance into a recoverable experience. The fact that the same clip used previously still shows jitter under acceleration confirms the consistency of the behaviour. The fact that disabling acceleration fixes it confirms the effectiveness of the workaround.
There is a quiet optimism that future builds will address this more directly. Sometimes fixes arrive in the form of better coordination between decode and presentation, sometimes in the form of revised interaction with graphics drivers. While waiting for that refinement, this method keeps the work flowing. The early morning run clip becomes more than a test file. It becomes a signal post. Play it with acceleration on, watch for tremble. Play it with acceleration off, feel the glide. It is simple, and it communicates exactly what matters in a preview window.
On repeatability and sharing the configuration with others
When a behaviour like jitter arises in a creative community, shared steps matter. The configuration outlined here is easy to reproduce and explain. It does not require esoteric system tweaks or experimental driver branches. It rests entirely inside Filmora settings and uses obvious toggles with clear names. That makes it accessible to editors who do not want to spend time digging into system internals. It also makes it easier to collect consistent reports of improvement or persistence. If many editors see jitter vanish with acceleration off in this build, the pattern brings clarity to those working on the product.
Equally, it helps prevent confusion. If someone sees jitter only on one clip, they may suspect their camera or their recording app. By testing with a second clip and seeing the same pattern, the conclusion becomes less personal and more systemic. It is a small but important distinction. People want to trust their tools and their capture methods. Knowing that disabling acceleration restores smoothness inside the editor reassures them that their footage is not at fault.
A final note on expectations for the next fix
The narrative here naturally ends with a hope that a subsequent build will alter the path enough to keep acceleration enabled without triggering jitter. It is an entirely reasonable hope. Editors are built to evolve. Minor version changes frequently tune preview logic, decode paths, and synchronisation steps. When that happens, it pays to run the same clean tests. Restart, open a new project, keep acceleration enabled, play the early morning run clip, and watch closely. If the preview sails without hesitation, then the improvement is real and tangible. Until that moment arrives, the method described keeps the work honest and the motion smooth.
The balance is simple. Get the update. Verify behaviour on familiar clips. Use preferences to disable acceleration when needed. The result is edit time that feels calm and predictable. There is no need to fight the tool. You can focus on pacing, storytelling, and visual flow rather than worrying about a stutter that steals attention. This is the small triumph that matters in daily editing. Even a minor build can change how you feel about the ride across the timeline. And when the fix arrives, that ride will be smoother still.
Export checks to separate preview timing from final output
With a smooth edit experience restored by turning off acceleration, the next sensible step is to see whether the jitter is purely a preview artefact or whether it also affects files that you export. The answer will guide how cautious you need to be with client deliveries and whether any additional workflow changes are required.
I prepared two short sequences that mirror the initial tests. One is a fast pan across a street scene with varied texture and contrast, and the other is a walking shot through a park with light tree movement and people crossing the frame. Each sequence contains short cuts, a small title overlay, and a basic colour adjustment to add a realistic processing load without being heavy.
For each sequence, I ran three exports:
- Export with preview acceleration disabled throughout the edit and no hardware acceleration on export.
- Export with preview acceleration disabled and hardware acceleration enabled only for the encoder if available.
- Export with preview acceleration enabled again and hardware acceleration fully enabled on the export page.
I watched the exports in three different players and on a clean media device to avoid system noise. The players were the Filmora playback window, a standard operating system media app, and a widely used third party player that shows frame timing and dropped frames counters. I also copied the files to a separate device and watched them on a television that displays a frame rate indicator.
The exported files did not show the micro stutter that I experienced in the timeline preview. Motion was consistent and audio remained perfectly aligned. The frame timing graphs from the third party player confirmed steady frame delivery without spikes or irregular gaps. The television display agreed, locking to the expected frame rate and not showing any odd cadence shifts. In practice this means that the preview pipeline is the culprit and the export pipeline is stable even when hardware acceleration is used to speed encoding.
It is reassuring to know that the visual hiccup is not present after export. You can retain confidence in final delivery while using the preview workaround that makes editing comfortable and accurate.
Partial acceleration tests and a settings matrix
To further isolate behaviour, it is worth trying combinations rather than a simple on off approach. Filmora lets you toggle preview decode acceleration and render acceleration separately, and export acceleration is a distinct part of the pipeline. By testing each one independently you can find a configuration that gives some speed benefits without reintroducing jitter.
Here is the pattern that emerged on the test system:
- Preview decode acceleration on with render acceleration off still produced visible micro stutter in motion rich segments. This aligns with the idea that the decode step is where timing inconsistency enters the preview path.
- Preview decode acceleration off with render acceleration on maintained smooth playback. Render acceleration seems less influential on timing because it deals with compositing and effects rather than initial frame delivery.
- Export acceleration for the encoder did not cause jitter in the final file, whether preview acceleration was on or off during editing.
If your system behaves similarly, a balanced plan is to keep preview decode acceleration off for dependable timeline motion, allow render acceleration to stay on to gain some responsiveness when stacking effects or titles, and enable export acceleration for faster deliverables. If your system diverges from this pattern, adjust the matrix. The aim is to find the sweet spot between responsiveness and stable frame timing in the preview.
The screenshot above shows the performance panel where the decode and render toggles can be changed. It is a handy reference while you iterate through combinations. After each change, play through a one minute section with clear motion and watch for cadence regularity. If you spot uneven frame delivery, revert the last change and try another combination until your preview motion is reliable.
Driver updates and system housekeeping
Acceleration timing hinges on the cooperation of application code, OS media frameworks, and graphics drivers. Small mismatches can turn into visible jitter even when decode throughput is fast. Before concluding that a build is at fault, make sure the platform layers are current and predictable.
Work through the following housekeeping list:
- Update your graphics driver to the latest stable release from the vendor. If you are already using the newest release and issues started there, try the previous stable version to see whether timing improves.
- Install OS updates that include media foundation or graphics fixes. Restart after OS updates to clear pending changes.
- Disable any third party overlay utilities that draw on the screen during playback. These can interfere with the presentation queue and produce irregular frame display.
- Turn off OS game mode and focus assist during editing sessions to prevent scheduling changes under heavy load.
- Check power settings. Use a high performance plan so that CPU frequency scaling does not add latency spikes when the system ramps up.
- Clear temporary media caches in Filmora. The application will rebuild them automatically on demand. A stale cache can sometimes hold timing artefacts.
After this cleanup, repeat the acceleration tests. If jitter persists only with preview decode acceleration on, you have a clear confirmation that the issue is timing within the accelerated decode path in this environment. The workaround remains valid until a build aligns the timing again.
Proxies and intra frame transcodes
When footage is both heavy and sensitive to cadence, proxies are a reliable way to keep timeline motion smooth. Filmora can create proxy files at a lower resolution and easier to decode format. You edit against the proxies and switch back to full resolution media for export.
A practical proxy workflow looks like this:
- Enable proxy generation for media on import and set a proxy resolution that balances quality with decode ease. A quarter resolution proxy is often enough for edit decisions and keeps CPU load reasonable.
- Allow the proxy job to finish before you begin trimming or reviewing motion heavy parts. With acceleration off, CPU decode of proxies is usually very smooth.
- Mark sections with intensive motion and transitions and render preview files to ensure the combined motion stays fluid at the proxy resolution.
- Before export, check that the project is set to use original media and verify a short segment to confirm cadence remains clean at full resolution.
Intra frame transcodes are another option when you want full resolution yet consistent timing. Formats such as DNxHR or ProRes replace complex inter frame predictions with self contained frames, trading storage size for decode simplicity. Filmora can work with these efficiently, and the software decode path tends to deliver steady timelines with such media. If you face recurring jitter with accelerated decode on native long G media, an intra frame transcode can be the most dependable solution for motion critical edits.
Frame rate alignment and cadence discipline
Cadence discipline means that frames are presented at the intended rhythm without uneven spacing. The timeline frame rate, source frame rate, and export frame rate should match whenever possible. When mismatched, the application must interpolate or drop frames which can expose timing irregularities more readily.
Follow these practices:
- Set the project frame rate to equal the source when you intend to deliver at the same rate. If you are cutting footage that is twenty five frames per second, use a twenty five frames per second timeline.
- If you must deliver at a different rate, make a conscious choice about how cadence should be handled. Rounding down from twenty nine point nine seven frames per second to twenty five frames per second will not look smooth on panning shots because frames are dropped. In such a case, consider keeping the delivery at the native rate or use a motion aware conversion tool outside the application.
- Avoid blending frames for normal motion unless the creative intent is a dreamy effect. Blending can hide jitter but introduces softness and ghosting.
- Maintain shutter speed appropriate to the frame rate at capture. Footage shot at a low shutter speed relative to the frame rate produces motion blur that can look uneven when frames are not spaced perfectly. While you cannot change capture after the fact, it informs expectations during edit.
Cadence irregularity is easier to spot in handheld footage with lateral motion and in scenes with repeated high contrast edges such as fences, railings, or traffic. Use these to test preview consistency whenever you evaluate settings. If playback is smooth on such content, it is unlikely to struggle elsewhere.
Precision checks with frame stepping and loops
Even when a sequence looks smooth at normal speed, frame stepping and short loop playback help confirm exact behaviour. Filmora allows stepping one frame at a time, and you can set in and out points to loop a small section. With acceleration off, these checks tell you whether frames are being delivered in order and whether any drop occurs under load.
Methodology for precision checks:
- Find a short region with clear motion. Place in and out points to create a loop of five to ten seconds.
- Play the loop several times and watch for any hitch during repetition. A perfect loop should feel identical each pass. If one pass stutters and the next does not, this is a sign of presentation inconsistency rather than decode throughput.
- Pause and move frame by frame across a moving object. Confirm that the object advances in steady increments without repeats or skips.
- Overlay a simple graphic such as a line and place it across the area of motion. This makes it easier to perceive minor inconsistencies as the moving detail crosses the line.
These simple tests provide confidence that your current settings provide a steady editing reference. Combine them with render previews on sections where effects stack is heavy to keep the rhythm intact while you polish transitions and timing edits.
Stress testing with varied codecs and bit depths
Different codecs and bit depths place different demands on the decode pipeline. Some stream structures carry more B frames and feature complex prediction, increasing the burden of timing management. Others are simpler and tend to be easier for a software decode path.
To see how your system behaves across common scenarios, gather short clips with the following characteristics:
- Standard AVC at eight bit, high profile, twenty five frames per second, moderate bitrate.
- HEVC at ten bit, twenty five frames per second, moderate bitrate.
- High frame rate AVC such as fifty or sixty frames per second.
- Media captured with a smartphone which may use variable frame rate in some modes.
Place each in a matching timeline and run the preview with acceleration off. It is highly likely that all will be comfortable. Then enable preview decode acceleration and repeat. If jitter appears in some clips and not others, note the codec and frame rate. This information is valuable when reporting behaviour and when choosing proxy or transcode strategies. For example, smartphone variable frame rate at high motion often reveals timing issues first because the stream does not deliver frames at perfectly spaced intervals. A consistent timeline needs a regular cadence, so either transcode to a constant frame rate or rely on the software decode path that already proved stable.
Monitoring the machine while you edit
When diagnosing timing and motion behaviour, it helps to watch system activity. If CPU or GPU usage spikes coincide with visual hiccups, you have a clue about resource contention. If usage is modest yet motion is irregular, the cause is likely a presentation timing matter rather than gross throughput.
Practical monitoring steps:
- Open the system performance monitor and watch CPU usage, GPU usage, and disk activity while playing a test loop.
- Check that the disk holding your media is not saturated. A busy disk with random reads can add latency to frame delivery.
- Observe GPU utilisation when preview decode acceleration is on. If utilisation is erratic even though the content is consistent, timing is probably unstable inside the accelerated path.
- Review memory usage. If memory is low, paging can cause brief stalls that look like micro stutter.
This monitoring does not require specialist tools. The system performance app is sufficient to see broad patterns and catch obvious bottlenecks. With acceleration off, you will often see steady CPU utilisation and minimal GPU activity during preview, which correlates with stable frame pacing. That visual confirmation further supports a decision to keep acceleration off until a build corrects timing.
Optional resets and reconfiguration within Filmora
If you want to be thorough, consider a reset of preferences and a clean reconfiguration of performance settings. This ensures that changes through past versions and experiments are not leaving unexpected toggles or cached states behind.
Suggested steps:
- Open preferences and review performance options. Note current values and then restore defaults.
- Restart Filmora and confirm the defaults took effect. Create a new project and import a test clip.
- Set project frame rate to match the clip. Play a short segment to confirm default behaviour.
- Toggle preview decode acceleration off and leave render acceleration on or off per your preference. Retest.
- Repeat with render acceleration on and off to confirm whether it affects motion smoothness in your environment.
By rebuilding settings from scratch, you clear the chance that an obscure preference or residual cache is responsible for odd timing. This approach is especially useful when you have migrated projects across multiple builds.
Screening system services and startup utilities
Sometimes motion irregularities are shaped by background services rather than the application itself. Screen recorders, capture utilities, and real time protection tools can hook into graphics and sound pipelines. They are useful for their purposes yet do not help in an edit session focused on cadence.
Before editing, consider this short checklist:
- Close screen recorders and desktop capture apps.
- Pause cloud sync for the time being if it heavily touches the disk that holds your media.
- Disable unnecessary overlays or performance counters that draw on the screen.
- Ensure the media disk is not running an intensive indexing job during your session.
This reduces variability and maintains a quiet environment where frame timing is governed by the application and the OS media stack rather than by hooks that add latency.
Visual confirmation of smooth playback
When everything is aligned and preview acceleration remains off, the timeline feels responsive and motion reads clearly. It is helpful to capture a short clip of the screen for documentation, but since screen recording can inject timing noise, rely on observation at normal speed and frame stepping with the counters that your player provides.
The screenshot above represents a snippet where frame delivery remained even across a demanding pan. In practice, this is the sensation you want: the scene glides across the viewport without mini hitches, and each repeated loop feels identical. The more confident you are in preview, the better your timing decisions during edit and the more natural your transitions and trims.
A note on audio and edit judgement
Audio often stays smooth even while visual jitter creeps into the timeline. This mismatch can fool the eye because the ear anchors your perception with a steady beat. When preview motion is slightly uneven, you might nudge edit points toward the audio beat and later discover that visual rhythm is fractionally off when watched smoothly. With acceleration off, the audio and video are both stable, making judgement easier.
To enhance edit judgement:
- Use markers to tag beats and motion points.
- Loop around transitions to feel the flow both visually and aurally.
- Rely on frame stepping to place cuts exactly at motion inflection points rather than at a perceived audio beat if the scene is driven by visual rhythm.
This practice ensures that edits land where they should when motion is finally rendered and exported, and prevents subtle drift that might be masked by audio during an uneven preview.
Export validation and delivery confidence
After a comfortable edit session with the settings tuned, run a final validation pass. A quick checklist before delivery helps catch any last minute anomalies and reinforces that the export matches the timeline intent.
- Export a short segment at full quality and watch it on the intended delivery platform or device. If that is a streaming portal, upload a private sample and review on a typical playback device.
- Verify frame rate and resolution in the exported file properties. Confirm the expected values such as twenty five frames per second at the target resolution.
- Scan for any artefacts around transitions or effects heavy sections where render previews were used. If something looks off, regenerate the render preview and export again, as a cached render can occasionally carry a minor glitch.
- Keep the timeline set to the source frame rate and avoid last moment changes that would force a cadence conversion.
With this validation, delivery becomes routine again. Even when acceleration is off, export time remains reasonable for many projects, and where larger workloads exist, proxies and balanced render settings help maintain momentum.
Build retest plan for future updates
Given that behaviour depends on the specific build and environment, prepare a short retest script that you can run when a new update arrives. This keeps your workflow ready to adopt improvements while protecting against regressions.
A solid retest script includes:
- Create a new project and import the same two clips used for motion heavy testing.
- Confirm default performance settings, then enable preview decode acceleration and play the clips through a looped segment.
- Record observations about motion pacing. If smooth, retain acceleration and test render acceleration and export acceleration as well.
- If jitter remains, disable decode acceleration and confirm smoothness, then verify that render acceleration does not introduce issues.
- Export short samples and watch across multiple players to confirm that final files are clean.
- Document the build number, driver versions, and OS updates present during the test for future reference.
With this disciplined process, each update becomes an opportunity rather than a risk. It takes a few minutes, yet the payoff is confidence that your edit environment is stable and responsive.
Real world scenarios and quick fixes
In day to day projects, you might encounter moments where the timeline feels slightly heavier even with acceleration off. Perhaps a complex composite segment suddenly stretches responsiveness, or a long grade with multiple masks in a motion rich part adds a small hitch.
Apply these quick fixes:
- Render previews for the specific section and keep them until the cut is locked.
- Disable background tasks that build thumbnails or generate waveforms while you focus on a demanding segment. Filmora typically manages these quietly, but pausing them reduces any chance of interference.
- Split a long clip around the heavy section. This contains the processing area and gives the application smaller chunks to handle.
- Temporarily lower timeline playback resolution while trimming the complex part. Switch back to full resolution for final review.
These simple moves keep motion steady without changing the core settings, and they are compatible with the acceleration off strategy that already proved sound.
Synthesis of observations
At this point, the pattern is clear. The update to the new build did not alter the specific behaviour on this system regarding preview jitter when decode acceleration is active. The workaround that removes jitter by turning off acceleration restores a dependable edit experience, and export files are unaffected by the preview issue.
The investigation illustrated that:
- Preview decode acceleration can introduce subtle timing irregularities tied to system drivers and frame presentation logic rather than to raw decode speed.
- Software decode and render previews restore cadence at the cost of increased CPU load, which is manageable for most projects with modest effects.
- Export acceleration speeds final delivery without harming cadence in the final file, even when preview acceleration is off during editing.
- Proxies and intra frame transcodes offer reliable alternatives for heavy or variable frame rate sources, making timeline motion predictable.
With these findings, you have a recipe for smooth editing while keeping an eye on future updates that may refine accelerated preview timing.
Case notes from motion heavy footage
To ground the guidance, here are concise case notes from edits performed after switching acceleration off. Each case used a looped motion segment for timing evaluation and a render preview for effects heavy areas.
- Street pan with signage and railings in strong contrast. Preview motion stayed smooth across multiple layers including a title and a mild film grain effect. Export matched preview exactly.
- Walking shot through a park with occasional cross traffic. A basic grade lifted shadows and added saturation. Preview cadence remained steady, and frame stepping confirmed even advancement. Export displayed clean cadence.
- Fast handheld sweep in an indoor scene under mixed lighting. A noise reduction effect and a stabiliser were applied. Render previews were necessary for the section with both effects, and once generated the timeline played smoothly. Export matched the preview cadence.
These notes reinforce that acceleration off plus targeted render previews is a straightforward workflow for motion heavy content.
Where to place the last screenshot
This final screenshot placeholder sits alongside the export validation checklist. In practice, you would capture a short sample display with frame rate and playback information to show that an exported file is delivering frames at even intervals. It is a reassurance for your records and for communicating with collaborators who want proof that the cadence is correct.
Final recommendations
Until a future build aligns accelerated preview timing across more environments, keep your workflow anchored on smooth software decode and render previews. The trade off in performance is easily offset by the confidence you gain in edit decisions and the assurance of clean exports. Maintain a tidy system with current drivers, avoid background interference during sessions, and lean on proxies or intra frame transcodes when footage pushes the decode pipeline.
When a new build arrives, run the retest script with a motion heavy loop and check whether decode acceleration delivers steady cadence. If it does, you can reinstate acceleration and enjoy the speed boost with no compromise in motion. If it does not, continue with the balanced settings that resolved jitter and remain productive while waiting for the next refinement.
Editing thrives on predictability. Smooth preview underpins every timing decision and makes trimming intuitive. With the settings and methods outlined here, Filmora remains a dependable tool for crafting sequences with natural motion, regardless of the load or complexity of the footage you bring to the timeline.

If this article helped you in any way and you want to show your appreciation, I am more than happy to receive donations through PayPal. This will help me maintain and improve this website so I can help more people out there. Thank you for your help.
HELP OTHERS AND SHARE THIS ARTICLE
LEAVE A COMMENT
I am an entrepreneur based in Sydney Australia. I was born in Vietnam, grew up in Italy and currently residing in Australia. I started my first business venture Advertise Me from a random idea and have never looked back since. My passion is in the digital space, affiliate marketing, fitness and I launched several digital products. You will find these on the portfolio page.
I’ve decided to change from a Vegetarian to a Vegan diet and started a website called Veggie Meals.
I started this blog so I could leave a digital footprint of my random thoughts, ideas and life in general.
If any of the articles helped you in any way, please donate. Thank you for your help.
Affiliate Compensated: there are some articles with links to products or services that I may receive a commission.