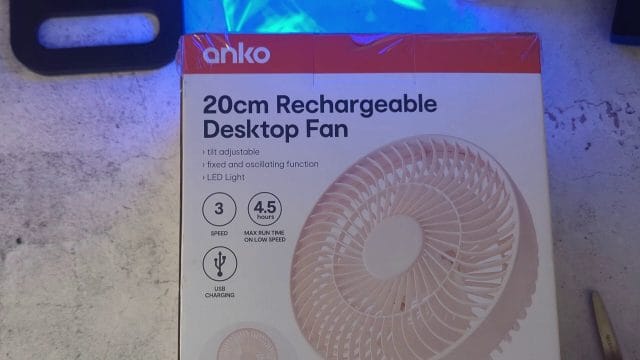
There is a special kind of satisfaction in finding a simple tool that immediately makes everyday work more comfortable. A compact desktop fan that you can place anywhere, without worrying about cables, falls into that category. In this hands on review I unbox and test the Anko twenty centimetre rechargeable desktop fan from Kmart, and share practical insights from real world use. If you have watched the video you might have noticed I initially said Anko at the start. To clarify this is the Anko model from Kmart, and the box and branding reflect that. The focus here is on how well it works, how you can use it to improve your working environment, and whether the features match what a busy home office or travel setup needs.
Below I walk through the packaging, the controls, the charging, the airflow tests using everyday items, and the quirks I noticed with tilt. I also include tips to get the most value from a portable fan, care and maintenance practices, and who I think this suits. If you are considering a rechargeable desktop fan for your desk, bedside, van, or workshop, this practical guide should help you decide.
What A Rechargeable Fan Brings To Everyday Work
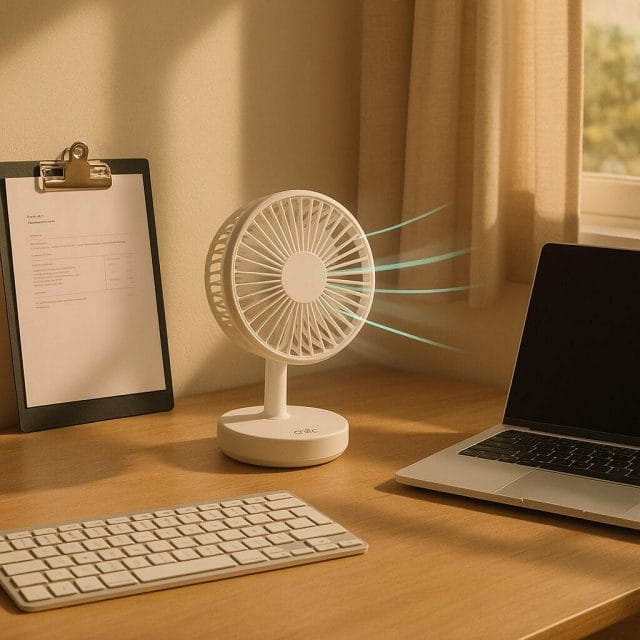
A rechargeable fan frees you from needing to keep it near a wall outlet. That means you can place it wherever the airflow helps most, shift it around during the day, and take it outdoors or into spaces without mains power. If you use a standing desk, move between rooms, or film content where you need a silent helper off camera, a cordless fan can be surprisingly useful. This Anko model includes a USB C port at the back, so you can top it up with a standard cable using a charger, a laptop port, or a power bank. In my testing the fan lasted around five hours in mixed use, dropping to roughly three to four hours at the highest speed. As with any battery powered device real world runtimes depend on speed selection, ambient temperature, and whether you also use the built in light, but this gives you a realistic expectation.
The fan diameter is about twenty centimetres which is a sweet spot for a desk. Bigger blades tend to move more air at lower speed, but compact fans are easier to tuck into a corner and carry between rooms. This one aims to balance portability with useful airflow and adds a few extra features beyond simple on and off.
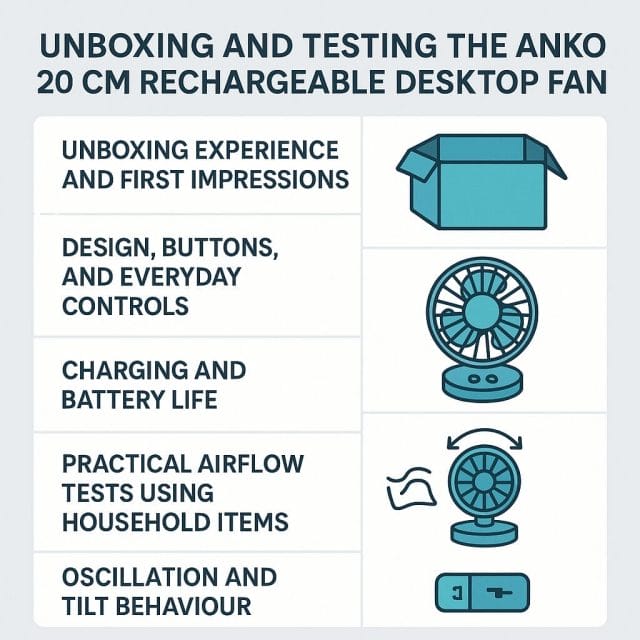
Unboxing Experience And First Impressions
Opening the box sets expectations for build quality and ease of setup. The Anko fan arrives in straightforward packaging. It is not an extravagant unboxing, yet it is practical and unfussy, which often suits tools we want to put straight to work. After cutting the tape on the top flaps I found the internals protected by a clear plastic cover and a plastic bag around the fan. There is a USB cable included, and notably no unnecessary extras to assemble. For a busy workspace, simplicity matters. Pull it out, plug it in if you want to charge immediately, and you are ready.
Sometimes boxes can be a little tricky to open, especially where the flaps and cardboard tabs are tight. Taking a moment to open both sides carefully prevents creases or tearing that might weaken the box if you plan to store it later. Once that was done, the contents came out smoothly. The fan is seated snugly which suggests it will survive transit without scuffs.
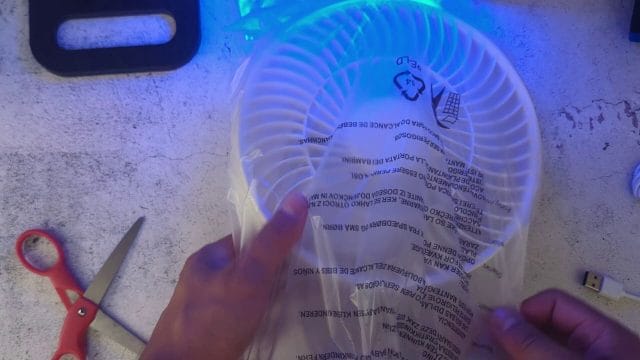
The plastic bag helps prevent dust during storage and transport. There are no loose screws or stands to attach. You can remove the bag and place the fan on the desk straight away. This is particularly helpful if you buy it during a hot spell and need immediate relief. The included cable lets you charge from day one without hunting for a spare. Many people keep several USB C cables around anyway, so this aligns with the modern trend of charging across devices with a single standard.
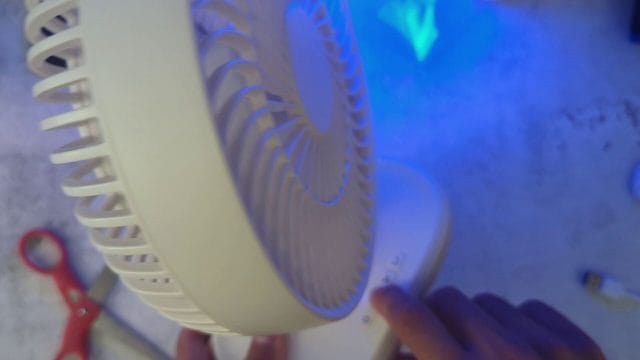
Design, Buttons, And Everyday Controls
On the front base of the fan you will find four clearly labelled buttons. These give you physical control without needing to cycle through a long on screen menu or remote. The layout is intuitive. One is the power button, another controls oscillation, a third sets brightness for the built in light, and the fourth selects fan speed.
Power And Oscillation
The power button toggles the fan on and off with a short press. A tactile click confirms the change which is helpful when you reach for it under low light. The oscillation button moves the fan head side to side, sweeping airflow across a wider area of the room. This is useful in larger spaces or when you share a desk, as it spreads the cooling sensation evenly rather than pointing continuously at one spot. If you are filming or recording audio, you might prefer to keep oscillation off to avoid changes in airflow noise during a take. For casual use, oscillation gives that gentle breeze feeling rather than a jet of air.
Brightness Settings
The brightness button controls a light built into the fan assembly. There are two brightness levels. On the lowest level the light serves as a subtle night light, enough to locate the fan or see your desk items without waking the whole room. On the higher level it becomes a handy utility light for late night reading, light DIY tasks, or keeping visible work notes. Having a light on a portable fan makes it versatile in a caravan, campsite, or during a power outage where a combined airflow and light source can be valuable. Because the light draws some power, it will have a small effect on battery life. If you want maximum runtime during a hot day, use the light sparingly.
Speed Selection And Airflow Character
The speed button cycles through three settings. In my testing the difference between the first and second speeds is not dramatic, but the third speed is noticeably stronger. Not all fans scale speed linearly, and many are tuned so that the jump to the highest setting provides a clear change in airflow. This approach makes sense because the lowest setting aims for quiet comfort, the mid setting offers a stable breeze for most tasks, and the high setting is for when the room is stuffy and needs a quick blast of air.
When you use it at a desk, the first setting is ideal for focused work. It adds a gentle breeze without rustling papers or drying your eyes. The second setting suits warm afternoons, where you want a bit more movement across your face and hands. The third setting is best for air turnover in a room, or when you need to cool down after exercise. Each setting also affects acoustic character. The first setting is whisper quiet, the second is noticeable but comfortable, and the third has an audible whoosh that you will hear in a quiet room. More on noise later in the dedicated section.
Charging And Battery Life
At the back of the fan there is a USB C port for charging. This standard makes it easy to keep the fan topped up using personal tech you already have. You can use a phone charger, a laptop port, or a portable power bank. If you use a high capacity power bank you can extend the runtime well beyond the internal battery. This makes the fan helpful as part of a mobile setup, such as working from a cafe with limited sockets or spending time outdoors.
In real world tests the fan lasted roughly five hours on mixed use, and around three to four hours continuously on the highest speed. The oscillation feature and the light will add small extra draw when enabled. Battery chemistry prefers moderate charge cycles rather than deep discharges. If you plan to use the fan daily, it is kinder to the battery to recharge it when it drops to about twenty to thirty percent rather than waiting until it is fully depleted. Storing it long term, like over winter, with around half charge and in a cool dry place helps preserve capacity.
As for charging time, that depends on the charger amperage and the internal battery size, which is not specified on the unit I tested. In general, using a modern charger will fill it up in a reasonable evening session. A simple way to manage expectations is to charge it while you work, even when you are not at full speed. It will continue to operate while charging, so you can treat it like both tethered and cordless depending on your needs that day.
Practical Airflow Tests Using Household Items
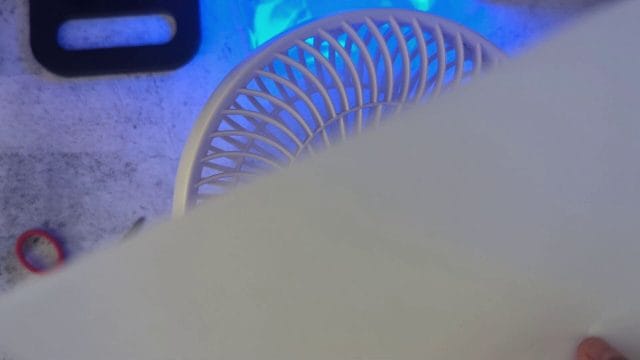
Tools are only valuable if they work in the real world. To gauge airflow without specialist equipment, I use everyday items like a lightweight plastic bag and a sheet of paper. These tests make it easy to visualise the movement and feel how far the breeze reaches.
First I held a plastic bag in front of the fan. The bag is very light, so even a moderate breeze will push it around. With the fan on the first speed the bag lifted and fluttered immediately. This indicates the airflow is sufficient for localised cooling at a desk. As I stepped up to the higher speeds the bag moved more vigorously and held position at a greater distance, which matches the aim of the third speed for stronger output.
The second test used a sheet of paper. I placed it upright a short distance away and observed how much the fan displaced it at varying speeds. On the first speed it pushed the paper enough to tip or slide, demonstrating that the airflow is not just cosmetic. On higher speeds the paper moved around freely and at further distances, confirming that the fan can cycle air across a small room if positioned correctly.
You can repeat these simple tests at home to find the best placement. If the paper barely moves you are probably too far or the angle is not ideal. Move the fan closer, or angle the head so the airflow passes the area you want cooled. In a shared office where you do not want to send papers flying, use clips or place the fan lower so the airflow passes under the paper plane of your desk. For video work where you have a microphone nearby, keep the fan off axis to the mic so airflow is not directed at the diaphragm.
Oscillation And Tilt Behaviour
Oscillation is a highlight for a small desktop fan, but tilt is equally important because it lets you direct the breeze up toward your face or down across your hands and keyboard. In my testing, I noticed a quirk with tilt on this unit. If you set the head at a moderate angle it tends to drift back down rather than hold position, unless you push it all the way up. At the maximum upward tilt it stays put, but at intermediate angles it can settle lower than you chose. This suggests the hinge tension or detent design is a little light for the weight of the head.
There are a few ways to work around this. First, place the fan on a lower shelf or a stack of books and use the maximum upward tilt. This achieves the desired angle without relying on intermediate positions. Second, let oscillation handle horizontal sweep and use slight changes in vertical placement to control height. Third, if you are stationary at a desk, direct the airflow toward a wall to diffuse it and reduce the precise angle you need at the head. If you plan to use the fan while lying down, set it on a raised bedside table and point it upward.
This tilt behaviour does mean that if you require very precise angle control without any drift, you might want to test the unit in store and see if a particular batch has tighter hinges. For most casual uses, it is manageable with the placement tips above. It is the kind of quirk you become aware of during use, and it is worth noting in a review so you can set expectations.
Noise Comfort And Speed Steps
Noise is a key factor for a desktop fan, especially if you take calls, record content, or work in a quiet space. On the first speed the fan is very quiet, producing a gentle background whoosh that many people find calming. It is similar to soft white noise, which can actually improve focus by masking small distracting sounds. On the second speed the noise rises, but it remains comfortable and unlikely to bother most users during normal work or study. On the third speed you can hear it clearly. If you need to record voiceovers, aim for the lower speed or turn it off during takes.
The perceived difference between speed one and speed two is small, while speed three is a noticeable jump. This is common. Fan designers often make the lowest speed as quiet as possible, keep the mid range solid, and provide a high speed that moves air decisively when you need it. The result is you may use speed one most of the time, switch to speed two when the room temperature rises, and only briefly use speed three to circulate air quickly.
For those who enjoy the calming effect of a steady breeze, speed one is perfect for long term comfort without drying your skin or eyes. If you get warm during video editing or while pushing a laptop hard and its internal fans run, speed two helps without adding much acoustic load to the room. Speed three is best for short bursts, such as cooling down after a workout or airing a small area.
Everyday Use Cases That Make Sense
Because the Anko fan is rechargeable, you are not tied to a single spot. That opens up many practical scenarios:
- Home office use. Place the fan slightly off to the side of your monitor and angle it upward for a gentle breeze that helps during long sessions. You will likely settle on speed one for most of the day.
- Bedside cooling. Use the lowest brightness as a night light and speed one for a quiet breeze that does not disturb someone sleeping. Oscillation can be off to keep airflow steady.
- Kitchen and workshop tasks. Move the fan to a bench to help keep air moving while you cook or tinker. Battery power means you do not need to run cables across the floor.
- Camping and caravans. Pair the fan with a power bank and use it in a tent, van, or under a pergola. The light is handy in low light situations, and the oscillation spreads comfort as people move around.
- Photography and video sets. Use it off axis to cool a subject between takes without blowing directly into microphones. The first speed is often quiet enough for most setups.
- Workout recovery. Place it near a treadmill or exercise bike to help regulate temperature, then carry it back to your desk afterwards.
Tips For Setup, Placement, And Air Direction
Optimising airflow is about placement and angle. Here are some practical tips from testing:
- Use vertical placement. If the tilt hinge drifts, lift the fan with books or a stand to achieve the desired height. Maximum tilt up holds better than mid positions.
- Bounce off walls. Point the fan slightly toward a wall to diffuse the flow. This reduces direct blast while still moving air across the room.
- Clip loose papers. Simple binder clips or a desk paperweight stop minor rustle when using speed two or three.
- Keep airflow aligned with your needs. If your hands get warm while typing, direct the breeze across the keyboard rather than at your face. For video editing, side airflow helps keep you comfortable without drying eyes.
- Manage noise in recordings. Keep the fan behind and off axis to the microphone, or use the lowest speed during audio work. If possible, pause the fan during key takes, and resume between scenes.
Care, Maintenance, And Durability
A fan is both an airflow device and a dust collector. Keeping it clean improves performance and extends life. Every couple of weeks, power off the fan and wipe the grille with a microfibre cloth. Compressed air can help dislodge lint. If the blades are accessible, gently wipe them to remove dust build up that reduces efficiency. Avoid harsh cleaning fluids and never soak the unit. Keep the vents clear and ensure the rear intake is not obstructed by papers or objects placed behind the fan.
For battery health, charge with a reputable charger and avoid extremes of temperature. Do not leave the fan in a hot car or in direct sunlight for hours. If a hinge feels loose over time, treat the tilt with care and rely on placement height rather than forcing angles that drift. Periodically check the base pads to ensure they remain grippy. If the fan slides on a smooth desk, a rubber mat can enhance stability and absorb vibration.
Value And Alternatives
Anko is Kmart’s in house brand known for practical everyday products that do not break the budget. This fan fits that mould well. It offers a useful set of features, rechargeable convenience, and straightforward controls without asking you to learn an app or pair a remote. If you primarily need a desk sized fan for personal comfort, it is a sensible pick.
Alternatives might include larger mains powered fans that deliver more power but require a cable. Those are suited to cooling a whole room rather than personal airflow. You could also consider slim tower fans for taller coverage, though they usually lack portability. Portable clip fans are another option if you need to attach to a shelf. However a twenty centimetre fan balances blade size for airflow with shape and weight for simple move anywhere usage. If you value oscillation and an integrated light, this Anko model pulls ahead of simpler compact fans that only offer fixed head operation.
Pros And Cons From Hands On Use
- Pros
- Rechargeable convenience with USB C charging that fits into modern tech ecosystems
- Three speeds with a clearly stronger top setting for rapid cooling
- Quiet low speed that is excellent for focused work and bedtime
- Oscillation spreads airflow across a wider area, ideal for shared spaces
- Built in light with two brightness levels for night time usability and emergency situations
- No assembly required, simple packaging, and ready to use out of the box
- Cons
- Tilt at intermediate angles tends to settle downward, with the head holding better at full upward tilt
- Difference between speed one and speed two is subtle, so some users may treat speed three as the default jump
- Battery life on high speed sits around three to four hours, so for long sessions you will want to plug in or pair with a power bank
A Few Extra Ideas To Get More From It
There are small tweaks that amplify the usefulness of a compact fan:
- Pair it with a smart plug for timed charging if you mostly use it at the desk while tethered. That way you maintain battery health without leaving it on charge constantly.
- Use a simple cable organiser to route the USB C cable so you do not tug it accidentally when the fan oscillates.
- Keep a small dust brush nearby to whisk the grille every few days. It takes seconds and keeps airflow at its best.
- Place the fan near a window during cooler evenings to help draw fresh air across the room without needing a larger unit.
- For content creators, position the fan behind soft furnishings like curtains to diffuse airflow and reduce directional noise.
Testing Recap With Visual Cues
To recap the hands on steps with visual cues, here is the simple flow I followed. Open the box carefully, remove the plastic cover and bag, and set the fan on the desk. Confirm the power and oscillation buttons work smoothly. Check the brightness levels for the integrated light to see if they suit your night use. Cycle through the three speeds and pay attention to the acoustic character at each level. Use a plastic bag and a sheet of paper to get a quick read on airflow at varying distances. Try tilt at your preferred angle, noting the tendency to settle, and adjust placement height accordingly. Finally, test charging with a standard USB C cable and power source you already have to confirm everything is ready for daily use.
With this flow, you quickly learn what the fan can do and how to tailor it to your space.
Final Verdict
The Anko twenty centimetre rechargeable desktop fan is a practical companion for everyday comfort. It prioritises ease of use, portable convenience, and sensible features like oscillation and an integrated light. The three speed design covers most scenarios, with a quiet low setting that is ideal for work and a strong top setting that moves air assertively when needed. Charging via USB C aligns perfectly with modern setups, and the included cable gets you started immediately.
The main caveat is tilt, which favours maximum upward position over intermediate angles. If precise angle control is crucial to you, consider placement tricks or test the hinge tension in person. The difference between the first and second speeds is subtle, but in practice you will likely settle into a pattern of using speed one for long sessions and speed three for quick cool downs, with speed two as a comfortable mid option.
For a budget friendly device that you can buy at Kmart and put to work across home office, bedroom, kitchen, and travel scenarios, it delivers solid value. The light is a thoughtful extra, the oscillation feels nicely paced, and the simple controls make it accessible to anyone. If you want to make your workspace more comfortable without running extension cables everywhere, this compact rechargeable fan earns a place on the desk.
As ever, choose based on your needs. If you want a personal breeze and the flexibility to move the fan wherever it helps, this Anko model is a smart and simple pick.

If this article helped you in any way and you want to show your appreciation, I am more than happy to receive donations through PayPal. This will help me maintain and improve this website so I can help more people out there. Thank you for your help.
HELP OTHERS AND SHARE THIS ARTICLE
LEAVE A COMMENT
I am an entrepreneur based in Sydney Australia. I was born in Vietnam, grew up in Italy and currently residing in Australia. I started my first business venture Advertise Me from a random idea and have never looked back since. My passion is in the digital space, affiliate marketing, fitness and I launched several digital products. You will find these on the portfolio page.
I’ve decided to change from a Vegetarian to a Vegan diet and started a website called Veggie Meals.
I started this blog so I could leave a digital footprint of my random thoughts, ideas and life in general.
If any of the articles helped you in any way, please donate. Thank you for your help.
Affiliate Compensated: there are some articles with links to products or services that I may receive a commission.