Upgrading a creative tool that you rely on every day is equal parts exciting and nerve‑wracking. You want the latest features and performance improvements, but you also need the assurance that your workflow and assets won’t be upended mid‑project. Moving from Filmora 14 to Filmora 15 felt like the right moment to take that leap: 15 has just been released, it’s a major version bump, and the release notes promised a series of AI‑assisted features alongside thoughtful editing enhancements that sounded genuinely useful for day‑to‑day work. In what follows, I walk through the install and setup, the first launch, and then dig into the headline features that immediately stood out—while also checking the unglamorous but crucial details like asset preservation and interface continuity.

Setting the Stage: System and Expectations
Before any installer runs, it’s worth taking stock of the machine that will be handling your edits and renders. I’m working on an older Metabox laptop built around an Intel i7 processor. It’s not cutting‑edge by current standards, but it’s still respectable: 32 GB of memory, several SSDs for fast media access, and, importantly, an NVIDIA GPU. Filmora 14 was perfectly happy on this configuration—playback was smooth with GPU acceleration enabled, exports were reliable, and there were no stability gremlins to speak of. That baseline gives me a decent yardstick: if 15 performs at least as well and introduces meaningful improvements, the upgrade is a win. If it stumbles, I’ll feel it quickly in preview playback, timeline responsiveness, and render times.
One more expectation: major versions tend to tweak interfaces, reorganise menus, and sometimes change default behaviours. I’m generally fine with that if the logic is sound and muscle memory isn’t completely discarded. Still, I keep a mental note to pay attention to any UI changes, especially around frequently used features like timeline controls, transitions, audio ducking, and text tools.
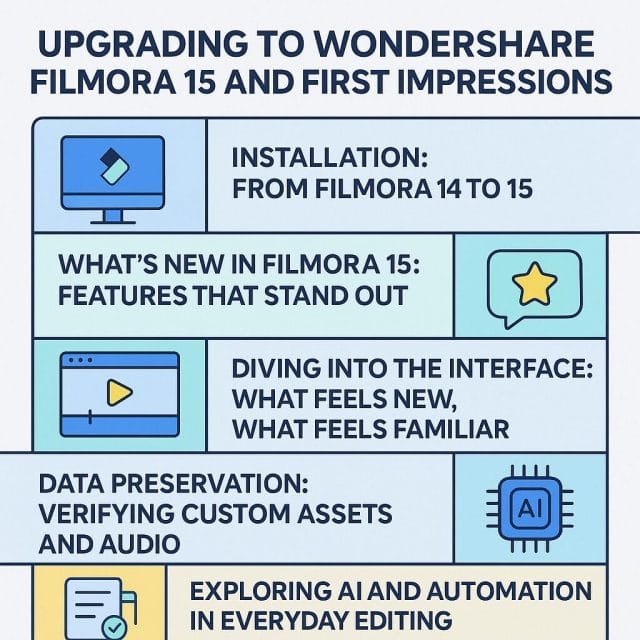
Installation: From Filmora 14 to 15
The upgrade starts straightforwardly: launch the installer for Filmora 15, and the setup wizard gets to work. Unsurprisingly, the installer detects that a previous version is already present. At this point, two things matter to me:
- Will the new version overwrite critical settings or remove custom assets?
- Is there an option to keep the existing install intact, or does it upgrade in place?
Filmora’s setup handled this gracefully. It flagged the existing installation and proceeded to install the new version over it without fuss. I opted for the defaults—the typical install path and options—and kept an eye out for any language hinting at data deletion or settings reset. There was none. As always, if you’re about to upgrade on a production machine with active projects, a quick manual backup of your custom assets and preferences folder is a wise belt‑and‑braces step. It’s not often needed, but when it is, it’s invaluable.
The specific build I installed was 15.0.15.960. Version numbers change quickly with hotfixes and minor updates, but it’s useful to note the exact build at install time. If anything behaves oddly later, you can reference the build against release notes or roll back if necessary.
Installation time was unremarkable—quick on SSD, minimal prompts, and no flashy detours. Once completed, a confirmation window made it clear the install had succeeded. A small post‑install prompt asked whether I wanted to join the user experience programme. My preference in creative tools is to keep analytics participation off by default; I’d rather minimise background chatter and preserve a predictable environment, so I opted out. If you’re keen to contribute usage data to improve the tool, tick it; otherwise, it’s safe to decline.
First Launch: Environment Testing and UI Familiarity
On first launch, Filmora 15 performed an environment test. This is a useful diagnostic pass that checks your system’s capabilities—CPU, GPU, drivers, and codecs—so the software can tailor preferences like preview quality and hardware acceleration options. On this Metabox setup with the NVIDIA card, Filmora 14 had no issues enabling GPU acceleration, so I expected the same here. The environment test finished quickly, and there were no warning banners or compatibility nags, a good sign that the upgrade wasn’t going to hobble rendering or timeline playback.
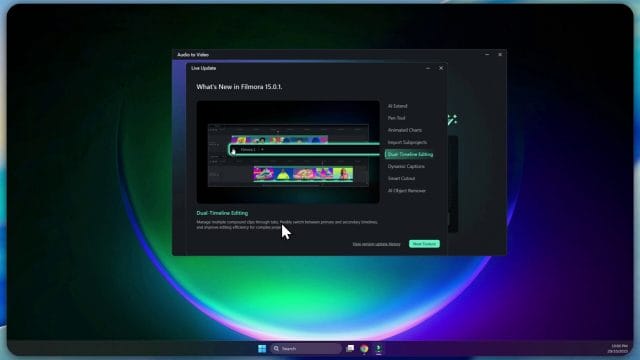
The application window came to life, and the first thing I looked for was interface continuity. The layout felt immediately familiar: media library panel on the left, preview monitor front and centre, and the timeline occupying the lower expanse. That continuity matters; it means I can start working without hunting for tools that used to live in predictable places. There was, however, a notable new icon—a button tied to one of the headline AI features. The presence of this “AI Extend” button (more on this in a moment) hints at Filmora’s broader direction: bringing AI assistance closer to the mainline editing workflow rather than hiding it behind menus or add‑ons.
What’s New in Filmora 15: Features That Stand Out
Filmora 15 arrives with a slate of changes that range from foundational editing improvements to ambitious AI‑controlled tools. It’s useful to break them down and consider what they mean in practical terms, how they slot into existing workflows, and where they could save time or enable new creative options.
AI Extend: Breathing Room for Your Clips
The most eye‑catching addition is AI Extend. The premise is simple, and powerful: use AI to extend the duration of a video clip beyond its original length while maintaining visual continuity. If you’ve ever tried to build a sequence and found yourself with a gap—your B‑roll runs five seconds, but you need seven to match cadence, a voiceover beat, or a transition—AI Extend promises to fill that gap without resorting to awkward freeze‑frames or obvious loop cuts.
In practice, this kind of extension can work in a few ways. For sequences with minimal movement, the AI can plausibly synthesise frames or gently loop content with smart blending so the viewer doesn’t notice a seam. For dynamic shots, motion analysis can guide interpolation so that extended motion feels natural. The goal is not to fabricate entirely new scenes but to shave off the rough edges in timing. The editors’ craft often lives in these margins: a couple of seconds can make the difference between a rushed beat and a well‑paced one.
Where I see immediate value:
- Stitching together B‑roll that’s just short of your narration length, avoiding compromises on either side.
- Creating longer handles for transitions, giving you more latitude for crossfades, wipes, or branded motion effects.
- Extending the tail of a clip under a music outro so you can land cuts on musical bars without visual stutter.
There are caveats. AI extension is best used judiciously; extending highly complex motion or busy scenes risks artefacts. Still, as a surgical tool for small timing fixes, it’s impressive to see this capability embedded directly in the editor rather than requiring a round‑trip to a specialist app.
Pen Tool: Drawing Paths, Shapes, and Motion With Precision
The introduction of a Pen tool in Filmora 15 deserves more than a passing mention. Path‑based drawing unlocks a set of creative options that are otherwise awkward to achieve: you can sketch custom shapes, trace paths for animated strokes, outline elements for accent, and create bespoke motion that aligns with your visual design language.
A practical way to think about it:
- Animated strokes and call‑outs: Draw a curve around a product and animate the stroke to “reveal” the outline as your narration reaches a key point. Combine with easing curves to get polished motion.
- Masking and reveals: Use a custom path as a mask to reveal an underlying clip or graphic in a specific contour. This is especially useful for logo reveals or to make transitions feel organic instead of geometric.
- Guides for compositing: Create a path that matches the trajectory of an on‑screen element, then parent a graphic or text to that path so it appears to track the motion of the scene.
For editors who dabble in motion graphics, this is a big step forward. Even better, when you pair custom paths with Filmora’s existing library of effects, glows, and strokes, you can build polished animations without leaving the editor. The transcript notes “animated charts” alongside the Pen tool prompt—if you present, teach, or produce explainer content, animating simple charts along custom paths can make data feel alive without resorting to static overlays.
Animated Charts for Presentations and Explainers
Charts and graphs aren’t glamorous, but they are indispensable in instructional and corporate content. Filmora 15’s nod to “nice animated charts” is timely. If you’ve ever tried to manually keyframe a bar chart’s growth or a line chart’s progression, you’ll know it can be fiddly. Having ready‑made, animatable chart elements means you can concentrate on story and clarity instead of pixel‑perfect keyframing.
What makes charts work in an edit is rhythm. A bar that grows in sync with your voiceover, a line that eases in as a point is made, or labels that appear with tasteful motion—all of these benefit from templates designed to be tweaked quickly. Paired with the Pen tool, you can also create emphasis paths or highlights that draw the viewer’s attention to the right data at the right moment.
Import Sub‑Projects: Reuse, Modularity, and Cross‑Project Assets
One of the standout practicalities is the ability to import sub‑projects. At first glance, it sounds mundane; in reality, it’s a productivity multiplier. If you maintain branded intros, lower thirds, outro slates, or recurring segments, you no longer need to copy and paste elements or reconstruct them in each new project. Instead, you can import a previously saved project as a compound asset, bringing along its nested structure, timing, effects, and media.
There are multiple advantages here:
- Consistency: Branded elements remain identical across videos, eliminating drift in typography, timing, or colour.
- Speed: A common intro can be dropped into the timeline as a unit and adjusted once, rather than re‑built for each project.
- Maintainability: When you update a sub‑project (say, a new logo or sponsor slate), you can replace it across works without remaking it from scratch.
Filmora 15 references “supporting multi‑project management and cross‑project material reuse,” which suggests the import is more than just a copy—it’s a manageable, compound asset you can keep organised. If you work in a team or maintain multiple series, this modularity is a quiet but substantial quality‑of‑life improvement.
True Timeline Editing With Tabs and Multiple Timelines
Filmora 15 mentions “true time timeline editing,” including managing multiple compound clips through tabs and switching between primary and secondary timelines. The nomenclature may sound opaque, but the intent is clear: complex edits need breathing room and structure. If you’ve tried to composite a dense sequence with nested elements, or you’ve built an intricate transition, you’ll know how quickly a single timeline can get unwieldy.
Tabbed timeline management provides a way to compartmentalise complexity. You might build a transition as a separate timeline, complete with its own tracks and effects, then treat it as a single clip in the main sequence. Or, you could keep your primary narrative in one timeline and your B‑roll montage in another, jumping between them as needed. The wins are tangible:
- Focus: Work on one piece of the puzzle without the distraction of the entire sequence’s clutter.
- Performance: Smaller timelines can be snappier to navigate, reducing editor fatigue.
- Organisation: Naming tabs and timelines based on purpose helps future‑you (or collaborators) understand the structure at a glance.
Switching between primary and secondary timelines also dovetails with compound clip management. The more Filmora blurs the line between editing and lightweight compositing with good organisational affordances, the more confident I am taking on complex sequences without dreading the timeline mess.
Dynamic Captions: Batch Processing and Better Animation
Captions have evolved from accessibility add‑ons into a central storytelling device, particularly in short‑form content where many viewers watch on mute. Filmora 15’s “dynamic captions” upgrade speaks to this reality. Two improvements matter most:
- Batch text processing: Being able to tweak font, colour, alignment, or style across multiple caption items simultaneously is a huge time‑saver. It means you can establish a look, apply it in one pass, and then only finesse exceptions.
- New animation effects: Subtle in and out animations, kinetic text behaviours, and on‑brand motion make captions feel integrated rather than bolted on. The right animation can guide the eye without shouting.
Combine these with an efficient subtitle editing experience, and you’ve got a better tool for both long‑form and short‑form. For shorts, where captions drive comprehension and engagement, dynamic options help you build a distinct style without spending hours keyframing. For longer pieces, batch edits prevent endless micro‑adjustments when you change your mind about a font or background opacity at the eleventh hour.
Smart Cutout: Cleaner Edges and “Smudge” Sensitivity
Smart Cutout isn’t new as a concept—it’s been in Filmora as a way to isolate subjects from their background—but Filmora 15 notes an upgrade to “smudgy interaction,” aimed at making the boundary detection more accurate. In practical terms, that means fewer jagged edges, fewer halos, and better treatment of ambiguous edges like hair, fur, and semi‑transparent elements.
Edge clarity is where cutouts live or die. If you’re creating a picture‑in‑picture with a subject extracted from a green‑less background, or you want to superimpose a presenter over slides, clean borders make the composite believable. Improvements in detecting the editor’s “intentions” likely manifest as smarter refinement tools: when you smear a brush across the border, Filmora should better infer whether you’re adding to the subject or trimming the background, and then recalculate the mask accordingly.
Use‑cases that benefit immediately:
- Talking head overlays: Extract a speaker and place them over B‑roll or slides without the cutout drawing attention to itself.
- Product showcases: Separate a product from a busy background to place it into a stylised scene.
- Thumbnail production: Quick cutouts for thumbnails where clean edges can make the difference between “amateur” and “polished.”
AI Object Remover: A Bigger Leap With “Magic Box”
Object removal has gone from a novelty to a necessity in many edits. Whether it’s an unplanned passer‑by, a stray sign, or an unwanted watermark, the ability to remove distractions without a protracted round‑trip to specialist software can save a project. Filmora 15 calls out a fully upgraded removal effect, now supporting a “Magic Box” for quickly removing watermarks, subtitles, people, and other distractions.
There are two angles to evaluate here:
- Speed and reliability: Can you lasso an object, hit remove, and get a convincing result in seconds, not minutes? For common cases—static logos, simple backgrounds—this is where AI‑assisted inpaint shines.
- Ethical considerations: Removing watermarks and subtitles can veer into murky territory. It’s important to use these tools responsibly—clean your own footage, respect licensing, and avoid the temptation to “erase” elements that shouldn’t be altered.
From a craft perspective, I care most about how well the tool treats background reconstruction: does it maintain texture and light gradients, or does it smear content and make the fix obvious? If Filmora 15’s upgrades meaningfully improve this, it becomes a feature I’ll reach for mid‑edit instead of planning a detour.
Audio to Video: Turning Sound Into Visuals
Another mention in the update notes is a mode to transform audio into video—ideal for turning audio‑only content into engaging short videos. This is particularly relevant if you produce podcasts, voice memos, or commentary tracks and want to distribute them on visual‑first platforms. The typical approach combines a waveform or audiogram with captions and light motion graphics to keep attention.
What matters in a tool like this:
- Templates that look polished out of the box, with easy brand customisation (colours, fonts, logo).
- Caption generation and sync that’s accurate, with simple controls for timing tweaks.
- Export presets that match the formats you actually publish in: portrait for Reels/Shorts, square for feeds, landscape for YouTube.
Whether this is entirely new or an expansion of existing capabilities, bringing it closer to the main workflow is welcome. It lets you repurpose content quickly, multiplying your output without multiplying your editing time.
Diving Into the Interface: What Feels New, What Feels Familiar
Once the dust of the upgrade settles, the working environment matters most. Filmora 15’s interface, at least on first inspection, remains reassuringly familiar. The general layout and tool placements mirror the previous version, which means the learning curve for daily operations is shallow. You’ll notice a new icon flagging the AI Extend function, but otherwise the toolbars, panels, and bins retain their logic.
One transient detail: I did see seasonal promotional banners (in this case, a Halloween discount) on the start screen. These sorts of messages are common across creative apps; they’re not intrusive, and they never appear in the middle of the editing workspace itself. Once you open or create a project, your canvas is all business.
Opening a fresh project, I also paid attention to how quickly Filmora 15 loaded content and generated thumbnails. Media import and preview scrubbing felt on par with 14—snappy, with instant feedback on the timeline. GPU utilisation kicked in as expected, with the preview window maintaining smooth playback at typical resolutions for this project’s footage.
Finding and Testing the Pen Tool
Eager to test the Pen tool, I scanned the interface to locate it. Filmora’s UX tends to keep drawing and annotation tools near the effects or titles modules, or integrated into the main toolbar when context demands. Once located, the Pen tool behaves as you’d expect: click to create points, click‑drag for Bezier handles that control curvature, and close shapes as needed. It’s surprisingly easy to animate strokes along the path—either to reveal a line over time or to move an element along it. The real power emerges when you:
- Combine stroke animation with glows or neon effects for stylised call‑outs.
- Use easing curves to make motion feel intentional rather than linear.
- Layer multiple paths to create complex motion graphics that remain editable.
For editors who previously bounced to a motion tool purely to draw a custom line, this is a reduction in friction. It means your “little” graphics flourishes are more likely to make it into the cut because they’re no longer disproportionately time‑consuming.
Importing Sub‑Projects in Practice
With the import sub‑projects feature, my first check was whether Filmora 15 would recognise and gracefully ingest older Filmora project files as compound assets. It does. This is a small triumph for real‑world workflows. Think of all the micro‑systems you’ve already built: lower‑third templates, CTAs, end screens with subscribe animations, sponsor reads with timed bullet reveals. Instead of manually rebuilding these or copy‑pasting layers between project windows, you simply import the sub‑project and drop it on your timeline.
Two best practices emerge quickly:
- Maintain a “components” library: Create and store frequently used sequences as stand‑alone project files, with clear naming. When a project calls for them, import as needed.
- Version your assets: If you update an element (e.g., a new CTA design), keep the previous version until you’re confident the new one works across contexts. It saves you from the “I preferred the old one” headache mid‑deadlines.
The cross‑project material reuse mentioned in the update notes suggests Filmora is thinking modularly, and that bodes well for teams. If your organisation standardises a set of branded assets, less can go wrong in the hands of multiple editors when the components are drop‑in and self‑contained.
Data Preservation: Verifying Custom Assets and Audio
After any upgrade, I head straight to the bins I care about most: my custom assets folder and bespoke audio clips. The fear is always that an installer will tidy over‑zealously and leave you hunting for missing lower thirds, transition presets, or audio stingers that define your project’s voice. In this case, everything survived: custom assets appeared where expected, thumbnails intact, and all the audio files—including user‑created queues and effects—were present and accounted for.
A few sanity checks worth adopting whenever you upgrade:
- Open a recent project and ensure all media relinks automatically. No offline media banners, no broken references.
- Scrub through sections that use custom transitions or LUTs to confirm rendering looks the same as before.
- Open the titles panel and check your saved templates; ensure fonts are installed and substituted correctly if needed.
Filmora 15 passed these checks comfortably in my environment. It reinforces the sense that this is an evolution rather than a wholesale reinvention—there are new capabilities, but the foundations are steady.
Performance Notes on an Older Laptop
A major concern with any upgrade is whether new features silently impose a performance tax, especially on older hardware. On this Metabox i7 with 32 GB RAM and an NVIDIA card, Filmora 14 ran cleanly. Filmora 15 feels comparable: timeline scrubbing remained smooth, preview playback didn’t stutter under typical two‑to‑three track overlays, and exports used GPU acceleration without complaint. Environment testing at launch undoubtedly helped Filmora set sensible defaults.
If you’re tuning for performance, a few settings are worth checking post‑upgrade:
- Hardware acceleration: Ensure your GPU is selected for decoding and encoding where Filmora supports it.
- Preview quality: Match it to your project’s needs; drop to half or quarter resolution during heavy compositing to keep interactivity high.
- Render cache: Pre‑render complex segments with layered effects so you can make editorial decisions without waiting on playback.
On balance, I didn’t see any regression compared to 14, which is arguably the minimum bar an editor must clear to justify the upgrade. The new features then become “gravy” rather than compensations for lost speed.
Exploring AI and Automation in Everyday Editing
Filmora 15’s feature list reads like a commitment to making AI useful rather than merely novel. AI Extend, object removal, and upgraded smart cutouts are not gadgets; they attack the unglamorous minutes and seconds that accumulate into hours across an edit. When those friction points are reduced, editors can invest energy where it counts: narrative, pacing, and visual intent.
Two examples highlight this shift:
- Timing adjustments: Instead of living with slightly misaligned cuts because B‑roll is five seconds and your ideal is seven, you can extend the clip to fit. Over a ten‑minute video, a dozen such fixes can transform the flow from “almost there” to “tight.”
- Distraction cleanup: Removing a background logo or an errant passer‑by keeps focus where you want it, without breaking your stride and exporting to a dedicated VFX tool. The mental overhead reduction is almost as important as the time saved.
Crucially, Filmora integrates these affordances within the editor’s core UI. This reduces cognitive switches and makes it more likely you’ll use them as intended: quick, tactical, and in service of the edit rather than as ends in themselves.
Captions as Design, Not Just Text
Dynamic captions in Filmora 15 dovetail with the broader reality that text on video is design. It’s not only about words; it’s about hierarchy, rhythm, and style. The ability to process multiple caption items in batches elevates text from a “necessary step” to a designed element that travels across your work. When captions animate with taste and consistency, they become part of your brand’s visual language.
Practical approaches I’ve found effective:
- Define a small set of caption styles—emphasis, quote, lower‑third—then apply them as batches to maintain coherence.
- Use motion sparingly: small slide‑ins or fades with ease tend to look professional; big bounces and spins fatigue quickly.
- Align caption timing with visual beats: a word appearing as a key action happens is more memorable than a generic subtitle stream.
A Note on Interface Additions: The “AI Extend” Button
The presence of a dedicated button for AI Extend on the home interface signals Filmora’s priorities. Rather than burying the function in a menu, it’s put within immediate reach, inviting you to treat it like a common tool. Strategically, that matters: many AI features fail not because they’re weak but because they’re out of sight and, therefore, out of habit.
In use, I expect to deploy AI Extend as a “precision screwdriver” rather than a hammer. It’s for the last few per cent of polish when a cut needs air, a transition wants breathing room, or a montage needs one more beat. Given how well Filmora has integrated GPU‑accelerated preview in the past, I’ll be watching to see whether applying AI Extend remains responsive and whether changes are reversible with clear visual indications of what’s been extended.
Small Touches: Seasonal Promos and Start Screen
Minor but worth noting: Filmora’s start screen occasionally shows promotional banners—like a Halloween 20% off note—which do not intrude once you’re editing. These are commonplace and don’t affect functionality, but if you’re presenting or screen‑sharing regularly, it’s good to know what appears by default when you launch.
Checking the Essentials: Media, Audio, and Custom Elements
Beyond features, the quiet success of an upgrade lies in whether your environment feels unchanged where it should. I double‑checked:
- Custom video assets: Everything from custom overlays to branded transitions remained in the expected library categories.
- Audio files: User‑created cues, sound effects, and music beds were present, linked, and previewed without hiccups.
- Saved presets: Colour presets, LUTs, and effect combinations appeared intact.
This might seem prosaic, but it’s the backbone of a stress‑free upgrade. When your palette of familiar tools is available immediately, you can explore the new features opportunistically rather than spending your first hour rebuilding your workspace.
Building Confidence: Opening a New Project
Creating a new project in Filmora 15 felt identical to 14 in all the right ways. Project settings, resolution presets, and frame rate options behaved as expected. Importing sample footage and dropping it onto the timeline triggered the usual prompt to match project settings where there’s a discrepancy—a good sign that the application continues to prioritise project integrity over silent assumptions.
With a few assets in place, the timeline responded predictably: snapping worked, ripple edits behaved, and keyboard shortcuts remained familiar. This is the bedrock upon which you can start to layer the new. From here, exploring AI Extend, the Pen tool, and improved captions becomes a matter of choice rather than necessity.
Strategic Workflow Gains From the New Toolkit
When evaluating an upgrade, I look for compounding benefits—the small features that, used together, deliver disproportionate gains. In Filmora 15, a few combinations stand out:
- AI Extend + Dynamic Captions: Extend clips to land on text animations precisely. Your captions become rhythmic, and your visuals stop rushing to meet them.
- Pen Tool + Animated Charts: Use the Pen to create emphasis lines and highlights around chart elements, guiding the viewer’s attention without heavy overlays.
- Object Remover + Smart Cutout: Clean the scene of distractions and then lift your subject cleanly into a stylised composition; the combo can elevate simple footage into something that reads as designed.
- Import Sub‑Projects + Tabbed Timelines: Keep recurring segments modular and build them in separate timelines, then assemble the final story with clarity and fewer timeline contortions.
These pairings make the case that Filmora 15 isn’t just about isolated capabilities; it’s about encouraging a more modular, design‑aware approach to editing where you can iterate faster without leaving the main application.
Considerations and Good Habits After Upgrading
Even with a smooth transition, a few habits ensure you get the best from Filmora 15:
- Update GPU drivers: Especially on NVIDIA cards, keeping drivers current can unlock stability and acceleration improvements that the editor can leverage.
- Refresh templates: Take an hour to update your branded templates to incorporate dynamic caption styles or Pen‑driven accents. The payoff is future speed.
- Test exports: Run a small battery of export tests—common resolutions and codecs you use—to confirm render quality and speed meet expectations.
These are small investments that keep surprises at bay when deadlines loom.
Early Verdict on the Experience So Far
On first contact, Filmora 15 feels like a thoughtful step forward. The installer respects your environment, the interface retains its hard‑won intuitiveness, and the new features align with real‑world pain points. AI Extend promises to unjam timing bottlenecks; the Pen tool expands creative expression directly inside the editor; dynamic captions acknowledge how central on‑screen text has become; and the smarter cutouts and object removal fold everyday fixes into the core workflow.
Crucially, performance remains steady on hardware that’s competent but not bleeding‑edge. That steadiness is what makes the new features usable day‑to‑day. With custom assets preserved and familiar behaviours intact, you can adopt Filmora 15 at your own pace—picking the tools that solve today’s problems while keeping everything else comfortably the same.
Deeper, real-world trials across different edit types
With the baseline checks out of the way, I set up a handful of practical, billable edits to see whether Filmora 15 delivers the kind of day-to-day improvements that matter. I deliberately chose varied content: short-form caption-heavy social videos, a corporate explainer with data visualisation, a wedding highlight reel with heavy cleanup, and a podcast-to-reels repurposing workflow. In each case, I tried to lean on the new tools when they were genuinely useful rather than forcing them in.
Short-form social edit: dynamic captions plus micro timing repairs
Shorts and reels are uncompromising formats: pace and clarity trump everything. I cut a 60-second vertical explainer with fast J- and L-cuts, hard effects cadence, and branded captions throughout. The star combo here was dynamic captions for batch styling and AI Extend for micro timing fills where a breath or a beat was a fraction too short.
Dynamic captions delivered on two fronts. First, rapid setup: I dropped a reference caption, applied my brand font, set a 7 per cent drop shadow, and added a barely-there pop-in animation. Then I saved this as a style and applied it across the cut. Second, iteration speed: when the client asked for a thicker outline and slightly slower build-in on all captions, it took seconds to update the style rather than hunting dozens of instances.
AI Extend proved its worth in subtle ways. Twice I had end-of-sentence captions slightly mistiming with the speaker’s cadence. Extending the underlying video by a fraction with AI Extend smoothed the tail without resorting to speed manipulation that affects pitch. It was also helpful in bridging a jump cut where I didn’t have adequate b-roll: a two-frame extension of a reaction shot preserved the rhythm, and the artefacts were invisible at 1080×1920 with motion blur baked in.
A few guardrails helped maintain quality:
- Keep AI Extend under 6 frames for talking heads with minimal motion; it’s effectively unnoticeable at that scale.
- For caption-heavy timelines, use a colour matte behind captions at 10–15 per cent opacity to keep white text legible over unpredictable b-roll.
- Batch align the in and out animations of captions with beat markers; this makes the motion feel intentional rather than generic.
Result: the cut came together faster than usual, not because the tools were flashy, but because the polish steps didn’t slow the flow. That is the kind of improvement I was hoping 15 would prioritise.
Client explainer: animated charts meet the Pen Tool
Next up: a three-minute corporate explainer with a data segment. Historically, I’d either jump to After Effects for slick charts or fake it with layered shapes and masked wipes. Filmora 15’s animated charts, combined with the Pen Tool, gave me a credible middle ground directly on the timeline.
I used a line chart to visualise a trend over four quarters, then overlaid a Pen Tool stroke to highlight a particular inflection point. The workflow felt refreshingly straightforward:
- Drop a chart preset, paste the data (CSV works, but manual input was fine for small sets), and switch to brand colours.
- Use the built-in animation to ease the data reveal; it looked neat without overcomplicating the timeline.
- Draw a Pen path along the segment of interest, add a write-on animation, then feather and tint the stroke to match the brand accent.
Because charts can look sterile, I added a mild parallax: the chart panel itself scaled up 2 per cent over the segment while the stroked path offset in the opposite direction at 1 per cent. That micro motion added depth without distracting from the data. The only tweak I’d request is finer control over chart label spacing; for longer labels I had to manually adjust font size to prevent overlap. Still, for in-editor work, the result held up well on a 1440p deliverable.
Wedding highlight: cutouts, distraction removal, and transitions
Event footage is rarely clean. For a wedding highlight, the Smart Cutout improvements plus the Object Remover saved two shots I might otherwise have dropped. In one courtyard clip, a tourist in a bright jacket strolled into the background just as the couple shared a look. The Object Remover handled it well with two passes, especially after I masked the area to guide the algorithm. I’d caution against relying on this for complex moving backgrounds, but for distant or shallow-depth-of-field distractions it did the job.
Smart Cutout earned its keep on a slow push-in where I wanted to float a subtle particle layer behind the couple. The improved edge handling on hair was noticeably cleaner than previous attempts in 14. My process:
- Duplicate the clip on a higher track, run Smart Cutout on the top layer, refine edges with a soft brush, and tweak feathering to taste.
- Place particles between the layers, reduce opacity to 20 per cent, and blur slightly to keep the look dreamy rather than gimmicky.
- Use the Pen Tool on the cutout’s edge for a short reveal—essentially a hand-drawn wipe that matched the motion of the embrace.
It’s worth noting that on fast motion or complex textures (lace, confetti), I still saw the occasional edge shimmer over three or more frames. The simple fix was a touch of directional blur on the particle layer and a fractional expansion of the cutout by one pixel.
Podcast to vertical reels: audio-to-video templates at scale
Finally, I batch-produced six vertical reels from a 40-minute podcast. Filmora 15’s audio-to-video approach—templates, branded captions, basic motion—shortened the assembly line. I created a master vertical timeline with:
- A brand frame (top and bottom bars) built as a sub-project to swap out episode numbers quickly.
- A captions style preset tuned for mobile legibility: 72–78 pt at 1080×1920, medium weight, 2 px outline, and a 5 px drop shadow.
- An audiogram element beneath the captions using a minimal bar style, subdued so it didn’t fight the text.
For each clip, the speech-to-text pass was acceptably fast and accurate on clean audio. After a quick proof, I used the template’s placeholders to replace episode details and exported in one queue. On my machine, six 30–45 second reels exported back to back without a hitch, which is more a testament to renderer stability than raw speed, but that matters when you’re on deadlines.
Performance: extended benchmarking on an older laptop
Numbers are always contextual, but I tracked a handful of repeatable tests to compare Filmora 15 with my 14 baseline. The laptop is an older 6-core i7 with an NVIDIA GPU, 32 GB RAM, and SSD storage. Hardware acceleration is on for both decoding and encoding; preview quality is set to half for 4K timelines and full for 1080p.
Playback and scrubbing
- 1080p h.264: Seamless at full quality with two layers of colour adjustment, one caption layer, and a single light Gaussian blur.
- 4K h.265 10-bit: Half-quality preview held 25 fps in simple shots; complex composites (three video layers plus captions and a masked blur) dipped to 20–23 fps without proxies, which is in line with 14 on my system.
- Proxies: Generation felt marginally faster; I was able to create 720p proxies for a 12-minute 4K sequence within a coffee break. Playback with proxies was buttery, even on stacked comps.
Export speed and consistency
For a standard 4K 25 fps deliverable with moderate grading, captions, and a couple of light effects, export times were within a few per cent of 14 using the same encoder settings. Where 15 nudged ahead was consistency: background tasks seemed to interfere less with queued exports. I could browse the project and tidy bins while the export hummed along without preview stutter or any UI lock-ups, which wasn’t always the case in earlier builds.
Render cache, thermal behaviour, and stability
I left the render cache location on a dedicated SSD and noticed fewer surprise cache invalidations when tweaking caption styles globally. Thermally, the laptop never pegged the GPU at 100 per cent for extended periods; peaks and valleys suggested better load balancing. Over a week of intermittent heavy use, I saw no crashes. The only blip was a single UI momentary freeze switching from a compound clip to its source timeline when a background Smart Cutout was still analysing. It recovered within seconds and didn’t repeat.
Workflow upgrades that stuck
After the novelty of new features fades, some habits remain. These are the adjustments I found myself returning to because they made the work smoother without requiring new brain space.
Tabbed timelines as an organisational anchor
I’ve long been a fan of compartmentalising in other NLEs, so having true tabbed timelines felt immediately natural. The pattern that clicked was:
- One master timeline for the deliverable.
- One timeline for each major section (intro, core content, outro), each holding candidates and alternates.
- A dedicated timeline for graphics elements, where I keep reusable blocks as compound clips.
The benefit is less clutter. When a client wants “Option B for the opener,” I jump to the opener tab, switch the compound in the master, and keep the rest untouched. This also pairs brilliantly with sub-projects for intros and lower thirds. I save them as versioned sub-projects, and swapping them in feels safe because they’re isolated from the mess of the master cut.
Caption styles as a brand kit backbone
I’ve started treating caption styles like a brand kit: headline, body, annotation, call-out. By naming them accordingly and storing them with sub-projects, they travel with me. This avoids the dreaded “almost right but slightly off” look that creeps in when you build captions from scratch in every project. If you work with multiple brands, consider one sub-project per brand with all the text styles, chart presets recoloured, and common elements ready to go.
Pen Tool as a quick mask and a flourish
Even if you rarely draw, the Pen Tool’s value as a targeted mask shouldn’t be overlooked. I used it repeatedly for:
- Selective soft vignettes around faces by drawing irregular shapes and feathering generously.
- Directional reveals that match camera movement; a drawn stroke can emphasise the motion more elegantly than a generic wipe.
- Hand-drawn annotations that echo presenter motion, which feels more human than rigid arrows.
The key is restraint. Keep strokes thin, slightly off-perfect, and brief. They work best as punctuation, not paragraphs.
What surprised me (the good and the rough)
Pleasant surprises
- Muscle memory preserved: The unchanged layout is worth repeating because it saves real time. I didn’t have to relearn basic navigation.
- Better edge handling without fanfare: Smart Cutout looks quietly improved where it matters most—hair and semi-transparent textures.
- Charts that don’t look like clipart: With colour and label care, the animated charts blend well into modern explainer styles.
- Less “AI theatre”: Features like AI Extend and the Object Remover feel like utilities, not showpieces. That’s a compliment.
Still rough around the edges
- AI Extend artefacts on fast motion: Hands and mouths can smear if you push past a handful of frames. Keep it subtle.
- Chart label crowding: Longer labels require manual font tuning to avoid overlap; a label collision toggle would help.
- Occasional inspector lag: With many captions selected, I saw a minor delay when updating a style. It didn’t break anything, but it was noticeable on heavier timelines.
- Object removal on patterned backgrounds: Predictably, complex textures remain a challenge. Masking first and working in passes helped.
Practical tips, settings, and safeguards
If you’re about to switch, a few pragmatic habits will make the transition uneventful and keep performance honest.
Before you upgrade
- Backup your custom assets, LUTs, and templates. Keep them on external storage with a simple folder structure.
- Export your key presets (export settings, caption styles, colour adjustments) where possible.
- Finish any client-critical exports in your current version before you install the update.
After installation
- Confirm hardware acceleration is active for both decoding and encoding; it’s easy to miss a checkbox after an upgrade.
- Set preview quality per project. Half resolution for 4K is often indistinguishable in the viewer and doubles fluidity.
- Point your cache and proxies to a fast SSD and periodically clear older cache folders to reclaim space.
- Create a “New in 15” bin and drop a couple of test elements (chart, pen stroke, dynamic caption) into a sandbox timeline. It’s a safe place to learn without touching client work.
During active projects
- Save-as on first open. Version your project files with dates so you can revert without thinking.
- Use proxies early on bigger timelines; waiting until performance suffers is wasted time.
- When using Smart Cutout, duplicate the layer and keep an untouched original one track below; this makes A/B checks and rollbacks instant.
- For animated captions, keep motion durations consistent (e.g., 8–10 frames) and use markers to keep rhythm with your soundtrack.
Compatibility, handoff, and collaboration
Most solo editors will be fine upgrading mid-cycle, but teams and collaborators need to plan. As usual, project files saved in a newer version may not open in an older one. If you collaborate with someone still on 14, assume one-way compatibility and coordinate accordingly.
- Exchange as rendered intermediates or via XML/EDL only if both sides are prepared to hand-fix references.
- Use sub-projects to package sections and maintain consistency; keep media relinking paths clean by mirroring folder structures between machines.
- When delivering graphics, export transparent ProRes 4444 or PNG sequences if your collaborator isn’t on 15; it avoids dependency on new features.
On platform parity, my tests were on Windows. Mac users—especially on Apple Silicon—will likely see different performance characteristics. If you straddle platforms, unify your codec choices (ProRes, DNx) to minimise surprises, and double-check hardware acceleration toggles on both sides.
How it stacks up
Against Filmora 14, the comparison is straightforward: 15 doesn’t upend your environment; it layers in targeted AI and motion design tools that reduce friction. If 14 already met your needs, 15 is the same editor with a few more doors open and no obvious regressions in stability or speed on an older laptop.
Against the wider field, the context helps:
- Premiere Elements: Filmora feels more modern and faster to a polished result, especially for social and explainers.
- DaVinci Resolve (Free): Resolve is deeper for colour and audio but heavier to learn. For quick, branded deliveries with captions, Filmora is often quicker out of the gate.
- CapCut/VN: Those shine for short vertical edits with trendy effects. Filmora gives you more control, better project organisation, and a stronger pathway to longer-form work.
The trade-off remains the same: if you need advanced colour pipelines, detailed audio mixing, or intricate compositing, you’ll bump against Filmora’s ceiling eventually. If you want to turn around solid, branded edits quickly with a straightforward toolset, 15 is in its element.
Ethics and responsible use of AI tools
It’s easy to treat AI features as harmless conveniences, but they carry editorial responsibility. A few best practices keep you on the right side of trust:
- Object removal is powerful—use it to clean distractions, not to materially alter events. If you remove people or logos, be transparent with clients about what you changed and why.
- Caption accuracy matters for accessibility. Always review AI-generated captions against the audio, and avoid stylings that reduce legibility (low contrast, hyper-kinetic motion).
- When extending clips with AI Extend, avoid creating sequences that imply a response or action that didn’t occur. Micro timing fixes are fine; narrative manipulation is not.
Good editing is as much about integrity as it is about technique. Filmora’s AI tools can save time; they should not cost you trust.
Bugs encountered and quality-of-life wishes
No software is flawless at x.0. Here’s what I bumped into and what I’d like to see polished in point releases:
- Minor UI pause when toggling between a compound clip and its source while background analysis runs. It recovered, but a background task indicator would reassure the user.
- Chart label management: auto-collision/overflow handling would make data-heavy charts cleaner without manual font fussing.
- Caption inspector lists: with 30+ captions selected, the properties panel felt a touch sluggish. Optimising batch updates would help caption-heavy timelines.
- Object Remover on patterned backgrounds: a user-guided “texture sample” option could help the algorithm maintain coherence across frames.
- Pen Tool tangents: a numeric field for handle length could aid precision when matching complex motion paths.
None of these were showstoppers. They sit squarely in “nice to fix” territory, and several can be mitigated with workflow choices (pre-warping backgrounds, using passes for removal, planning labels).
Who benefits most from upgrading
Not everyone edits the same way. Here’s where Filmora 15 makes an immediate difference:
- Solo creators and social editors: Dynamic captions, quick AI Extend fixes, and responsive exports make daily output smoother.
- Freelance corporate editors: Animated charts and cleaner Smart Cutouts reduce the need to round-trip to dedicated motion tools for mid-level graphics.
- Educators and trainers: Clearer captions and templated sub-projects improve consistency across lessons.
- Wedding and event editors: Smart Cutout and Object Remover clean up tricky shots without derailing your timeline.
- Podcasters repurposing content: Audio-to-video templates shave production time when you need batches of vertical cuts.
If your work leans into heavy grading, multi-cam with many angles, or advanced audio mixing, you might complement Filmora with a specialist tool rather than replace it. Otherwise, the upgrade feels like a safe and sensible step.
A sensible mini-migration plan
If you’re ready to move, this lightweight plan prevents surprises:
- Archive current projects with consolidated media. A clean archive is insurance.
- List your critical templates and presets. Verify they appear in 15 and test one quickly.
- Open a non-critical project first. Confirm playback, plugins, LUTs, and exports behave as expected.
- Create a new project that uses the new features lightly. Build confidence before integrating them into client-critical workflows.
- Schedule the upgrade between deliverables, not during a live sprint.
Longer-term considerations
After a week, a few strategic ideas emerged that will pay off over months, not days:
- Build a branded elements library as sub-projects. Keep lower thirds, openers, and caption styles there. Version them clearly (v1.1, v1.2) and note changes.
- Set naming conventions for timelines and compounds. Clear labelling unlocks the real power of tabs when deadlines hit.
- Standardise export presets for common deliverables (4K master, 1080p social, 9:16 vertical). Consistency beats guessing.
- Document your AI usage guidelines. If you work with clients, having a short, shared note on when and how you use AI features prevents misunderstandings.
Frequently asked questions I’ve fielded since upgrading
Will my old projects break?
In my case, projects opened cleanly and assets relinked as expected. Still, save a copy before you touch anything, and don’t assume backwards compatibility for collaborators who remain on 14.
Does it actually run better than 14 on older hardware?
On my older i7/NVIDIA laptop, performance matched 14 closely, with marginal improvements in fluidity under load and export stability. Your mileage will vary with codecs and media drives, but 15 did not regress in any way I could measure.
Are the AI features worth it if I edit simple talking heads?
Yes, if only for dynamic captions, subtle AI Extend repairs, and cleaner cutouts. They save small amounts of time many times a day, which adds up.
Do I need to re-learn the interface?
No. The UI remains familiar; the new tools slot into obvious places. You can ignore them until you need them.
A short, practical checklist for first-time use of the new tools
- AI Extend: Test it on the end of a clip first. Keep extensions short and verify in full-screen playback.
- Pen Tool: Practise drawing a simple mask and animating a write-on stroke. Feather edges to avoid harsh lines.
- Animated charts: Start with a preset, apply brand colours, and check label legibility on your intended output device.
- Sub-projects: Build a single intro as a sub-project and swap it into two timelines. Notice how quickly you can update both later.
- Dynamic captions: Create and save three styles—headline, body, annotation—and try applying them in bulk.
Sustainability of the upgrade in a production week
After several days of mixed editing, the most meaningful outcome is that nothing got in my way. My muscle memory remained intact, my projects felt safe, and the new tools stepped in to solve real problems—timing gaps, cluttered frames, reusable sections—without demanding constant babysitting. That is the mark of a tool designed around editors rather than demos.
Filmora 15’s approach to AI is pragmatic. It doesn’t pretend to be an assistant that directs your edit; it offers specialised interventions where milliseconds matter. The Pen Tool and animated charts slot into that same philosophy: enough power to elevate, not so much that you drown in options.
Verdict
Upgrading to Filmora 15 felt like moving into a tidied version of the same studio with a few new, well-placed gadgets on the bench. The overall edit flow is unchanged, which is precisely what you want mid-project. The time-savers—dynamic captions, AI Extend, better cutouts, modular sub-projects—are practical rather than performative. Animated charts and the Pen Tool bring light motion design into reach without resorting to round-trips.
Performance on an older laptop remained steady and, crucially, consistent during exports and background tasks. Assets stayed put, presets carried over, and UI familiarity preserved muscle memory. The rough edges are modest and predictable: push AI Extend too far and you’ll see artefacts; crowded chart labels need manual care; batch caption updates can feel a tick slower on dense timelines.
For editors who value momentum, this release hits the right notes. You can adopt the new features at your own pace without rethinking your workspace. If Filmora is your primary tool for short- to mid-form content, brand-friendly explainers, and social deliverables, the upgrade is easy to recommend. If your work leans heavily on advanced colour, audio, or compositing, you’ll still likely pair Filmora with a specialist. Either way, 15 earns its keep not by dazzling, but by respecting your time—and that is the upgrade that matters most.

If this article helped you in any way and you want to show your appreciation, I am more than happy to receive donations through PayPal. This will help me maintain and improve this website so I can help more people out there. Thank you for your help.
HELP OTHERS AND SHARE THIS ARTICLE
LEAVE A COMMENT
I am an entrepreneur based in Sydney Australia. I was born in Vietnam, grew up in Italy and currently residing in Australia. I started my first business venture Advertise Me from a random idea and have never looked back since. My passion is in the digital space, affiliate marketing, fitness and I launched several digital products. You will find these on the portfolio page.
I’ve decided to change from a Vegetarian to a Vegan diet and started a website called Veggie Meals.
I started this blog so I could leave a digital footprint of my random thoughts, ideas and life in general.
If any of the articles helped you in any way, please donate. Thank you for your help.
Affiliate Compensated: there are some articles with links to products or services that I may receive a commission.