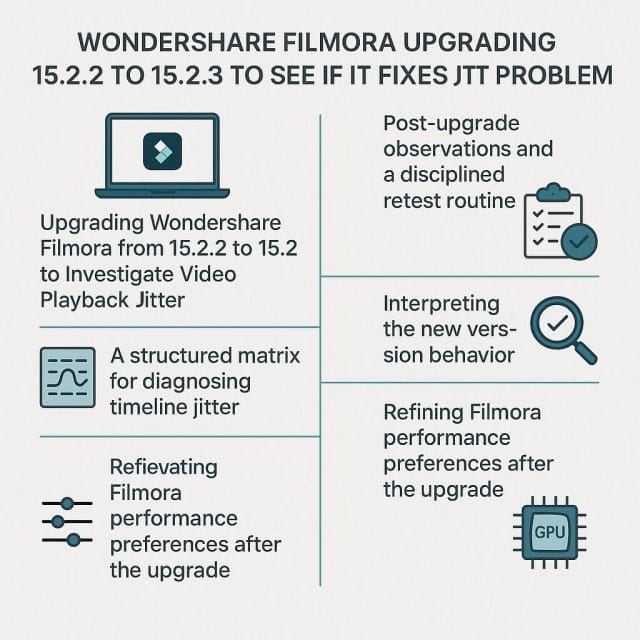
When a creative workflow is interrupted by jitter during video playback, every small improvement and patch release becomes a beacon of hope. Discovering that Wondershare Filmora has released version 15.2.3 is the sort of moment that prompts a careful upgrade followed by a forensic look at performance settings, GPU usage, and project configuration. The aim is simple yet vital. Achieve smooth preview playback so that editing decisions are based on confident evaluation rather than guesswork.
In this guide we walk through the full upgrade journey from Filmora 15.2.2 to 15.2.3, and explore the performance options that potentially affect jitter in timeline preview. Along the way you will see how to verify the version change, how to run the GPU compatibility check, where to enable and disable hardware acceleration, why full restarts matter, and what to do when an upgrade does not fully resolve the issue. We will also dive into deeper troubleshooting, including frame rate alignment, proxy creation, driver updates, power management, and media preparation. The goal is a systematic approach that puts you in control of how Filmora previews and renders your content.
First Steps: Checking for the Filmora Update
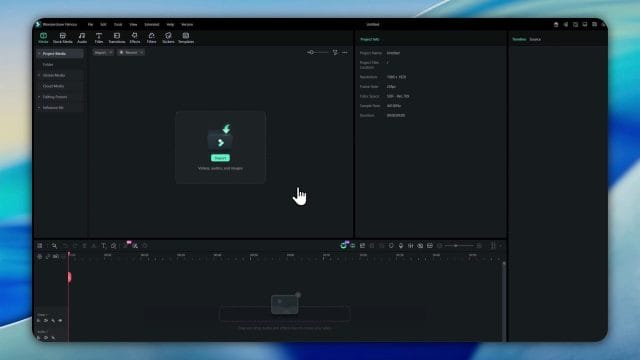
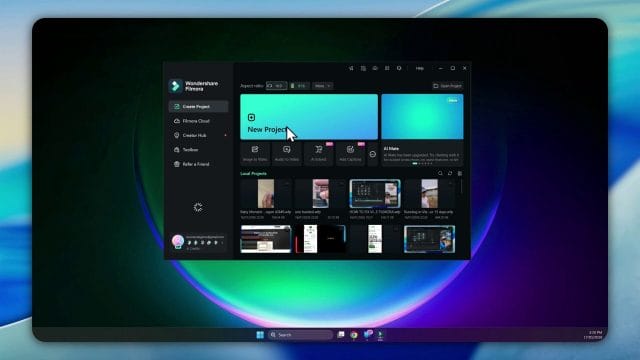
The starting point is the update notification. When Filmora signals that a new version is available, the most direct path is to use the built in update flow. From within the application you can initiate a check so that Filmora confirms your current version and fetches the latest build if available.
If you are still on Filmora 15.2.2, you should see that 15.2.3 is offered as an upgrade. The release note indicates that bugs have been fixed and overall experience has been improved. For anyone who has been battling jitter in video playback, that phrasing invites a test. The hope is that the preview engine has been refined, that GPU paths are more reliable, or that internal caching has been tuned. Ultimately the proof will be in how your timeline behaves after the upgrade.
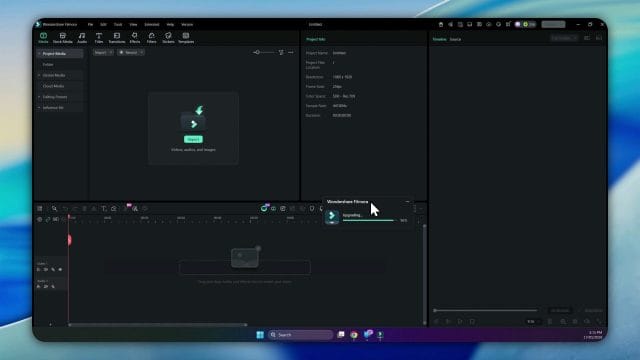
Begin by choosing the update option. Filmora will download the necessary files and apply changes to the application. You will see progress messages indicating that the upgrade is underway, followed by an update phase as components are switched out and verified. Since this is a minor version bump, the process is typically quick, but it is still wise to avoid working in any open projects during the installation. Save your work and close timelines if you want to be cautious.
Understanding the Version Bump from 15.2.2 to 15.2.3
A move from 15.2.2 to 15.2.3 implies that the change set is focused on refinement rather than dramatic feature additions. Minor version increments in creative editing software often include performance corrections, codec handling adjustments, preview engine tuning, and bug fixes reported by users. Even small alterations to how the application interacts with graphics drivers can influence the smoothness of timeline playback.
Jitter in video preview can arise from a mix of factors. The editing app may be decoding frames with uneven timing, the GPU may not be engaged for certain codecs, cached preview segments may be missing or invalid, or the project may be configured with frame rate and resolution settings that do not align with the source footage. A small update that addresses any of these layers can, in practice, reduce or eliminate stutter. With that in mind, the next step is to complete the upgrade and prepare to test under controlled conditions.
Completing the Upgrade and Restarting Filmora Cleanly
Once the upgrade has been applied, Filmora will prompt you to restart the application. Accept the restart so that the new components load correctly. After Filmora closes, give it a moment to complete any background tasks. Then relaunch Filmora fresh. If Filmora leaves an update confirmation window open, close that window as well and relaunch from your usual application shortcut. This ensures that you begin from a clean baseline, with the new version fully active and without lingering update dialogues.
When Filmora opens, confirm the version number. You should see 15.2.3 indicated in the About or Help section. This is your assurance that the system has shifted from 15.2.2 and that any internal changes promised in the release are now in place. With that validation complete, move on to performance configuration before opening the project where jitter has been observed.
Engaging the Performance Settings and GPU Options
Filmora provides performance settings that influence how preview and rendering are handled. These options can be found under Preferences, often under a Performance tab. Here you can enable or disable hardware acceleration for video rendering, choose whether Filmora attempts to use your GPU for decoding and encoding, and access a GPU compatibility check tool.
If your system has an NVIDIA graphics card, Filmora can often utilise its capabilities for decoding certain formats and for accelerating preview rendering. The exact benefits depend on the codec and resolution of your footage as well as driver support. Using the GPU compatibility check is a sensible step right after an upgrade. It reassesses the environment and confirms that Filmora can successfully engage the GPU.
Before changing toggles, take a moment to note the current state of your settings. If you had previously disabled certain acceleration options in an attempt to troubleshoot jitter, record that configuration. After an upgrade it can be useful to re enable acceleration to see whether Filmora has improved GPU integration. Conversely, if jitter persists, you may test by disabling acceleration again. The key is to make one change at a time and observe the effect under consistent preview conditions.
Running the GPU Compatibility Check
Within the Performance settings, select the GPU compatibility check and allow Filmora to run through its procedure. This tool assesses the current graphics environment and applies any necessary internal flags so that Filmora knows which tasks can be offloaded to the GPU. If the check completes successfully, Filmora will usually suggest a restart. Accept this prompt. Close Filmora entirely and reopen it. The restart is not a mere suggestion. It ensures that the preview engine reinitialises with the updated GPU paths active.
If your graphics device is NVIDIA, the check should acknowledge it, possibly listing the card model and confirming that acceleration is available. If an issue is detected, Filmora may indicate that certain features will revert to CPU processing. This is an important signal. Jitter during preview is more likely when the CPU must handle all decoding and effects in complex timelines. However, if acceleration is misapplied or unstable, preview can be uneven even with GPU support. That is why testing both modes can be informative.
Why Closing Pop up Windows Matters Before You Test
After the GPU check and restart, make sure any remaining pop up or background windows are closed. If the update completion panel remains on screen, close it, then relaunch Filmora again. Start from a fresh launch rather than continuing inside a post update environment. This helps ensure that no transient processes or partial resets interfere with performance.
With a clean start, open the specific project where you previously observed jitter. Keep notes ready about what sections of the timeline were affected, which clips were involved, and the nature of the stutter. Was it consistent across the timeline, or did it happen at the start of playback and then settle. Was it more pronounced when certain effects were active. Being precise about the context will help you interpret the results after the upgrade.
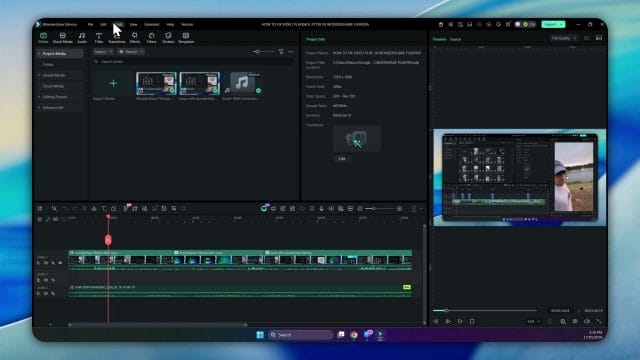
Opening the Problem Project and Initial Observations
Load the project that presented jitter in earlier testing. Do not change any settings yet. Press play in the preview panel on the section where stutter was most obvious. Watch for frame skipping, micro pauses, or uneven motion. Listen for any audio fluctuation, such as minor crackle or audio drift coinciding with the video hesitation. If jitter persists immediately, switch to a different section of the timeline to see whether it is universal or localised.
If you are using footage such as an early morning run clip filmed on a smartphone with ducks by the water, consider whether light conditions, motion content, or camera settings could be influencing preview behaviour. Footage captured outdoors at dawn often has dynamic exposure. If the phone records at a variable frame rate, the timeline preview can be taxed more heavily unless Filmora or your system is optimised for variable rate decoding.
Enabling Hardware Acceleration After the Upgrade
If your previous troubleshooting disabled acceleration, turn hardware acceleration back on in the Performance preferences. Enable GPU support for video rendering and decoding if those options are available. Apply the changes and run the GPU compatibility check again to ensure that Filmora recognises the card and updates its internal configuration. When Filmora prompts for a restart, accept and relaunch the application.
After relaunch, again ensure no extra windows are left open. Open the same project and play the same segment. Observe whether the jitter is reduced, whether the start of playback is smoother, and whether scrubbing is more responsive. If the improvement is subtle, try switching the playback resolution in the preview panel from full to half or quarter to see whether lower preview resolution helps. Filmora often allows you to do this from the preview window controls. This does not change the export quality. It simply lightens the load during playback.
If Enabling Acceleration Does Not Help
If acceleration is on and you still see stutter, disable it. Return to Preferences and uncheck hardware acceleration for video rendering and any related decode options. Apply the setting, restart Filmora, and test the same timeline. Observe whether the behaviour changes. Sometimes, due to driver interactions or codec specifics, a system can preview more evenly using CPU processing alone. The only way to confirm is to test methodically.
If the jitter remains even with acceleration disabled, the upgrade alone has not resolved the issue, and the cause likely lies in media properties, project configuration, or system resources. In that case, shift to deeper troubleshooting. Before doing so, clear Filmora temporary preview files if that option exists within Preferences. Some editors maintain a cache of rendered preview segments, and stale cache data can introduce uneven playback. After clearing the cache, restart again and retest.
How Filmora Preview Differs from Final Export
It is essential to understand that the preview panel is a real time simulation of what the final edit may look like. Filmora must decode frames from your source media, apply any effects and transitions, composite overlay elements, render text, and output the result to the preview window all in real time. Depending on the complexity of the timeline, this can exceed the capability of your system to deliver a perfectly smooth video stream at the target frames per second. By contrast, final export can take its time. Filmora can process frame by frame without the constraints of real time. As a result, an export may be perfectly smooth even if the preview was jittery.
This distinction means that preview optimisation is its own task. You want to help Filmora achieve real time play by reducing demands during preview and by aligning project settings to the media properties. The following sections guide you through the major areas that influence jitter.
Match Project Settings to Source Footage
When a project frame rate does not match the footage frame rate, playback can introduce uneven motion. For example, if your camera has recorded at thirty frames per second but the project is set to twenty five frames per second, Filmora must drop frames to match the project. The resulting motion can feel less fluid, especially in moving subjects such as runners or ducks gliding across water. Conversely, if the project frame rate exceeds the footage frame rate, Filmora may duplicate frames to reach the target. That can also manifest as slight stutter.
To align settings, open Project Settings within Filmora and set the frame rate to match the majority of your clips. If the footage was recorded at a variable frame rate, consider transcoding it to a constant frame rate before importing it into Filmora. This single change can transform preview stability.
- Identify the frame rate of your source clips by right clicking on the media in the media library and viewing properties.
- Open Project Settings and choose the same frame rate as your footage. If most clips are thirty frames per second, set the project to thirty frames per second.
- Ensure the resolution matches your media as well. If clips are full HD, set the project to full HD for preview tests.
- If you have mixed frame rates, consider aligning the project to the most common rate and handling the exceptions with dedicated transforms or by pre processing those clips.
The reward for this alignment is a preview engine that no longer has to reconcile mismatched timing on every frame.
Use Proxy Media for Demanding Footage
Filmora includes options to create proxy files for high resolution or high compression footage. Proxies are lower resolution or easier to decode versions of your clips used during preview. They reduce strain on the CPU and GPU while preserving edit precision. When you export, Filmora uses the original high quality sources, so the final output retains full fidelity.
Seeking smooth preview, proxies are a powerful option. If your footage is four K resolution or encoded with a heavy codec, proxies can prevent jitter while you edit.
- Open Preferences and locate the section for proxy creation or performance optimisation.
- Enable automatic proxy generation for clips above a certain resolution.
- Import your clips and allow Filmora to generate proxies. This may take time. Let the process complete before intensive editing.
- Once proxies are active, test the timeline playback again. You should see improved smoothness in the preview panel.
If you already have imported clips, you may need to right click them and choose to generate proxies manually. After creation, Filmora will use the proxies for the preview while maintaining links to the originals for export.
Configure Preview Quality and Playback Resolution
Filmora allows you to adjust preview quality and the playback resolution within the preview window. When jitter occurs, lowering the preview resolution to half or quarter can reduce decoding and rendering demands. This change can be applied quickly while you evaluate whether other settings are effective.
- Locate the preview window settings and choose half or quarter resolution.
- If available, disable high quality preview during performance troubleshooting.
- Reduce overlay detail where possible while previewing complex segments.
- Turn off intensive effects temporarily to isolate their impact on preview.
Edit decisions can still be made at lower preview resolution. Set resolution back to full when you need to check fine details and colour grading. The balance is between smooth motion for timing evaluation and full resolution for visual precision.
Check GPU Driver State and Update Graphics Drivers
After a Filmora upgrade, the next source of influence is your graphics driver. If your system uses NVIDIA, make sure the driver is current and stable. Outdated or beta drivers can produce unexpected behaviour. A driver update can alter decode performance and preview stability. Use the official NVIDIA software or direct downloads from the NVIDIA site to update your drivers.
- Open NVIDIA software tools and check for driver updates.
- Install a recommended driver rather than a beta release to prioritise stability in editing software.
- Restart your computer after updating the driver to clear old libraries from memory.
- Open Filmora, run the GPU compatibility check again, and restart the application before testing playback.
Where possible, avoid installing optional graphics utilities that change behaviour across applications. Keep the driver environment simple, as creative software prefers predictable GPU states.
Optimise System Power Settings for Editing
Windows power management can influence CPU and GPU performance. If your system is set to a balanced or power saving plan, the processor may not boost consistently under load during preview. Adjust your power plan to high performance so that the system maintains higher clocks during editing sessions.
- Open Windows Power Options and select a high performance plan.
- Check that the graphics adapter power settings are also set to maximise performance.
- Disable any automatic power throttling utilities that may lower performance during media playback.
- Ensure that your laptop, if used, is connected to power. Battery conservation can limit GPU performance significantly.
Consistent performance reduces jitter, especially at the beginning of playback when components ramp up. Smooth playback is more likely when the system maintains stable output.
Assign Filmora to the Discrete GPU
On systems with both integrated graphics and a discrete card, you should ensure that Filmora is using the discrete GPU. In Windows you can set per application graphics preferences. In NVIDIA Control Panel you can also assign Filmora to the preferred CUDA device.
- Open Windows Graphics Settings and add Filmora to the list of apps with custom graphics preferences.
- Choose the high performance GPU for Filmora.
- Open NVIDIA Control Panel and set Filmora to use the discrete card explicitly.
- Restart Filmora, run the GPU compatibility check, and retest playback.
If Filmora was previously running on integrated graphics, this change can be the difference between jitter and smooth preview. Make sure that the discrete GPU is active before commencing your tests.
Clear Filmora Cache and Re render Previews
Filmora may cache certain preview renders. If these files are out of date or corrupted, you can experience odd stutter where the cache attempts to serve frames that do not match the current timeline state. Clear the cache using preferences if Filmora offers that option. Then use the render preview function to pre render complex segments of the timeline. Once a preview has been pre rendered, Filmora can play it back as a simple stream rather than attempting to compute effects in real time.
- Open Preferences and clear temporary files and preview cache.
- Select sections of the timeline that include multiple effects and transitions and choose to render the preview.
- Wait for the progress bar to complete before playing the segment.
- Test playback. Pre rendered sections should now play with improved smoothness.
This approach is effective for segments that combine text overlays, colour adjustments, transitions, and speed changes, all of which increase demand during preview.
Evaluate Codec and Container Choices in Your Footage
The codec used to compress your video heavily influences how difficult it is to decode in real time. Highly compressed formats such as high efficiency video coding can be particularly challenging, especially at higher resolutions. If your device records in such formats to save storage, consider transcoding to an editing friendly format before bringing the footage into Filmora. The container also matters. Some containers interleave audio and video differently, which can affect smooth preview if the decoder is not fully optimised.
- Identify the codec and container of your source clips by using media properties within Filmora or a media analysis tool.
- If the codec is highly compressed, transcode to a format that is easier to decode, such as a high quality intermediate codec.
- Maintain a constant frame rate during transcode rather than variable rate.
- Import the transcoded clips into Filmora and test playback again.
Transcoding adds a step to your workflow, but it can stabilise preview dramatically, especially for smartphone footage recorded in challenging conditions.
Address Variable Frame Rate in Smartphone Clips
Many smartphones record video with a variable frame rate to handle changing light and motion. This can produce files where frame timing fluctuates. Editing software can handle such files, but preview smoothness may suffer unless a constant frame rate is enforced. If you have an early morning run clip with ducks, recorded quickly without custom settings, there is a good chance it uses variable timing.
To remedy this, transcoding to a constant frame rate is recommended. Choose a frame rate that matches your intended project, such as twenty five or thirty frames per second. The transcode creates an evenly timed stream that Filmora can decode predictably.
- Use a trusted transcoding tool to convert your smartphone clip to a constant frame rate.
- Choose a high quality setting to preserve visual detail.
- Import the result into Filmora and align project settings to the chosen rate.
- Play the previously problematic segment and observe whether jitter is reduced.
This single change often resolves micro stutter where the edit software struggled with fluctuating timing in the source file.
Check Audio Sample Rate and Synchronisation
While jitter is typically associated with video, audio configuration can play a role. If the audio sample rate of the source clip does not match the project audio rate, the software must resample in real time, which can add CPU load and increase the chance of uneven playback. In addition, if audio is recorded with variable timing, synchronisation can drift slightly, adding to the perception of jitter.
- Inspect the audio sample rate in your source clips. Common rates are forty four point one kilohertz and forty eight kilohertz.
- Set the project audio rate to match the most common rate in your clips.
- If mismatch is unavoidable, transcode audio to a uniform rate alongside video when creating constant frame rate versions.
- Ensure that Filmora is not applying heavy audio processing during preview that could add latency. Temporarily disable effects to test.
Even if audio is not the root cause, simplifying audio processing during preview can make video playback smoother.
Consider Monitor Refresh Rate and Synchronisation
Your display refresh rate can influence perceived smoothness. If your monitor is set to a refresh rate that does not divide evenly into the project frame rate, visual cadence can feel slightly off. While this is more of a perception issue than a strict decoding problem, it contributes to the feeling of jitter.
- Check your monitor refresh rate in display settings.
- If possible, choose a refresh rate that is a multiple of your project frame rate. For example, sixty hertz aligns with thirty frames per second.
- Ensure that any adaptive synchronisation features are stable with your graphics card and drivers.
This is a subtle area, but aligning refresh behaviour can improve the visual experience during preview.
Test With a Clean Project to Isolate Variables
If the problem project still shows jitter after you adjust performance settings and drivers, create a new clean project and import a single clip from the original footage. Do not add effects. Set the project frame rate to match the clip. Test playback. If the clip plays smoothly, the stutter may be linked to the original project timeline, possibly due to multiple layers or complex effects. If the clip still jitters, the source footage or system performance is likely at fault.
- Create a new project with default settings adjusted to match your clip.
- Import a single clip and place it on the timeline without effects.
- Play the clip in full and observe motion.
- Repeat with a transcoded constant frame rate version to compare.
This comparison isolates whether the issue is linked to project complexity or to the media itself. It is a useful way to narrow the scope of troubleshooting.
Understand the Limits of Hardware Acceleration During Preview
Filmora supports hardware acceleration for rendering and, in some contexts, for decoding. However, not every effect is accelerated, and not every codec benefits from GPU paths. Some effects may require CPU processing even when acceleration is enabled. As a result, timeline segments with multiple non accelerated effects can still exhibit stutter during preview.
This is not a flaw so much as a design limit. Even professional grade editing suites exhibit similar behaviour when asked to play back complex compositions in real time. The solution is either to reduce the load during preview by disabling certain effects or to pre render the segment so that playback draws from a rendered cache.
Apply Smart Rendering Strategies in Filmora
When you have a segment with many adjustments, apply a smart rendering strategy. Use markers to identify points where playhead motion stalls. Render the segment, then play back to confirm smoothness. If you have motion effects such as speed changes, make sure they are applied last in the effect stack to reduce layered computation during preview.
- Place markers at the start and end of a complex segment.
- Render that section using Filmora preview render tools.
- Test playback across the rendered segment and note any improvement.
- If issues remain, simplify effects temporarily to isolate which element causes stutter.
By applying this structure, you can keep creative flexibility while maintaining workable preview behaviour.
Case Study: Early Morning Run Clip with Ducks
Consider an outdoor clip captured at six in the morning during a run. The scene includes moving subjects, quick camera pans, and water motion with ducks gliding. The light is soft and changing, and exposure adjustments happen on the fly. This type of content is beautiful yet challenging for real time preview. There is considerable motion in the frame, and the smartphone camera may engage dynamic exposure and noise reduction that complicate decoding.
In such a case, jitter can be reduced by preparing the footage carefully. Transcode to a constant frame rate, adjust the project frame rate to match, and use proxies for preview. Test the clip in a clean project. If the preview is still uneven, reduce preview resolution and pre render the segment. This combination often yields smooth motion even when the original clip is demanding.
Why the Filmora Upgrade Alone May Not Resolve Jitter
Returning to the Filmora upgrade from 15.2.2 to 15.2.3, it is entirely possible that the internal improvements affect certain codecs or fix specific bugs without changing the preview behaviour that matters for your exact footage. When an upgrade does not resolve jitter, it does not imply that Filmora has ignored performance. It simply means your issue lies in a different layer. Your system drivers may need attention, your project may need alignment to footage, or your media may require preparation to achieve constant timing.
That said, upgrades are valuable because they remove known obstacles. Proceed with the deeper measures described here. Combine driver stability, acceleration configuration, proxy usage, and frame rate alignment. Each layer contributes to a preview experience that feels predictable. Many editors find that such a holistic approach eliminates jitter even when a single change did not appear to help.
Practical Checklist After Upgrading Filmora
Use the following checklist as a field guide for the next steps after moving to 15.2.3.
- Confirm that Filmora shows version 15.2.3 in the About window.
- Open Preferences and review Performance settings. Enable or disable hardware acceleration as needed for testing.
- Run the GPU compatibility check, then restart Filmora.
- Close all pop up windows and start Filmora fresh before testing.
- Open the problem project and test the exact segments where jitter was seen.
- If jitter persists, match the project frame rate to your footage.
- Enable proxy creation and allow Filmora to generate proxies for heavy clips.
- Lower preview resolution temporarily to half or quarter.
- Update graphics drivers to the latest stable release and restart the computer.
- Assign Filmora to the discrete GPU in system settings and NVIDIA Control Panel.
- Clear preview cache and pre render complex segments.
- Transcode variable frame rate clips to constant frame rate and re import.
- Align audio sample rate in the project with your clip properties.
- Check monitor refresh rate and synchronisation features for stable display behaviour.
- Create a clean project for baseline testing with individual clips.
Work through the checklist methodically. Take notes on each change and its effect. This makes it easier to isolate what resolves jitter in your environment.
Deep Dive: What Causes Jitter in Timeline Preview
Jitter can be understood by breaking down timeline preview into stages. Filmora must read compressed video from disk, decode it into raw frames, synchronise audio, apply effects and transitions, composite overlays, and display the result. The pipeline length and the computational cost of each stage determine whether frames are delivered to the preview window at the target rate.
Decoding stage. If the codec is complex, the decoder may struggle to output frames on time. Hardware acceleration can help, but only if the codec aligns with supported acceleration paths. Otherwise, CPU decoding must handle the load, and if the CPU is not sufficient, frames arrive late.
Effects stage. Colour correction, denoise, sharpening, and motion transforms add per frame computation. If these are layered, the cost rises. Filmora must compute these within the frame time budget. Any overrun produces a dropped or delayed frame.
Compositing stage. Text overlays, picture in picture, and transparency blending add to the frame work. Some of these are accelerated, others are not. The balance determines overall load.
Display stage. The monitor refresh rate and graphics driver present the final image. If the display pipeline stalls, frames can be displayed unevenly even if computation was on time.
Storage stage. If the media resides on a slow drive, read speeds can limit decode performance. Video files are large and require sustained throughput.
Project alignment stage. If frame rates are mismatched or if video and audio are resampled, additional computation is required per frame, reducing the margin for smooth playback.
By addressing each stage deliberately, you can convert a jittery timeline into a smooth preview without sacrificing final quality.
Storage Considerations for Preview Smoothness
Media files should be stored on a fast disk. If your footage sits on a traditional hard drive with limited read speed, decoding may be starved of data during preview. Move your source media to a solid state drive where possible. Keep the project and media in a location with ample free space so that Filmora can create temporary files without contention.
- Place project files and media on a fast storage device.
- Avoid external drives with low bandwidth during editing, unless they are high speed devices.
- Keep the drive free from heavy background tasks during editing sessions.
- Defragment traditional drives if still in use, although solid state drives do not need this maintenance.
Stable storage throughput contributes to consistent frame delivery in the decode stage.
Memory and Background Task Management
Preview can be disrupted by background tasks that consume CPU or memory resources. Close other heavy applications before editing. Ensure that system update processes are not running in the background. Keep antivirus scans away from your media folders during editing sessions, as real time scanning can delay file reads.
- Open Task Manager and close applications that compete for CPU and GPU resources.
- Pause any scheduled scans or backups while editing.
- Ensure that Filmora has sufficient memory available and that the system does not begin swapping data to disk during preview.
Optimising the environment prevents sudden dips in performance that manifest as jitter at random moments.
Validate Export Behaviour Separately
As you troubleshoot preview, run a short export of the problematic segment to see whether the final output is smooth. If the export is clean, you have confirmation that the jitter is purely a preview issue. You can continue editing using proxies and pre render strategies with confidence that the final video will be unaffected. If the export also exhibits jitter, the issue is more likely rooted in frame rate mismatch or codec features that need attention during transcode.
- Mark in and out points around the jitter segment.
- Export to a standard format and play the result in a reliable player.
- Compare motion between the export and the Filmora preview.
This simple test frames your expectations and guides where to invest your troubleshooting effort.
Respect the Restart Prompt and Start Clean
The upgrade and GPU compatibility check both prompt you to restart Filmora. Use these restarts. They ensure that configuration changes take effect throughout the preview engine. In addition, it is good practice to close any update windows that remain and to relaunch Filmora from your normal shortcut rather than continuing from the upgrade flow. This gives the application a clean context and reduces the chance of partial initialisation that could contribute to jitter.
If you made changes to preferences, restart once more before testing the timeline. Changes to acceleration and decoding options often require a reinitialised preview engine to be fully applied. Skipping a restart can lead to false impressions about whether a setting helps.
Organisation Tips Within Filmora During Troubleshooting
Keep your timeline organised as you test. Use track names for layers, disable individual tracks to isolate where jitter is introduced, and remove effects temporarily from specific clips to see if one effect is responsible. When possible, duplicate a sequence and apply changes to the duplicate so that you can compare behaviour directly without losing your original design.
- Name your tracks clearly and group related elements such as titles separately from video layers.
- Mute individual tracks to see whether their presence changes preview performance.
- Use the visibility toggle on overlay elements to reduce compositing during tests.
- Apply changes in small steps and test after each change.
This is an editorial discipline that helps you see the effect of each change and prevents confusion about what improves or worsens preview.
When Disabling Hardware Acceleration Does Not Help
In some scenarios, disabling hardware acceleration is attempted as a way to stabilise preview. If it does not help, the implication is that the jitter source is not tied to GPU instability but to media properties or to project configuration. In this case, lean on proxies, transcode to constant frame rate, and align project settings. If these actions do not change behaviour, inspect whether your system is thermal throttling or whether background tasks are interfering unexpectedly. You may also experiment with turning off audio effects and normalisation to reduce combined processing loads.
Document Outcomes to Build Your Own Performance Profile
Every system has unique characteristics. Document outcomes for each change, including notes about the clips used and the timeline segment tested. Over time you will identify patterns. Perhaps your system previews most smoothly when proxies are generated for four K clips, when the project is aligned to thirty frames per second, and when graphics drivers are kept current. Or perhaps constant frame rate is the determinant. Capture these insights and base your future workflows on them. Editing becomes smoother when your system is tuned consistently.
Remember to Close Filmora Properly Between Tests
A minor yet important habit is to close Filmora fully between certain tests. If you are toggling hardware acceleration, or after you have run the GPU compatibility check, do not simply apply the setting and continue. Close the application and restart. If an update window is left in the background, close it. Then start from your start menu or desktop shortcut. This ensures that Filmora begins from a known state. It can make the difference between an effective test and a misleading one.
Assess the Nature of Jitter During Scrubbing Versus Playback
Scrubbing through the timeline with the playhead is different from pressing play. Scrubbing requests frames out of order quickly, which exercises the decode engine in a different way than sequential playback. If jitter is observed only during scrubbing, it may be expected at high scrub speeds unless proxies are used. If jitter occurs only when playback starts and then smooths out, the issue may be initial buffer fill or effect cache. Use pre roll in your tests to see whether starting a few seconds before the complex segment improves continuity.
- Scrub slowly and then more quickly to test the bounds of preview behaviour.
- Start playback a few seconds before the jitter point to see whether continuity improves.
- Render the complex segment and test again.
Careful observation helps you choose the right mitigation strategy.
Final Thoughts on the Upgrade and Next Steps
Discovering that a Filmora upgrade is available offers a chance to improve day to day editing experience. Installing 15.2.3 from 15.2.2 is straightforward, and it is sensible to hope that jitter will be reduced by updates to the preview engine. If the upgrade does not deliver a direct fix, the work outlined above provides a comprehensive route to smooth playback. Enable acceleration, run the GPU check, and restart cleanly. Try the project with acceleration on and off. Align frame rates, create proxies, and adjust preview quality. Update drivers and power settings. Transcode variable frame rate clips to constant frame rate.
With patience and systematic effort you can build a preview environment that reflects your creative choices accurately, even when source footage is demanding. As you refine your settings, the edit will become a pleasure again, with the timeline flowing as smoothly as those ducks on a calm morning river.
Post upgrade observations and a disciplined retest routine
With the system upgraded to the new version, the first priority is to run the same repeatable checks that revealed jitter before. Consistency matters. If you change too many variables at once, you will not know which adjustment helped. Work through the earlier checklist, but expand the scope. Add a time coded log, take notes on visual smoothness, and record any audio irregularities. The goal is to quantify preview behaviour and reduce the guesswork.
Begin with your original problem project and play it from the start to the end without interruption. Observe the first five seconds for warm up stutter, then the mid section where effects and overlays are stacked, and finally the outro where titles and audio fades often coincide. If you used markers in the earlier phase, they will help you compare like for like. If not, drop new markers at the points that previously revealed jitter and annotate them with simple labels such as start, heavy effects, audio crossfade, transition, and colour grade.
Now repeat the run with a different preview resolution. Switch from full to half and then to quarter, and record any change in smoothness. Toggle hardware acceleration in Preferences and restart when prompted. Re run the same playback segments and collect notes. If the new version resolves some stutter while acceleration is enabled, that points to better device handling by the software. If smoothness improves only when acceleration is disabled, you may have a driver or device issue that still needs attention.
Export a short section where preview is jittery and compare the final file in a separate media player. If the export is smooth, the jitter is a preview limitation or a configuration issue, not a rendering defect. This distinction protects your delivery timelines while you continue to pursue smoother real time editing.
A structured matrix for diagnosing timeline jitter
Instead of random toggling, use a matrix that combines three dimensions. These dimensions are decode load, effect load, and display constraints. Each dimension can be low or high, and the combinations will expose bottlenecks.
- Decode load low and effect load low and display constraints simple: baseline smoothness.
- Decode load high and effect load low and display constraints simple: decoding bottleneck likely.
- Decode load low and effect load high and display constraints simple: compositing and effect computation likely.
- Decode load high and effect load high and display constraints simple: the most demanding setup, expect stutter unless proxies or pre renders are used.
- Decode load low and effect load low and display constraints complex: display and refresh alignment likely.
- Mixed cases with audio filters and transitions: keep these separate in your notes to catch audio related sync drift.
Apply this matrix to three clips from your project. Transcode one source to a constant frame rate intermediate, leave one original as is, and create proxy media for the third. Duplicate the timeline section and swap in the different versions one by one. Record behaviour at each step. When the proxy version plays smoothly and the original stutters, the decoding path needs help. When the constant frame rate intermediate plays smoothly and the original stutters, variable frame rate is the culprit. When both versions stutter only after adding effects, the computation budget is exceeded in real time.
Interpreting the new version behaviour
The version upgrade can improve device compatibility, reduce per frame overhead for certain internal effects, and adjust threading decisions inside the render engine. However, a sustained change in preview smoothness will still depend on your configuration and media. Use the following interpretation guide.
- Improved warmth of playback within the first second from pressing play: the software may now pre warm device resources more efficiently.
- Reduced stutter during motion intense scenes without heavy overlays: decoding path improvements are likely.
- Smoother compositing with multiple tracks and titles: internal effect optimisation is likely, but this can vary by effect type.
- No change with acceleration toggles: your bottleneck is not the device interface but a different stage such as display or audio.
- Persistent jitter only at transition boundaries: transitions can demand brief bursts of compute and memory bandwidth, try pre render for those sections.
If your notes point to reduced jitter in some areas but not others, resist the urge to declare victory. Target the remaining weak spots with specific interventions and keep the improved sections as a baseline that should not regress while you continue tuning.
Refining Filmora performance preferences after the upgrade
Return to Preferences and confirm the device acceleration options. Some updates may add sub options or change their default states. Run the device compatibility check again and accept the restart prompt. Then open the performance panel for proxy generation and adjust the target resolution so that it matches your project needs. If you are editing at full high definition and your source is ultra high definition, a proxy at full high definition is a sensible choice. If you are editing at thirty frames per second, keep the proxy frame rate consistent with your project. Avoid mixing proxy settings that introduce mismatched frame rates, as this adds resampling cost to the preview path.
Clear the preview render cache after a version upgrade. The cache was built under older runtime assumptions, and a rebuild can remove stale data that confuses the new render engine. In Filmora you can remove render files for the project or clear caches via preferences. After clearing, pre render the same complex sections again and note the difference.
Evaluating GPU assignment and system level optimisations once more
Even if you covered driver updates and device assignment previously, revisit them. Version changes can alter how a program is identified by the system and discretion can slip. Open your system graphics settings and confirm that Filmora is assigned to the performance GPU. Relaunch the software after making changes. In the device control panel, verify that the power setting for the video editor is set to prefer maximum performance, not adaptive. This reduces frequency swings during playback.
Open Task Manager and observe the CPU, GPU video decode, GPU three dimensional, and storage graphs while you play the timeline. If the GPU video decode graph is flat while the CPU spikes, your acceleration is not being used for the current codec or clip arrangement. If the GPU video decode graph rises and remains steady while three dimensional activity spikes at effect intense areas, your pipeline is using device acceleration for decode and also using device compute for composition. These are good signs. If your storage graph peaks and dips sharply during playback of large clips, consider copying those clips to a faster drive and relinking them in the project.
Presenting a visual checkpoint
While working through a retest, a visual checkpoint helps you confirm that settings and timeline behaviour are in line with expectations.
Use the checkpoint as a reference for panel layout and markers. Keep the preview window, timeline, and performance panels visible. Simplify window arrangements to reduce clutter. Close any non essential panels that may update in real time and consume compute or draw calls during playback.
Impact of titles, animations, and overlays on live playback
Titles and animated overlays are high level visual components that can be deceptively demanding. The text itself is light, but the animation curves, shadows, glows, and blending modes increase the per frame workload. While pre renders help, there are additional strategies.
- Use simpler title templates with fewer effects for rough cuts. Reserve complex title treatments for final pass or pre rendered sections.
- Avoid stacking multiple animated overlays at once. Sequence them and keep overlaps short. This spreads compute load.
- Reduce opacity and blending complexity where possible. Multiplying blend modes adds work during composition.
- Rasterise or snapshot static title frames when the motion is complete. Filmora allows you to add static frame captures to the timeline.
For motion heavy overlay items, consider pre rendering a composite clip. Place the overlays and background on a temporary sequence, render it out, and reimport the composite as a single track. You lose some live adjustability, but for segments that will not change much, this can rescue real time playback in the main edit.
Transitions and their effect on real time smoothness
Transitions vary widely in their complexity. Some dissolve or fade transitions are simple, while certain stylised transitions perform advanced per pixel operations. Test with basic transitions first when preview jitter is a concern. Replace complex transitions with dissolves and see if your playback stabilises. Then reintroduce complex transitions gradually and pre render those sections when needed.
Keep transition durations modest. Extremely short transitions can cause rapid changes in the compositing path that the preview engine must chase. Slightly longer transitions may give the pipeline enough time to settle. Match transition length to motion intensity. For a fast panning shot, a shorter dissolve can feel natural. For a slow or static shot, a longer dissolve can be smooth and restful.
Stabilisation, speed changes, and time remapping
Stabilisation is helpful for handheld footage but also computationally heavy. If you enable stabilisation on a clip, expect preview demands to rise. Pre render immediately after applying stabilisation if the timeline starts to stutter. Stabilised results can be smooth enough to merit the extra pre render step.
Speed changes and time remapping are often involved in creating dynamic sequences. Variable speed clips require frame interpolation, and this becomes demanding. When preview stutter appears after a speed change, try these steps.
- Create a separate sequence for the speed affected clip, render it to a constant frame rate intermediate, and reinsert the result into the main timeline.
- Reduce the number of clips with speed changes playing at the same time. Sequence them rather than stacking them over each other.
- Avoid combining speed changes with heavy effects and overlays during live playback. Pre render or simplify.
If the new version improves speed change preview smoothness, excellent. Even so, treat time remapping as a candidate for pre render in complex projects and keep the live playback workload manageable.
Motion tracking and masks
Motion tracking and masks create visually powerful results, but they represent another layer of computation. When you track a subject and attach a title or blur, the pipeline must evaluate the tracking data and apply effects per frame. Masks alter per pixel blending and can be resource intensive depending on their shape and feathering.
Use motion tracking conservatively during the rough cut pass. Save heavy tracking for dedicated segments and pre render afterwards. With masks, keep them simple and adjust feathering as a later pass. If preview smoothness is a priority, avoid complex animated masks in the same section where you already have transitions, titles, and colour grade layers.
Colour correction, LUTs, and scopes
Colour correction is indispensable, and Filmora provides convenient tools and support for look up tables. When preview jitter appears in sections with heavy colour grading, remember that some adjustments occur per pixel and add significant cost to the render path.
- Apply broad adjustments first and evaluate preview behaviour. Exposure and white balance corrections are a good starting point.
- Add LUTs with awareness of their per frame cost. Test the LUT on a duplicate clip and compare the preview with and without it.
- Avoid stacking multiple LUTs. Use a single LUT and refine with native colour tools for small adjustments.
- Use scopes sparingly during playback. Scopes are wonderful for evaluation, but they draw and update in real time. Disable scopes during playback if stutter increases.
When a particular combination of colour corrections reduces preview smoothness, pre render those sections and move on. You can refine the colour pass later with focus and patience.
Audio filters, devices, and buffer behaviour
Audio jitter or crackle, even if subtle, can accompany video stutter. Reconfirm your audio device selection in Filmora. Choose a stable device path from the system and keep the sample rate consistent with your project. If your project uses forty eight kilohertz audio, ensure that your source and device settings align.
Avoid Bluetooth devices during editing. Wireless audio introduces unpredictable latency and buffer behaviour that can stress real time synchronisation. Choose wired earphones or speakers connected directly to the system audio interface.
If you use third party audio filters or limiters, apply them at the final pass stages. Live playback with complex audio chains can overwhelm the real time budget, especially when combined with video effects. Render a submix if necessary, but keep the working timeline manageable. Filmora offers convenient audio transitions and fade tools that are gentle on compute. Prefer those during rough cutting.
Display refresh and window behaviour
The display path can influence perceived smoothness. Confirm that your monitor refresh rate aligns with your project frame rate or a sensible multiple. Thirty frames per second content on a sixty hertz display tends to look natural, while content at fifty or fifty nine point nine four frames per second requires careful alignment to avoid uneven cadence.
Disable any gaming sync features such as adaptive sync for the editor window if you notice unusual tearing or stutter. Some features target games and can alter timing in a way that does not serve editing playback. Keep the editor in a normal window, avoid full screen. Windowed behaviour can be more stable for multi monitor setups. If you use a high DPI display, confirm that the software is scaled correctly by the system. Mis scaling can lead to extra draw load and subtle performance issues.
Nested sequences and their effect on preview load
Nesting can simplify organisation, but it also creates another pipeline layer. When a nested sequence contains heavy effects, the main timeline must resolve the nested composition and apply further effects on top. Pre render nested sequences that are complex. Consider rendering them to intermediate files and replace the nests with those files temporarily. This reduces the mental load for the program and can transform preview behaviour.
If you prefer to keep nests editable, reduce the number of active layers in the nested sequence while you work on the main timeline. Disable some tracks temporarily. Filmora allows you to toggle track visibility. Use this to control what the preview engine must compute in real time.
Media management and storage throughput
Storage throughput remains a quiet source of jitter. Place your media on a fast solid state drive, avoid editing from external spinning drives, and keep your cache and project files on the fastest available device. If you use an external solid state drive, connect it through a high bandwidth port and avoid hubs that may share bandwidth with other devices. The editing software reads frames predictably during playback but random access behaviours such as scrubbing can demand sudden reads. Fast storage reduces the chance of the pipeline waiting for data.
Defragmentation is not relevant to solid state drives, but a cluttered drive can still be slower if it is near capacity. Leave ample free space for the system and the editor to use for temporary files. If you sense that storage performance is variable, run a simple throughput test using a reputable tool and move your media if needed. Relink clips inside Filmora to the new location and clear cache to rebuild any references.
Project alignment and constant frame rate confidence
The earlier emphasis on constant frame rate transcoding is worth repeating now that you are re testing with a new version. If the smartphone clip used in the case study is still variable, transcode it again with a reliable tool and import the constant frame rate version. Match the project frame rate to this constant frame rate and confirm that the monitor refresh rate is aligned with an even multiple. In most cases, thirty frames per second content will play comfortably on a sixty hertz display.
When transcoding, choose a codec that is easy to decode. An intermediate such as ProRes or DNxHD is appropriate, but if you prefer a smaller file, use a high bitrate H two six four with constant frame rate and a sensible keyframe interval. This reduces random access decoding cost during scrubbing and playback. Confirm that audio is also remapped to a consistent sample rate and channel layout.
Proxy media, generation timing, and management
Proxy media continues to be one of the most effective ways to restore real time playback for demanding projects. In Filmora, enable proxy generation for high resolution clips and set your threshold such that any ultra high definition media gets a proxy automatically. Begin the generation process and wait until it completes. Proxies are only helpful once they exist. Do not attempt to play the timeline while proxies are generating, as background tasks compete with playback for device resources and you will see jitter simply because generation is still underway.
After proxies complete, verify that the proxy label appears on the clips, and play the timeline again. Your media should now be easier to decode, and preview smoothness should improve. Keep proxies on the same drive as your project for consistent access speed. If you move the project, move the proxy files along and maintain the folder structure to avoid relink hassles.
Markers, pre renders, and workflow discipline revisited
Markers remain the best way to anchor your work in repeatable checkpoints. Add markers at the start of each demanding segment and include notes that remind you which adjustments are in place during that test. For example, note whether acceleration is enabled, whether proxies are present, and which preview resolution is active. This transforms your timeline into a test surface that reveals the effect of each change.
Use pre renders for sections that combine motion, overlays, colour grading, and transitions. After pre render, playback should be smooth for that segment, which validates the stability of the rest of the pipeline. If jitter remains after pre render, look to display and audio layers, or investigate emergence of background tasks or device power settings. Restart Filmora after major toggle changes and keep non essential apps closed during testing.
A view of performance panels during a demanding segment
To illustrate what a performance oriented setup can look like during a demanding section, here is another visual reference.
The checkpoint encourages a tidy layout. Panels you do not need during playback should be closed. If the playback monitor displays safe area overlays or grids, disable them during tests to reduce draw calls. Keep the timeline zoomed to a level where markers and transitions are clear, and avoid excessive zoom that causes the system to redraw many timeline elements rapidly.
Revisiting the smartphone dawn run with ducks case
Return to the case study. This clip features fast motion, exposure changes, and potential variable frame rate. Apply the full toolkit after the upgrade. Create a constant frame rate intermediate. Generate a proxy for the original. Match project frame rate to source. Check monitor refresh alignment. Enable device acceleration and run the compatibility test. Restart the program. Close pop ups and background tasks. Then play the clip from start to finish and monitor behaviour.
Divide the clip into three segments. The first segment includes the first few seconds where the camera movement begins. The second segment includes the fast motion where ducks appear and the runner changes direction. The third segment includes the end of the clip where motion slows and exposure stabilises. Place markers at each boundary. Record behaviour for the original, for the proxy, and for the intermediate. Toggle preview resolution and observe changes. Apply a gentle colour correction and a basic dissolve transition in the middle. Add a simple title at the end. Pre render each segment after effects are added, and compare pre rendered playback with live playback.
If the upgrade has reduced jitter on the original clip during live playback, you have evidence that the decode path benefits from the new version. If the proxy makes playback silky even with effects, proxies remain your best friend. If the intermediate provides consistent behaviour across the board, a constant frame rate transcoding workflow deserves a permanent place in your process.
Understanding why some effects resist acceleration improvements
An editor can optimise internal routines, but not all effects can be accelerated through the device path. Certain creative filters are fundamentally per pixel operations that combine multiple samples and require a full computation on the CPU or a complex pipeline on the GPU. When such effects are active, real time playback can suffer unless you pre render. It is important to recognise that this is not a failure of the editor but a natural trade off between creative power and the reality of how many operations fit inside the budget for each frame.
When you discover that a particular effect consistently causes stutter, decide on a workflow strategy. Either add the effect and pre render, or reserve it for the final pass. If the effect must be tweaked during the creative process, isolate the section, trim the surrounding layers to reduce the compositing stack, and pre render repeatedly as you refine.
Working with third party plugins and packs
Filmora supports a wide range of assets and packs. While these add variety, some pack items can increase the preview workload. Ensure that you only load the assets you truly need, and avoid browsing animated packs while playing the timeline. The act of previewing assets in a panel can consume compute and storage as the system loads thumbnails and animations. Close asset panels during playback.
If a third party plugin introduces heavy draw calls or non standard compositing behaviour, trust your senses. If jitter appears only when the plugin is active, simplify, pre render, or remove it temporarily while you edit the rest of the project. Consider contacting the plugin maker for advice on real time performance settings. Provide a short sample project that reproduces the issue with notes on your system and editor version. A precise report accelerates support responses.
System cleanliness and background task vigilance
After any software upgrade, re check the system for background tasks that sneak back. Some services or helper programs can restart themselves after a system or app update. Use the task manager to identify high usage tasks and close them. Disable game mode if you find that it interferes with the balanced distribution of resources. Keep the power plan set to high performance, not balanced. Confirm that the system does not start indexing duties during your editing session. On some setups, indexing can cause storage spikes that disrupt playback.
Disconnect external devices that are not needed during your edit, such as webcams and capture devices. These can cause drivers to wake and poll the system, adding complexity to the device landscape. A clean system reduces surprises and makes your test results more reliable.
Release notes, known issues, and realistic expectations
Release notes are a valuable source of insights but they cannot list every nuance of performance behaviour across the enormous range of systems in use. When you look at release notes for the new version, take note of improvements to device compatibility, bug fixes related to playback, and any mention of performance tuning. Treat these as pointers rather than guarantees. Your exact system and project mix will reveal how those changes play out.
If jitter persists in specific scenarios, file a support request. Provide the version number, a description of the issue, your system details, and a small reproducible project. Attach a short screen recording that demonstrates the exact behaviour. Keep the recording focused on a ten to thirty second segment. This helps the support team to see the issue quickly and compare with internal tests.
Creating a dedicated benchmark project for future updates
Make a small benchmark project that captures the situations that challenge your system. Include a constant frame rate clip with fast motion, a variable frame rate smartphone clip, a section with heavy titles and overlays, a section with colour grading, a section with a speed change, and a section with a couple of transitions. Add markers and simple tags for each section. Keep this benchmark project on your fastest drive and open it whenever you apply an update or change a driver.
Run the benchmark after every significant change. Store the notes in a simple text file with dates and version numbers. This gives you a personal history of performance and helps you spot regressions quickly. If performance dips, you can roll back or adjust settings based on your own data rather than relying on anecdote or distant advice.
When to roll back and how to do it safely
If the new version introduces regressions that you cannot mitigate with configuration, consider a temporary roll back. Before you roll back, export your current projects and back up your settings and presets. Note any preferences you changed for the new version so that you can restore them later. Then install the previous version and re run your benchmark. If behaviour returns to the prior baseline, continue editing with the stable version while you monitor updates. If you have a service window between projects, you can test future versions and move forward again once stability returns.
Rolling back is not a defeat. It is a professional decision that protects delivery timelines. Maintain a disciplined approach to version management that balances access to new features with the practical realities of editing work.
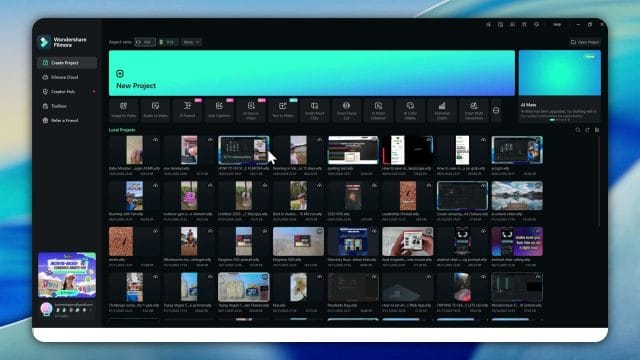
An additional visual snapshot for comparison
Here is a final checkpoint image to keep your mental model aligned as you work through demanding segments and settings.
Use these snapshots to remind yourself to keep panels tidy, markers visible, and effects layered in a way that aids pre rendering when it is needed. These practical details reduce friction and keep you moving.
Export settings and validation of final output
While the preview can stutter under load, the final export may be perfectly smooth. Validate your export settings with care. Choose a target that matches your delivery. If you plan to upload to a platform with a preferred frame rate and bitrate, set those values accordingly. Use constant frame rate for export if the platform expects it. Match the audio sample rate to your project and keep channel count appropriate for your content.
Export the segments where preview issue appeared and then watch them in a separate media player. Use a player that is known for accurate frame timing. Observe motion, titles, transitions, and audio synchronisation. If export is smooth and preview is not, adjust your approach to live playback while keeping confidence in your delivery pipeline. Pre renders, proxies, simplified live effects during rough cuts, and a clean system can protect the preview experience without compromising final quality.
Collaborative workflows and shared projects
If you work with collaborators, ensure that everyone uses the same version and project settings. Mixed versions can lead to subtle differences in effect rendering and cache behaviour. Share a settings manifest with the team that lists the editor version, device acceleration preferences, proxy generation thresholds, project frame rate, and audio sample rate. Store the manifest alongside the project files.
When exchanging projects, move the media and proxies together and maintain relative paths. Avoid storing media on personal desktop folders that differ across systems. Use a central share or a common folder structure on a shared drive. Document expected behaviour in the project notes so that collaborators do not misinterpret preview jitter for final output defects.
Safe experimentation with new features
New versions sometimes add features that are attractive but also demanding in preview. When exploring a new feature, use a separate test project and a short sample clip. Evaluate the effect on preview smoothness without risking your main project. If the feature proves stable, bring it into your main timeline and remember to pre render if it is heavy.
Keep your appetite for novelty balanced with the obligation to deliver. This approach preserves your creative energy while protecting your schedule. Your benchmark project remains your anchor. Each time you add a new feature, add a short test for it in the benchmark with a marker and a note. Over time, your benchmark becomes a valuable tool that reflects your actual use of the editor.
The importance of patience and process
Editing is an art and a craft. Preview jitter can distract and frustrate, but a patient and structured process will solve most cases. While the new version aims to improve performance and stability, your configuration and media are part of the story. A disciplined approach pays dividends.
- Ensure that your device acceleration settings are current and compatible.
- Keep your drivers up to date and power settings consistent.
- Align project settings with source media.
- Enable proxies for demanding clips and wait for generation to finish.
- Simplify effects during rough cuts and save heavy treatments for pre rendered segments or final pass.
- Use markers, keep notes, and compare behaviour with your benchmark.
- Close background tasks and keep the system clean.
- Validate export and protect delivery confidence while preview remains under investigation.
As you work through these steps, preview smoothness will improve, and your stress will decrease. Most importantly, your decision making will be grounded in evidence rather than hunches. This puts you in control.
Practical examples of effect combinations and their preview impact
Here are examples that illustrate how different effect combinations influence preview behaviour and how to manage them.
- A simple colour grade plus a dissolve transition: usually smooth at full or half preview resolution, especially with device acceleration enabled.
- A complex title animation plus a speed change: likely to stutter without pre render. Pre render after finalising title motion and speed map.
- A mask with feathering plus a motion tracking blur: demanding per pixel operations. Prefer pre render and consider separating these into a temporary composite clip.
- A three layered overlay with glows and blending modes: heavy draw calls. Reduce layers during rough cuts and bring the full stack back for final pass.
- A stabilised handheld shot with a slow zoom effect: compute heavy. Pre render for a smooth preview experience.
Use these examples to anticipate where jitter may emerge and plan your workflow accordingly. Proactivity is better than reactive frustration.
Managing large projects with many tracks
Large projects with many tracks present a special challenge. Even when individual effects are modest, the sheer number of tracks increases compositing work. Organise tracks by function. For example, dedicate specific tracks to base video, overlays, titles, and effects. Disable non essential tracks during playback. Rename tracks clearly for fast toggling. Group related clips and temporarily mute groups that are not part of the current review.
Consider using nested sequences to contain complex track arrangements. Pre render nests that represent finished segments. Keep the main timeline simpler with fewer active tracks. This approach is particularly helpful when sharing projects with collaborators who may not know your layout preferences.
Automating parts of the testing workflow
You can automate portions of your testing routine. Create a checklist macro or a templated set of markers inside a blank project. Start every new project with that template. Include a section at the end of the timeline with standardised test clips, such as a motion test chart and a colour test. Add a couple of transitions and a title template here. Run this segment after every change to compare behaviour quickly without navigating your main project.
Keep a text checklist attached to the template and tick off items as you progress. This reduces the cognitive load of remembering every step and ensures consistency across projects.
System maintenance and periodic deep clean
Periodic system maintenance contributes to reliable real time editing. Update the operating system during planned windows. Reboot after driver updates. Clean temporary folders and caches. Uninstall unused programs that may include resident services. Refresh system restore points so that you can roll back changes safely if something goes wrong.
Consider testing your memory and storage for errors once in a while. Editing pushes a system in unique ways. Detecting and resolving hardware issues early prevents mysterious jitter and crashes later. Keep your system firmware current, especially for the motherboard and storage devices. Firmware updates can improve stability and performance.
Clarity on expectations and creative priorities
Your priority is the creative outcome and delivery confidence. Preview is a tool to aid creative decisions. It does not need to be perfect at all times. When sections are complex, pre render and move forward. When the final export is smooth, consider the jitter solved even if preview remains demanding for that particular section. This pragmatic approach keeps your momentum and ensures that you spend time where it matters most.
If the new version improved any part of your preview experience, celebrate the gain and keep pushing on the remaining issues with patience. Update notes and benchmark results will guide you. Over time, your system and workflow will settle into a pattern that delivers smooth playback for most work, and quick fixes for the few sections that resist live rendering.
Summary of the enhanced workflow after the version upgrade
Consolidate everything you have learned into a refined editing workflow that responds to preview jitter and maintains creative focus. Here is a concise guide to apply in daily work.
- Verify the version number and performance preferences in the editor before testing.
- Run the device compatibility checker and restart as prompted.
- Assign the editor to the performance GPU in system settings and confirm power preferences.
- Update device drivers and keep the operating system current.
- Align project frame rate and resolution with source media, and use constant frame rate when possible.
- Enable proxies for high resolution clips and complete generation before playback tests.
- Simplify timeline effects during rough cuts and pre render complex sections.
- Manage audio devices and sample rate consistency, avoid wireless audio during editing.
- Check monitor refresh alignment and disable gaming sync features for the editor window.
- Use markers to track test segments and keep a benchmark project for repeatable comparisons.
- Validate export separately from preview. If export is smooth, trust the delivery pipeline.
- Maintain system cleanliness, close background tasks, and keep storage fast with plenty of free space.
This guide is the foundation. Adapt it to your projects and system. Your own notes and benchmark history will be your most reliable source of truth.
Final recommendations and confidence for future projects
The upgrade to the new version is a valuable step that can contribute to smoother preview and improved compatibility. Combined with thoughtful configuration, proxy use, pre renders, and disciplined testing, you can achieve reliable real time playback for most editing tasks. When sections remain demanding, pre render and keep moving. Your audience will judge the final export, not the preview jitters you navigated during production.
Continue building your benchmark project and updating your workflow notes. Share your findings with collaborators so that the entire team benefits from a consistent and efficient process. Over time, these habits transform jitter into a manageable detail and keep your creative energy focused on storytelling and polish.
The dawn run with ducks illustrates the point perfectly. With the right preparation and settings, even a challenging smartphone clip can play smoothly in preview and export beautifully. Maintain this approach and your work will flourish regardless of the media you encounter.

If this article helped you in any way and you want to show your appreciation, I am more than happy to receive donations through PayPal. This will help me maintain and improve this website so I can help more people out there. Thank you for your help.
HELP OTHERS AND SHARE THIS ARTICLE
LEAVE A COMMENT
I am an entrepreneur based in Sydney Australia. I was born in Vietnam, grew up in Italy and currently residing in Australia. I started my first business venture Advertise Me from a random idea and have never looked back since. My passion is in the digital space, affiliate marketing, fitness and I launched several digital products. You will find these on the portfolio page.
I’ve decided to change from a Vegetarian to a Vegan diet and started a website called Veggie Meals.
I started this blog so I could leave a digital footprint of my random thoughts, ideas and life in general.
If any of the articles helped you in any way, please donate. Thank you for your help.
Affiliate Compensated: there are some articles with links to products or services that I may receive a commission.