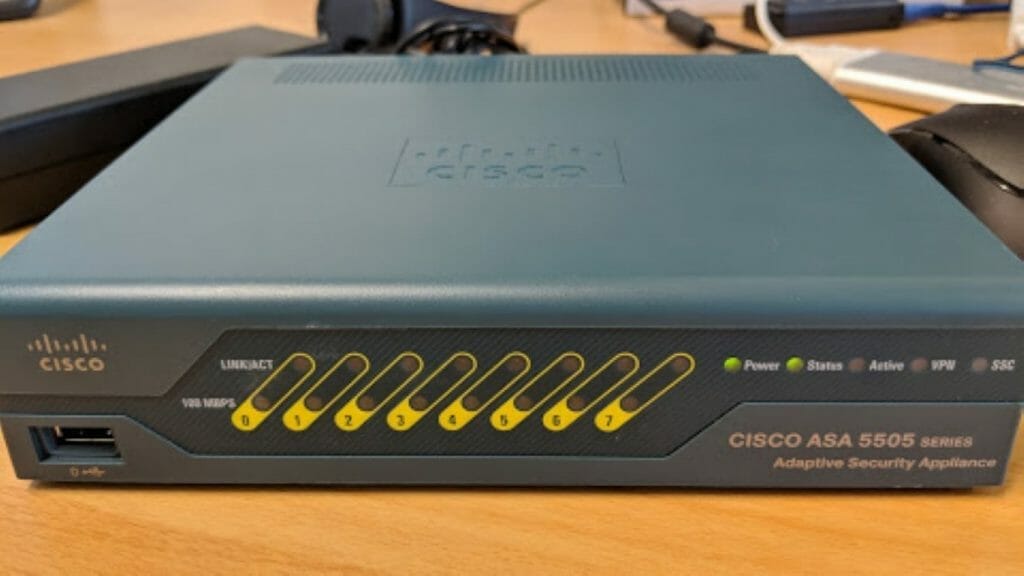
I recently had to set up the Cisco ASA (Adaptive Security Appliance) 5505 for our office and this brought back fond memories of when I was working for the Australia Broadcasting Corporation migrating vendors using Site to Site VPNs and the whole of the ABC staff from the Cisco VPN Concentrator 3000 to the Cisco ASA’s. It was a complex and tough project but in the end, I did manage to configure the Cisco ASA in failover mode and migrated all the vendors and staff.
Setting up the office one was much easier, but I initially thought it would be a bit of a challenge when I didn’t touch a Cisco device in over 5 years. We were previously using a TP-LINK router that supported Site to Site VPNs but because one of our clients required IKEV2, the existing router didn’t support it. After some research, the Cisco ASAs were one of the only few devices that supported this version of IKE. We were lucky enough to purchase the refurbished Cisco ASA 5505 from eBay at a very low price. Even though it’s an EOL product, it was good enough to do the job.
In summary, this was the process I followed:
- find a Console Cable and USB to Serial adaptor cable(after going through my cable stash, I found my old USB to Serial cable)
- setup local LAN connectivity
- enable ssh and ASDM
- disable the VPN tunnel from TP-LINK router
- use ASDM VPN Wizard to create the VPN existing tunnels (still using IKEV1)
- test the VPN tunnels and if it’s all working then add the new IKEV2 VPN tunnel
- check to make sure I could connect to all remote hosts
- enable VPN AnyConnect Secure Mobility Client
- allow remote access to the VPN and local office network via AnyConnect users
- test connections to remote hosts
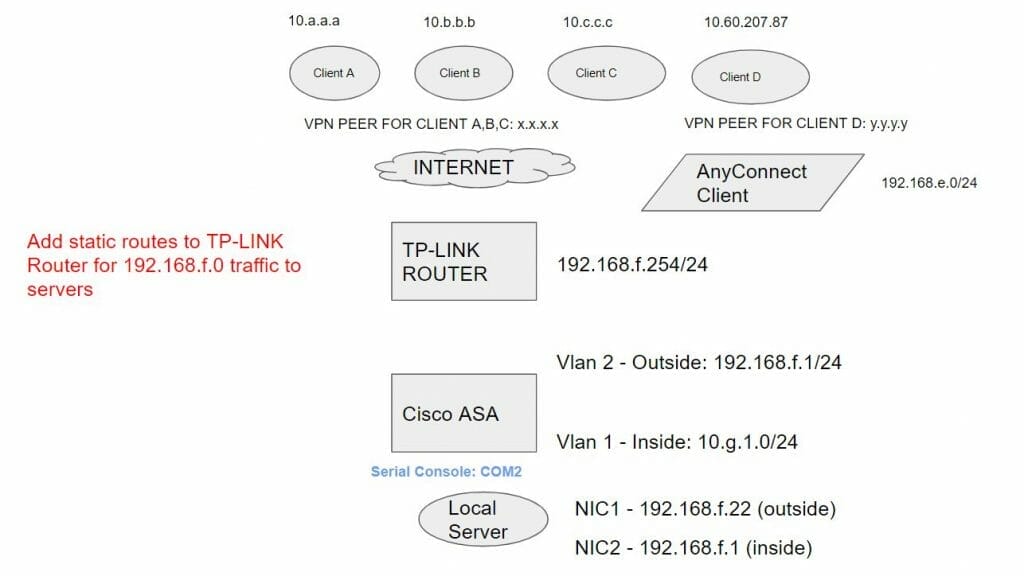
One other important task was to create a quick network diagram which helped me to understand the overall setup and configuration. Here’s the diagram that I created using Google Slides (I changed the IP addresses). Back in the day, I would have created this network diagram using Visio and it would look very professional.
I won’t go through the whole configuration of the Cisco ASA but I want to note some points and stumbling blocks I experienced:
CISCO ASDM
To use the Cisco ASDM, I needed to add the following configuration:
http server enable
http [ip to alllow] [interface]
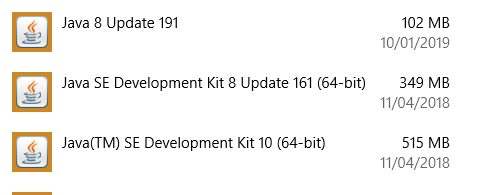
I also needed to install the latest version of Java as per below on a Windows 10.
Without the correct Java version, ASDM and the Java Web Start application wouldn’t load.
CREATING SITE TO SITE VPN
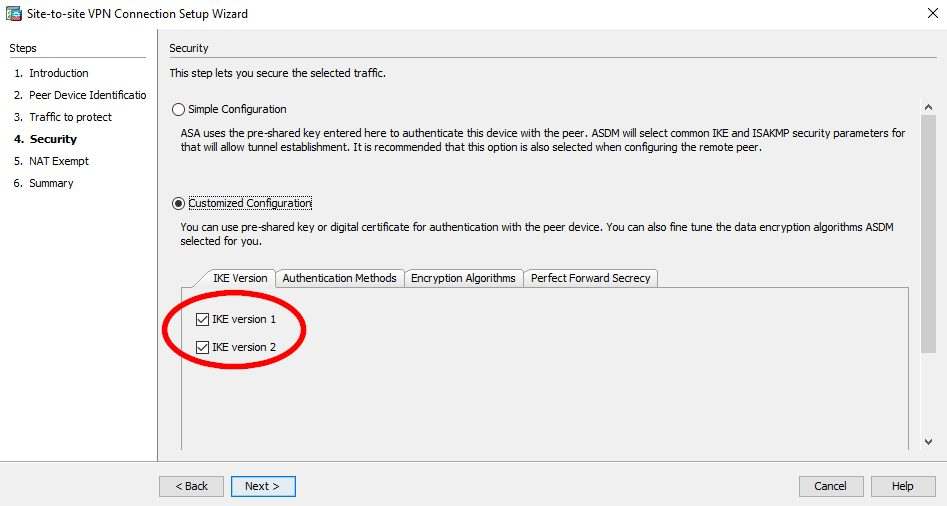
It’s quicker to use the ASDM VPN Wizard to generate the config and clean up the config after it’s generated.
Just make sure you have the correct NATs configured. The ASDM does allow you to select which version of IKE to use for each VPN Tunnel.
CISCO ANYCONNECT
Once again, use Cisco ASDM to configure the AnyConnect VPN. You will need to set up a DHCP pool for the AnyConnect clients. The other thing I had to do was to use the command:
same-security-traffic permit intra-interface
This allowed the clients on the AnyConnect network on the outside interface to route to traffic on the same interface e.g VPN tunnels and devices on the same network as the outside interface.
I also had to download a later version of the AnyConnect Client from the Internet (used Google to search a later version than the one that was stored on the ASA).
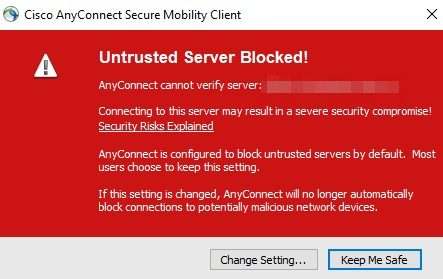
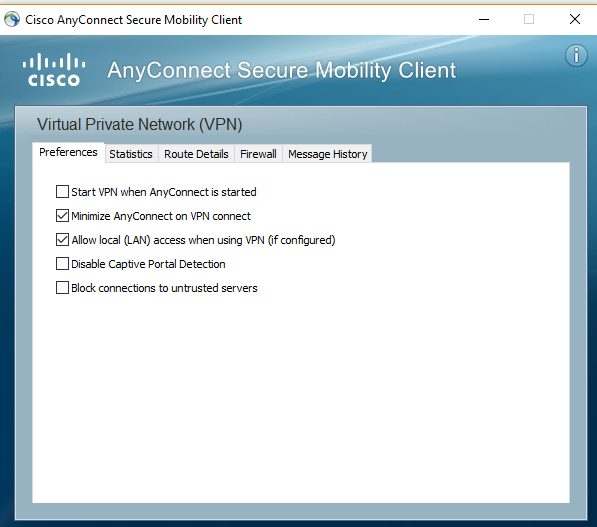
Block connections on untrusted server
Since I used the self-signing certificates, the ASA becomes an untrusted server when trying to connect.
To resolve this issue, just open up the preferences tab and deselect Block connections to untrusted servers
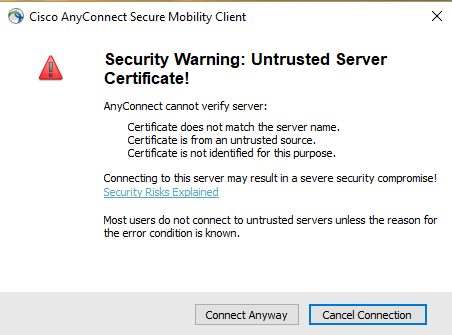
You will also receive Security Warning issues but just hit the Connect Anyway
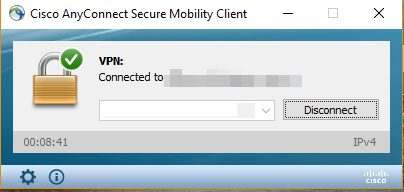
Once connected you will see a Green tick on the padlock
Split Tunnelling
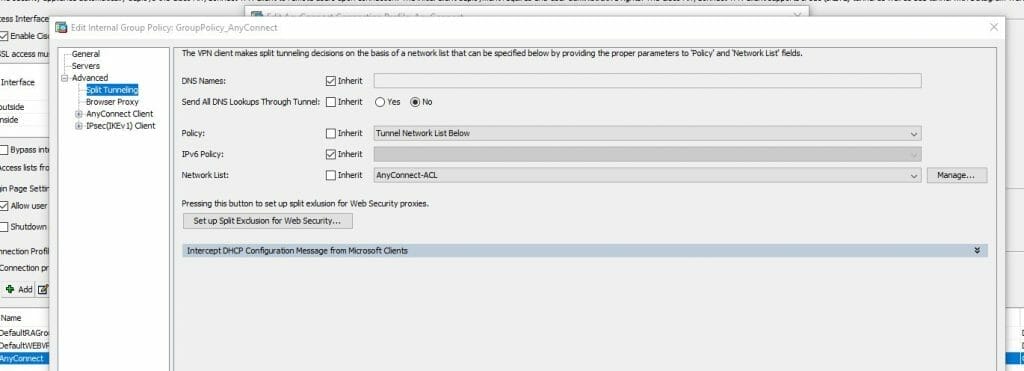
I also configured Split Tunnelling which allowed specific traffic I wanted to route to the VPN. For example the remote VPN tunnels, devices on the outside network. All other traffic such as Internet traffic, I didn’t want to route via the VPN. Just go to the AnyConnect Group policy and under Advanced click on Split Tunnelling. In the Policy section select “Tunnel Network List Below” and in the Network List create the networks you want to route via the AnyConnect VPN tunnel.
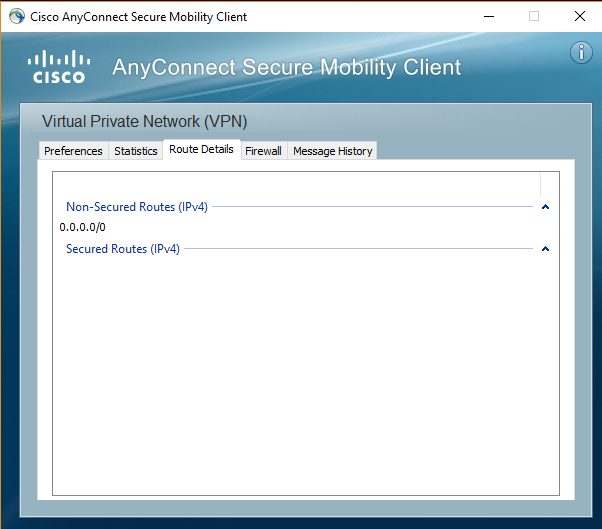
In the AnyConnect client software, you can also confirm and check the routes by clicking on the Settings button then Route Details
Also, to access the Cisco ASDM Java after enabling AnyConnect, you need to use https://[IP Address of ASA]/admin as https://[IP Address of ASA]/ is used for the AnyConnect HTML Login
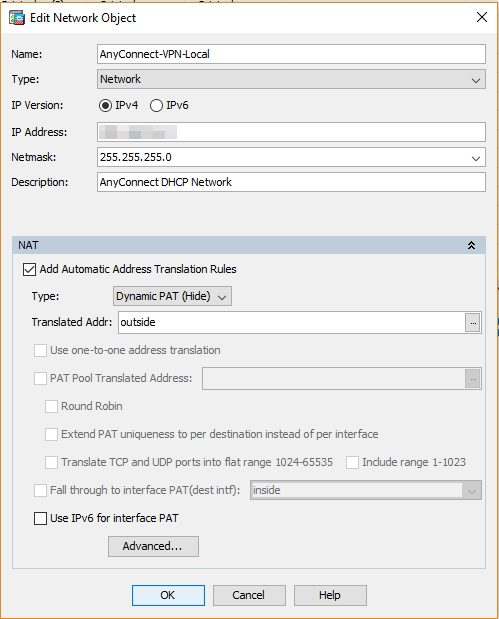
NAT AnyConnect network with the outside interface
Without this, I wasn’t able to route traffic from the AnyConnect traffic out to specific hosts that I wanted to route traffic to the Internet via the AnyConnect VPN.
NAT on Router
Add firewall rules for port 80 and 443 on the TP-LINK router to allow the AnyConnect clients to route to the Cisco ASA
ROUTING FROM TP-LINK TO ASA
The other configuration I needed to do was to add the VPN and AnyConnect network on the TP-LINK router. This also allowed the outside network to route to VPN networks instead of the default gateway (Internet).
That’s about it. After a days worth of work, I managed to get it all working.
When it comes to networking and troubleshooting, what I found really helpful is to simulate how the packet transfer through each device and figure out how you’re going to get from source IP to destination IP.

If this article helped you in any way and you want to show your appreciation, I am more than happy to receive donations through PayPal. This will help me maintain and improve this website so I can help more people out there. Thank you for your help.
HELP OTHERS AND SHARE THIS ARTICLE
LEAVE A COMMENT
I am an entrepreneur based in Sydney Australia. I was born in Vietnam, grew up in Italy and currently residing in Australia. I started my first business venture Advertise Me from a random idea and have never looked back since. My passion is in the digital space, affiliate marketing, fitness and I launched several digital products. You will find these on the portfolio page.
I’ve decided to change from a Vegetarian to a Vegan diet and started a website called Veggie Meals.
I started this blog so I could leave a digital footprint of my random thoughts, ideas and life in general.
If any of the articles helped you in any way, please donate. Thank you for your help.
Affiliate Compensated: there are some articles with links to products or services that I may receive a commission.
