I’ve been using LiveAgent as our Advertise Me support tracking system. The company uses it to track all support requests and it has been a great tool. We haven’t used all the features such as softphone and chat but we may in the near future. Since we have sensitive information in the LiveAgent system, we need to use HTTPS ie a secure and encrypted communication with the server using Transport Layer Security.
In order to set up the TSL on the LiveAgent platform, you need to use an SSL Certificate. I originally started to use ZeroSSL as it was recommended by LiveAgent however they changed their Free plan and you only get 3 90-day certificates. It worked well for part of the year but it was technically no longer free.
After looking around, I found another provider called FreeSSL. With this SSL provider, you can obtain a 90 day SSL certificate and the process is pretty straightforward except for the verification part. There is an option to verify the certificate request by email, DNS or via HTTP. I wasn’t able to do the verification using DNS or HTTP and the only option was with email. With email, there isn’t a choice to enter your email address and you can only pick one from the list they provide e.g administrator@[your email address] or postmaster@[your email address] and a few others.
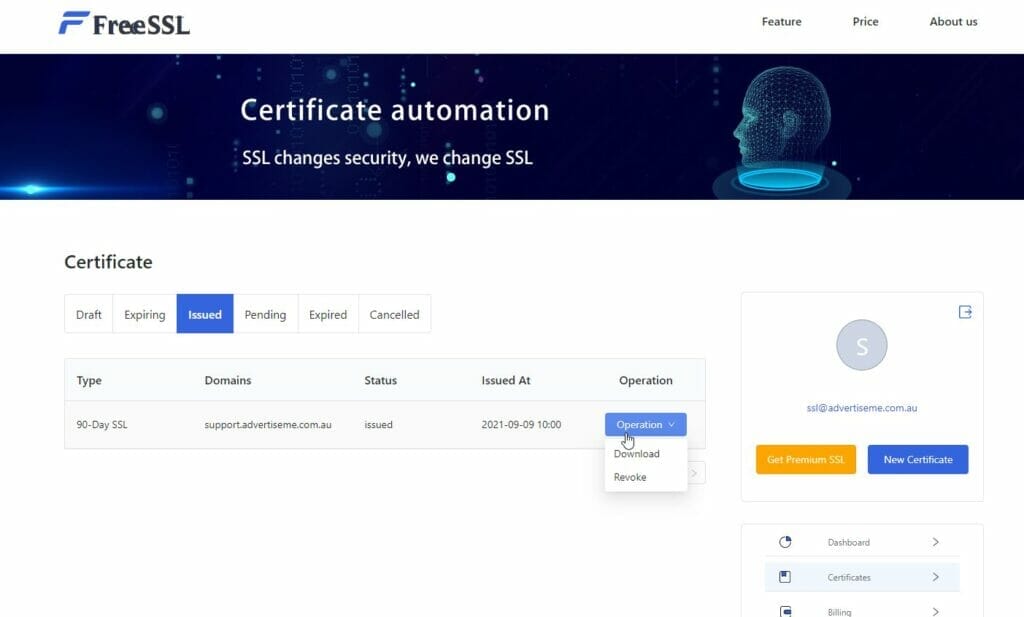
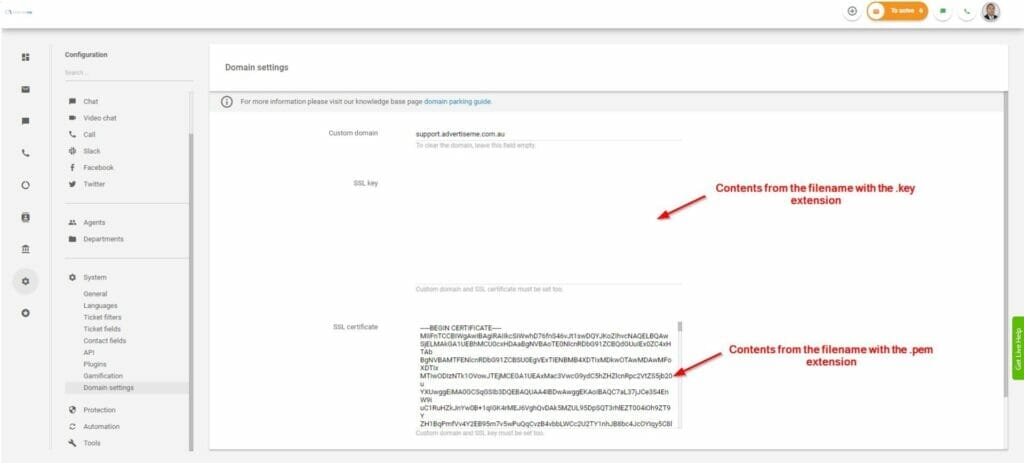
Once you have successfully verified your domain, you will be able to download the certificate and keys via a zip file. All you need to do is copy the contents of the file with the .key extension into the LiveAgent System – Domain Settings SSL key field. You then copy the contents of the .pem file into the SSL certificate field and then press SAVE.
Your LiveAgent website will now be able to use the SSL certificate and you will be able to access the website securely by using HTTPS. If you want to purchase an SSL certificate that lasts for a year you can do that on the Online Hosting Solutions website.