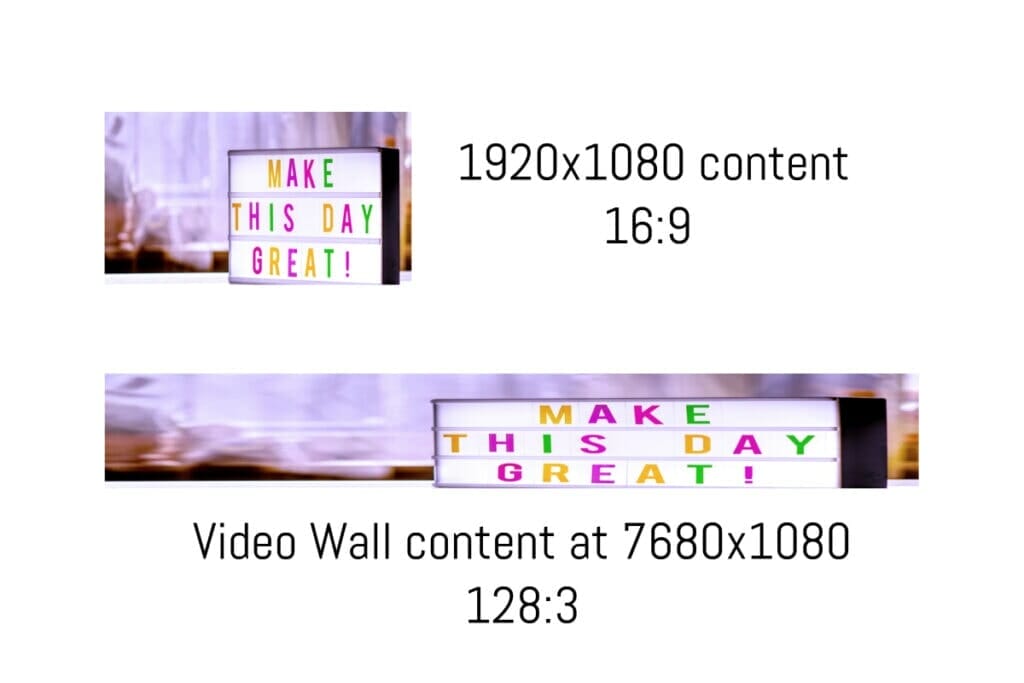
I was recently involved in setting up a digital video wall for an Advertise Me (a digital signage solutions company) client. This type of setup is different from your traditional 2×2 setup where the ratio of the pixel width and the height of the canvas area is 16:9 aspect ratio (1920×1080 pixels if using a Full HD screen). With a 4×1 video wall, the pixel ratio ends up being 128:3 aspect ratio (7680×1080 pixels).
Most digital signage video wall screens have an internal video wall that can stretch the input signal to fit all the screens. Here are a few examples of a 2×2 video wall, you can read this article on how to set up a video wall:
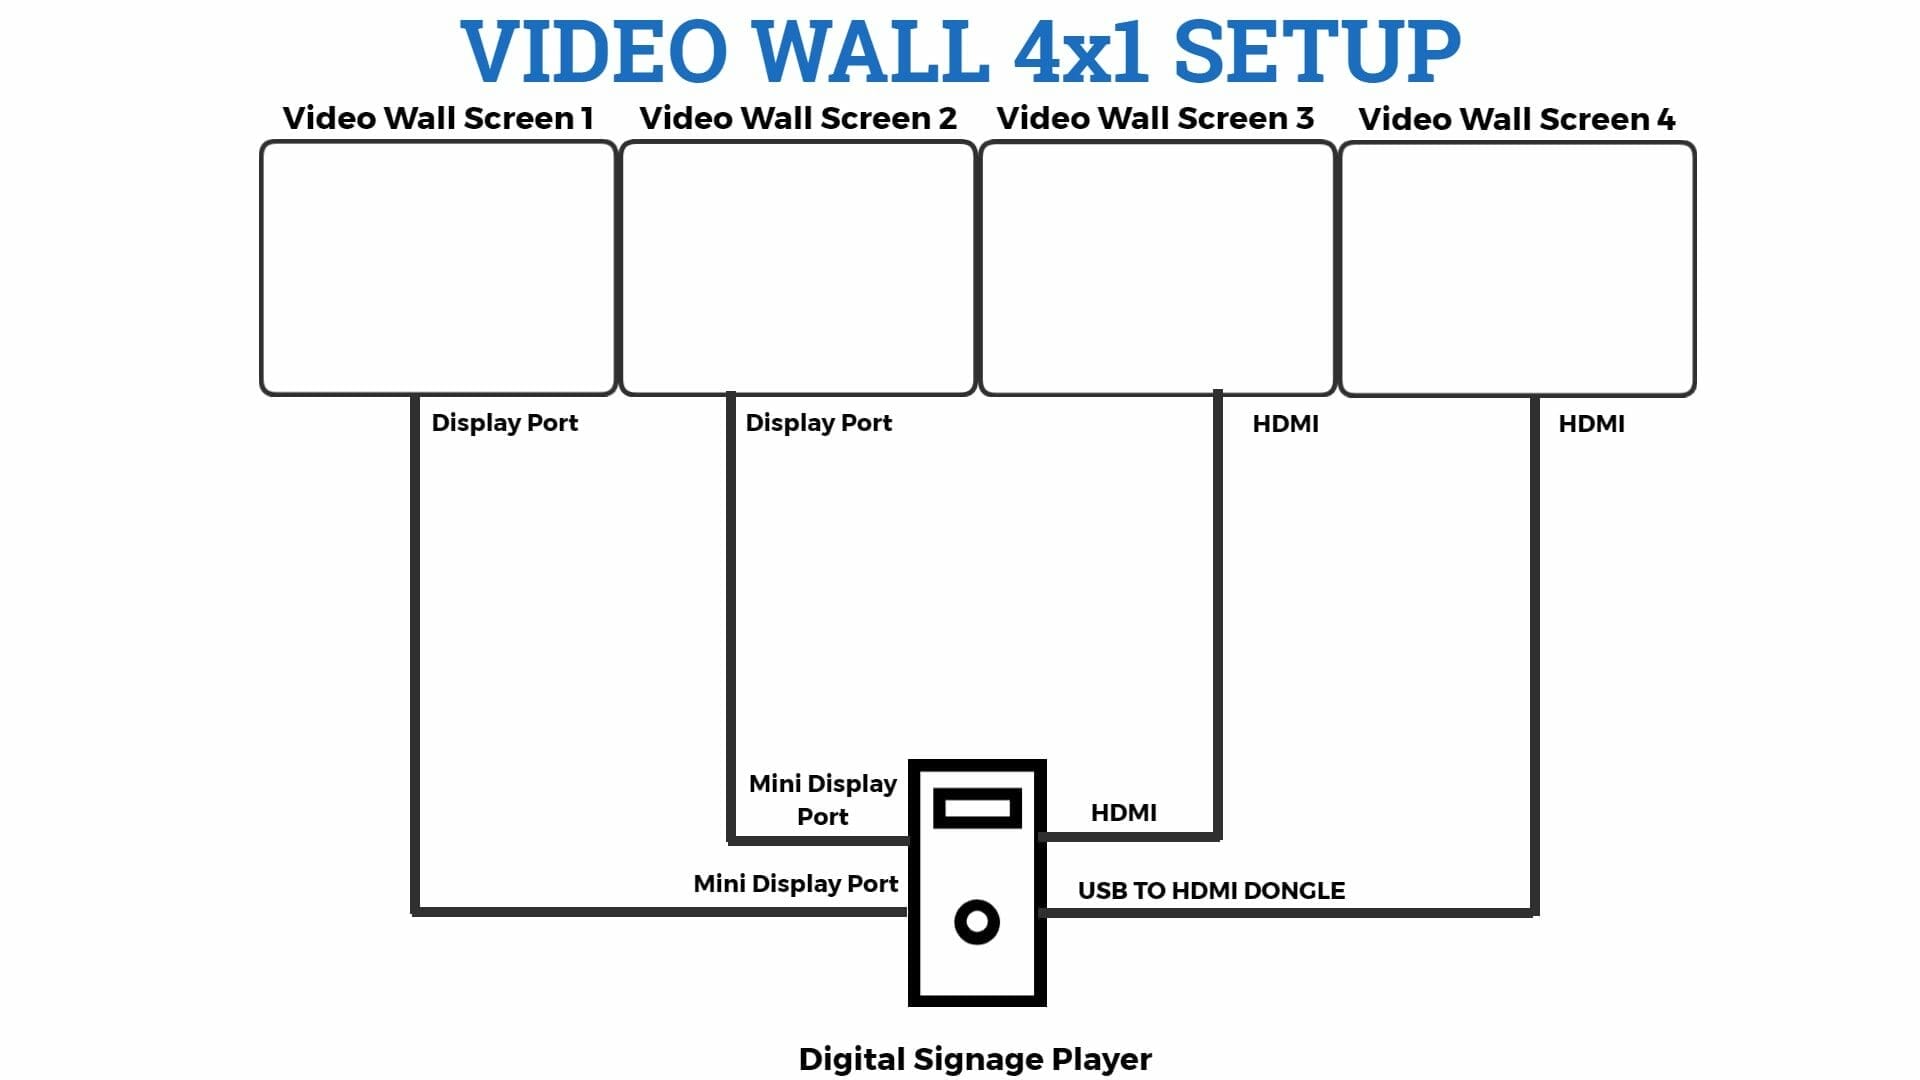
We initially tried using the built-in video wall feature on the digital signage video wall screens but the content displayed looked horrible because it stretched the signal from a 1920×1080 to fix a 7680×1080 canvas. After some playing around we decided the best way to display the content was not to use the video wall feature and to connect a video output signal to each screen. Fortunately, the digital signage player we used already had 3 video outputs (2 Display Ports and 1 HDMI), meaning we could only connect the digital signage player to 3 screens only. We decided to use a USB to HDMI dongle and connect the last screen to it.
Table of Contents
VIDEO WALL SETUP EXAMPLE
This is an example of the setup:
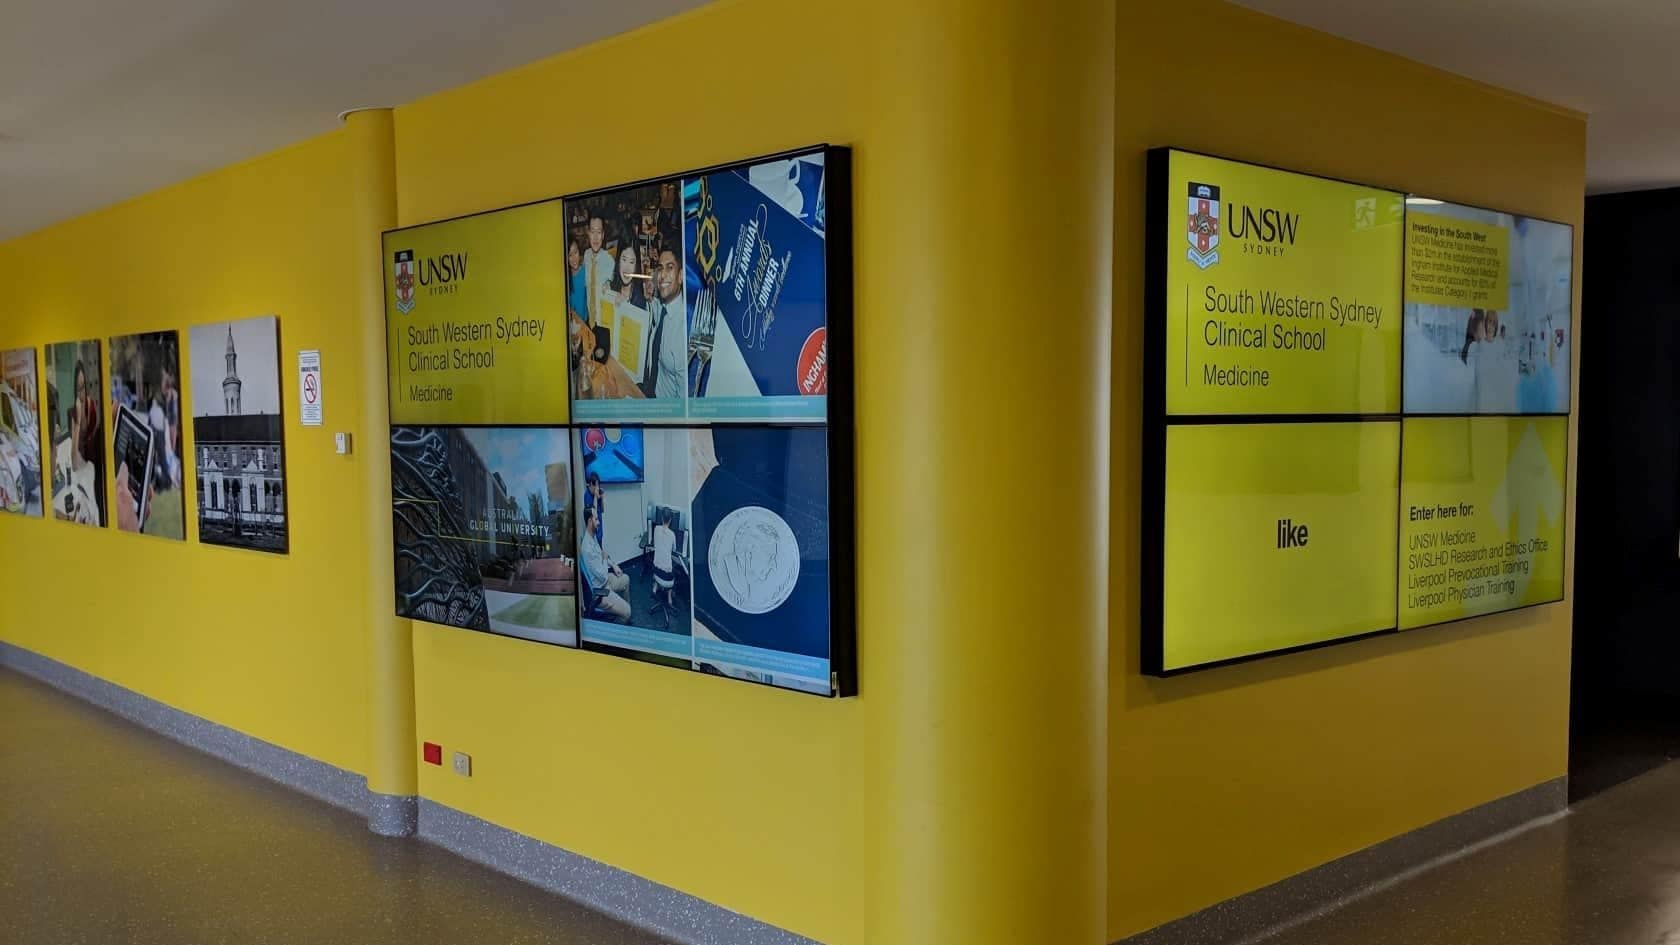
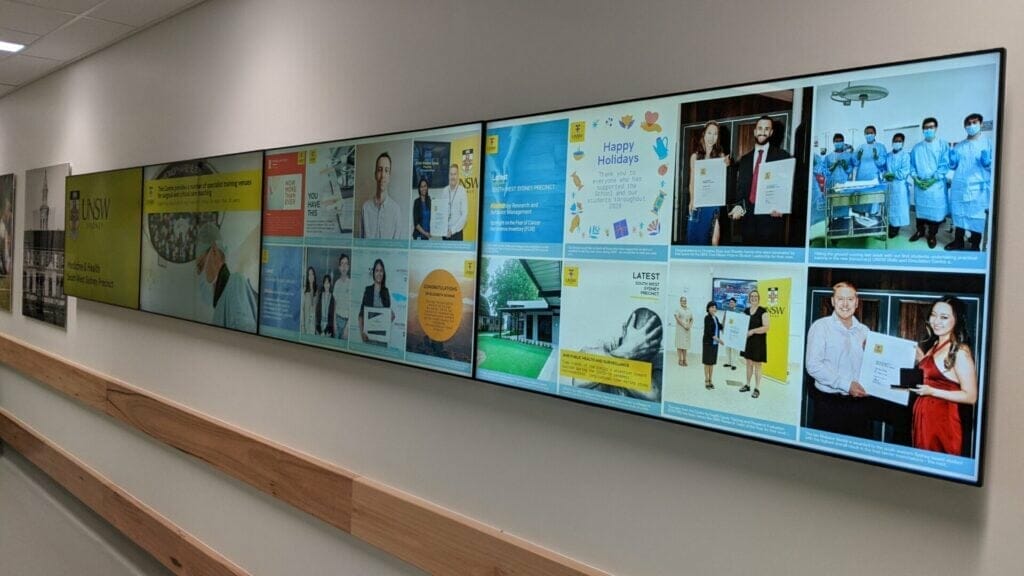
The final setup looked like this and it displayed images and our Social Wall:
VIDEO WALL HARDWARE
In summary, to set up a 4×1 video wall you will need the following digital signage hardware:
- a digital signage player with 4 video outputs
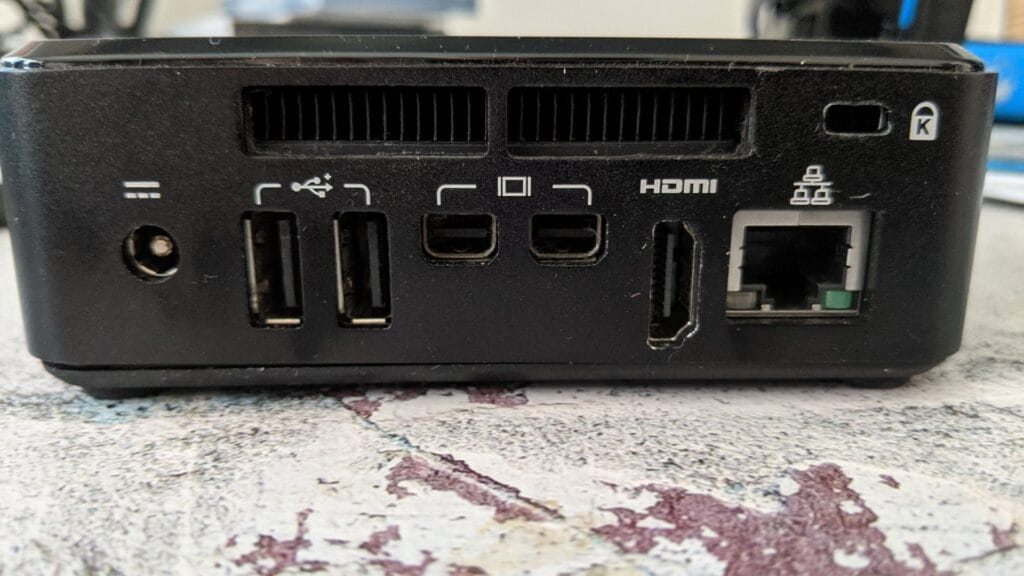
- four video wall monitors with thin bezels
- You can use USB to HDMI dongles or USB-C to HDMI dongles if your player doesn’t have 4 video outputs
- various video cables (mini display to display, HDMI to HDMI)
- video wall brackets
VIDEO WALL INSTALL
A video wall installation is a project that will take some time and can be complicated, but the end results will be well worth it. A typical video wall installation process is as follows:
- determine the location where the video wall will be installed
- layout tools and materials needed for the installation
- mark out the location where the wall brackets will be installed install the wall brackets
- install a in wall box where the digital signage player and all the outlets will be installed in. The in wall box will be recessed into the wall
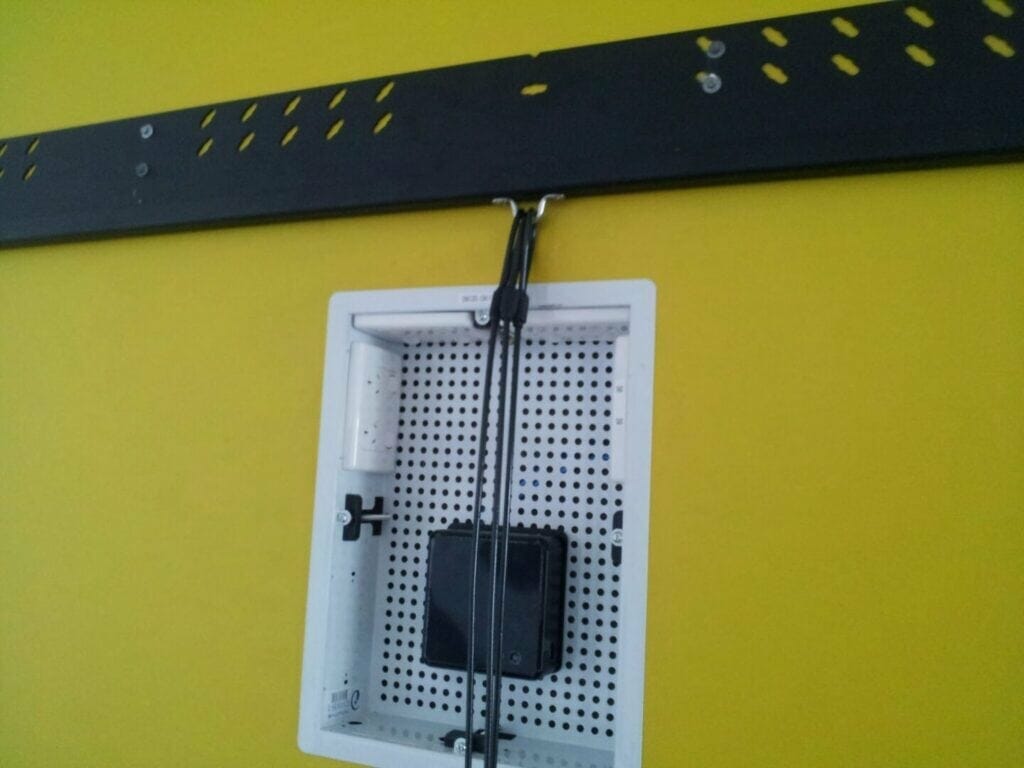
- get an electrician to install the data and power outlets in the in-wall box at the location where the wall brackets were marked out. Ideally, you will need 5 power outlets (4 for the video wall screens and 1 for the digital signage player) and 2 data outlets (1 for the video wall screens and 1 for the digital signage player. The video wall screen can be daisy-chained using RS232 or you can also install a network switch to connect each one to the network).
- install the video wall bracket arms to the back of the video wall screens
- mount the video wall screens onto the wall bracket
- connect all the required cables (power, data and video). For the video cables, make sure you use high-quality video cables. When we connected a mini display cable (digital signage player) to HDMI (video wall screen) it didn’t work on our digital signage player setup. We needed to use a mini display cable to display cable.
- setup the digital signage software
- test the video wall
There you have it, if done correctly you will have an amazing looking video wall. From this setup and installation, I learnt a few things I wasn’t aware of and as usual life is a journey of learning so make sure you embrace this.

If this article helped you in any way and you want to show your appreciation, I am more than happy to receive donations through PayPal. This will help me maintain and improve this website so I can help more people out there. Thank you for your help.
HELP OTHERS AND SHARE THIS ARTICLE
LEAVE A COMMENT
I am an entrepreneur based in Sydney Australia. I was born in Vietnam, grew up in Italy and currently residing in Australia. I started my first business venture Advertise Me from a random idea and have never looked back since. My passion is in the digital space, affiliate marketing, fitness and I launched several digital products. You will find these on the portfolio page.
I’ve decided to change from a Vegetarian to a Vegan diet and started a website called Veggie Meals.
I started this blog so I could leave a digital footprint of my random thoughts, ideas and life in general.
If any of the articles helped you in any way, please donate. Thank you for your help.
Affiliate Compensated: there are some articles with links to products or services that I may receive a commission.